Setup Bank Account Post Deposits in Microsoft Dynamics NAV 2015
We’ve been buying and selling coffee mugs and coffee and looking a lot at inventory and how that moves around – lot tracking and all of those things and now it’s actually time to get a little bit involved in the accounting part.
So we received some checks from The Cannon Group; we need to deposit them and we actually opened up a specific bank account for all the coffee work or coffee sales. So I’m going to go ahead and create a new bank account.
I’ll go here in the Departments.
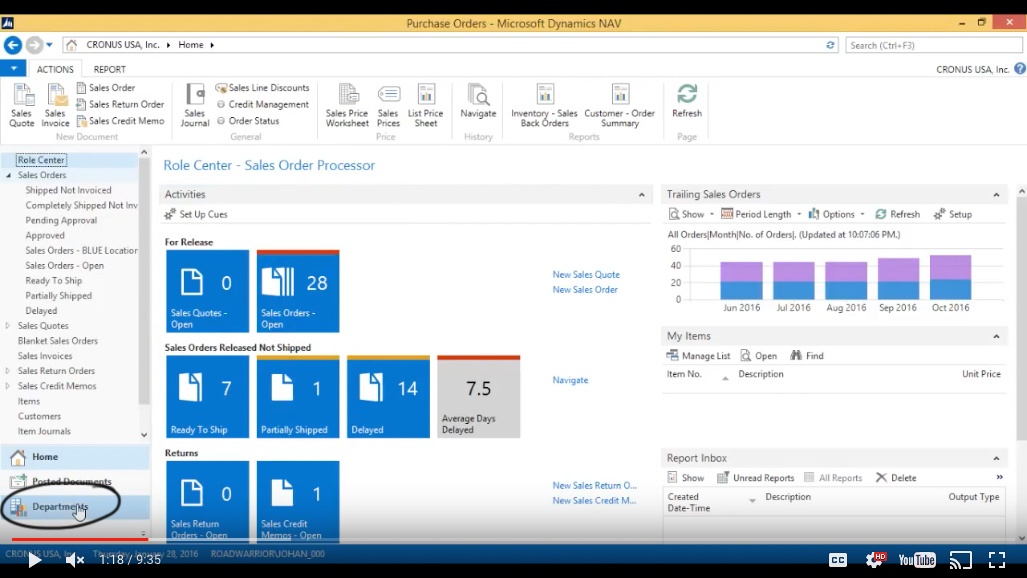
(Click image to view larger version)
Financial Management > Cash Management.
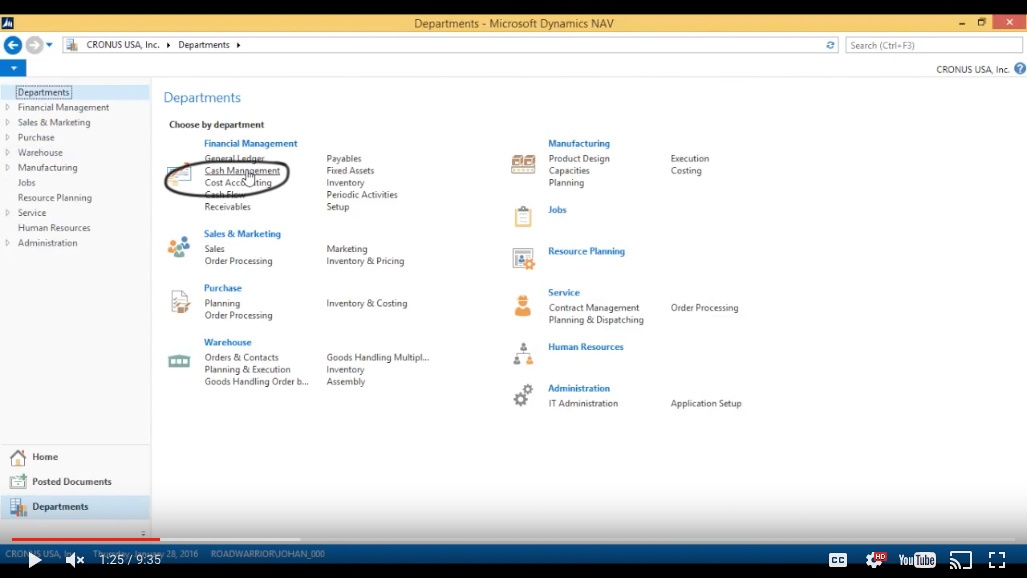
(Click image to view larger version)
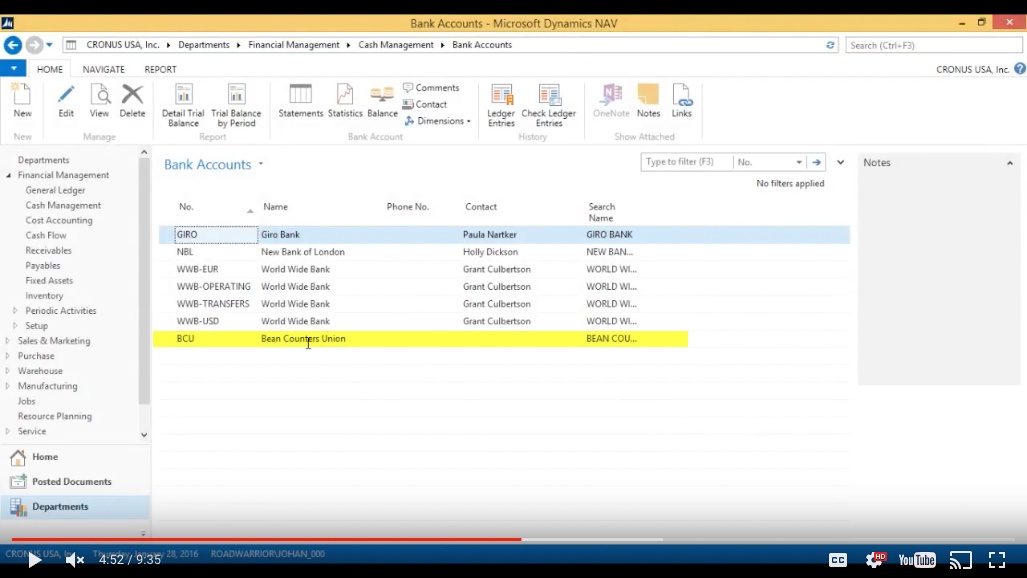
Here I can get into Bank Accounts.
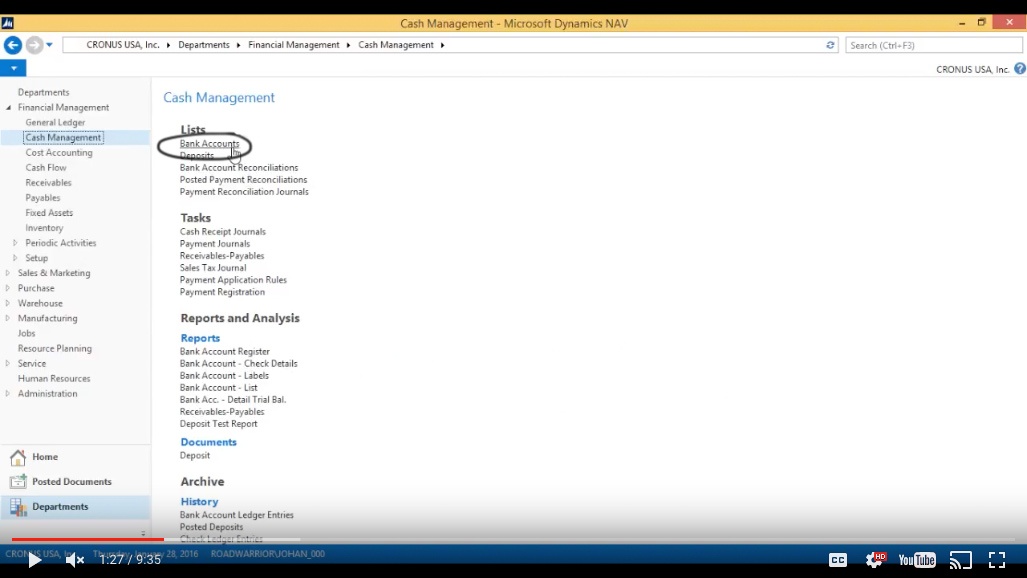
(Click image to view larger version)
Setting up a New Bank Account
We’ve got a few bank accounts already set up and I want to set up a new one so I just hit New.
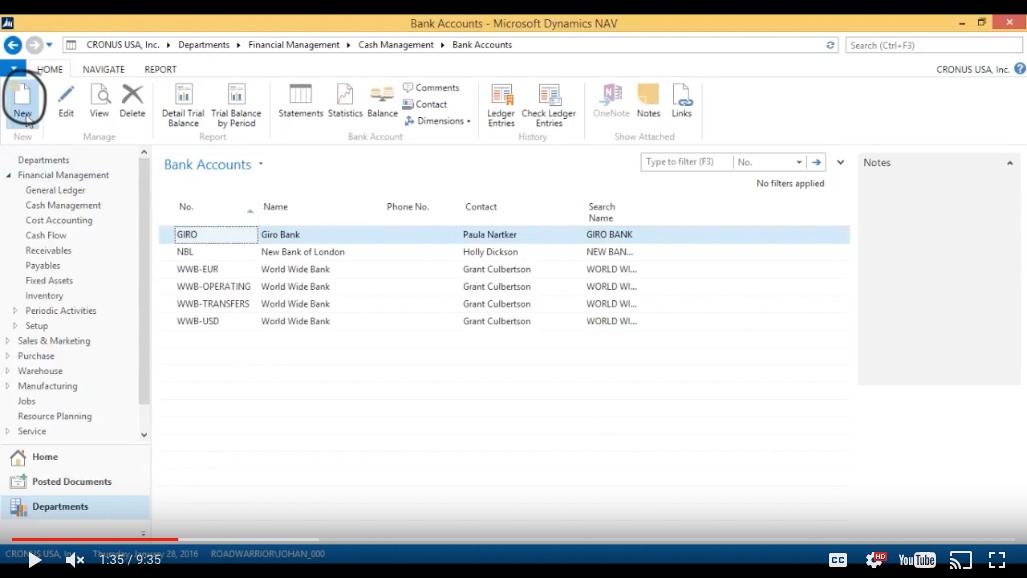
(Click image to view larger version)
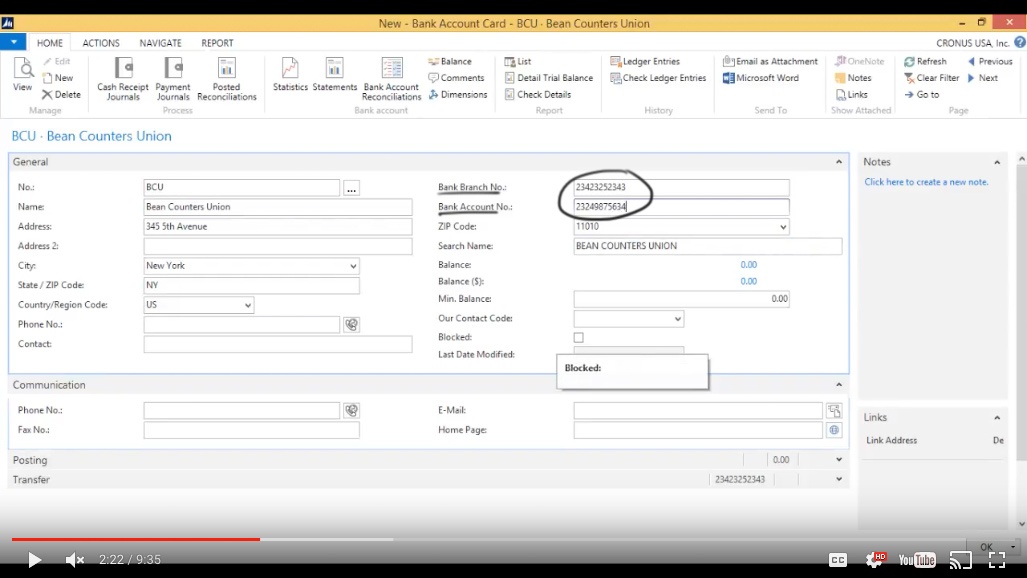
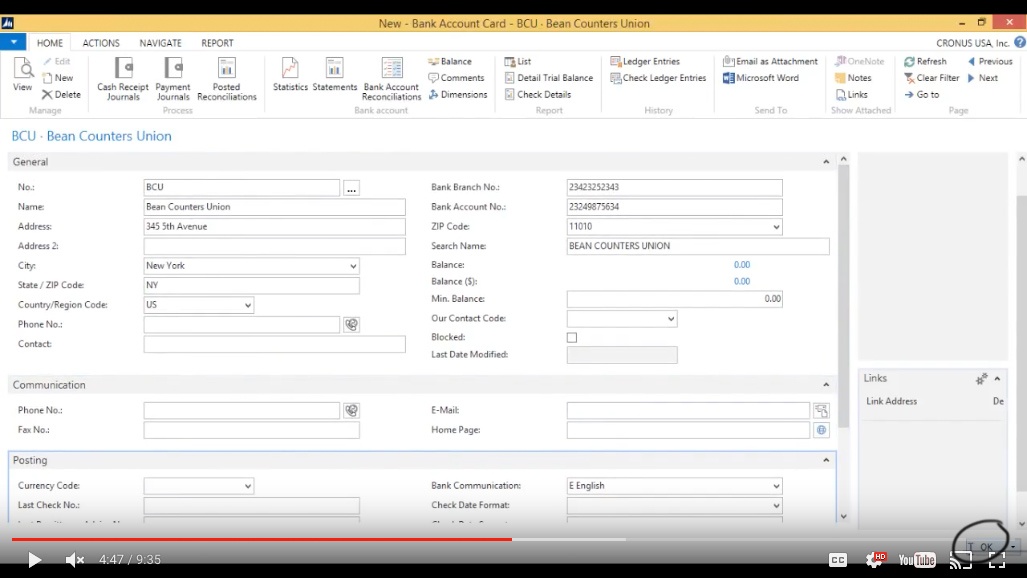
This is going to be BCU or the Bean Counters Union. That’s going to be 345 Fifth Avenue, that’s in New York, New York, and the Zip is 11010. Enter the Bank Branch Number and Account Number.
(Click image to view larger version)
And we can fill out more information here but one of the most important parts about setting up a bank account is the Posting Group.
Now I’m going to jump a little bit ahead here into Posting Groups and explain what this is. A Posting Group is what connects the bank account – or actually any entity- to the GL or to the chart of accounts.
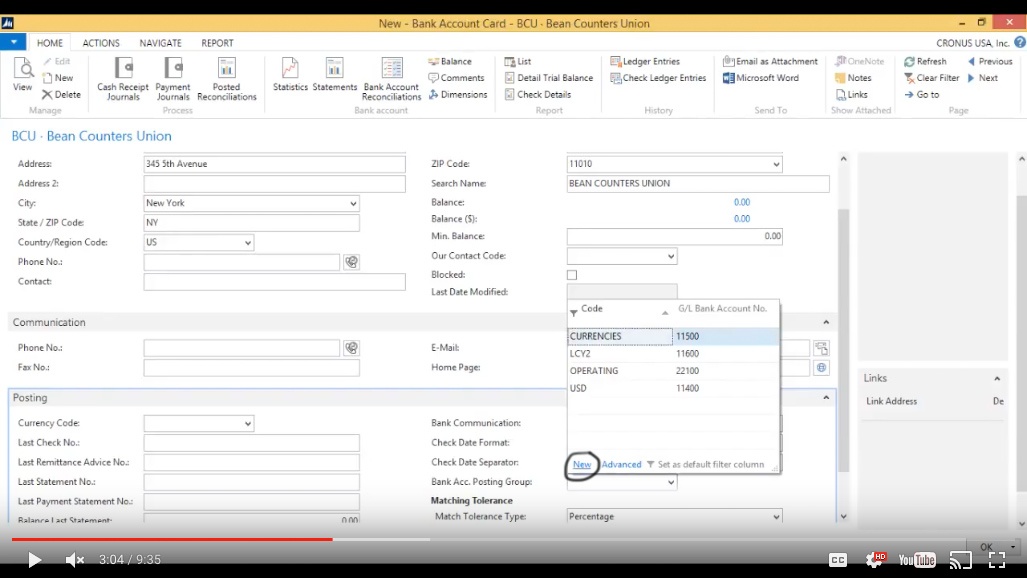
So I’m going to go ahead and look up the Posting Groups and best practice is actually creating a specific Posting Group for all of the bank accounts so each bank account will have its own Posting Group.
Create a New Posting Group
I’m going to go to Bank Accounting Posting Group > New.
(Click image to view larger version)
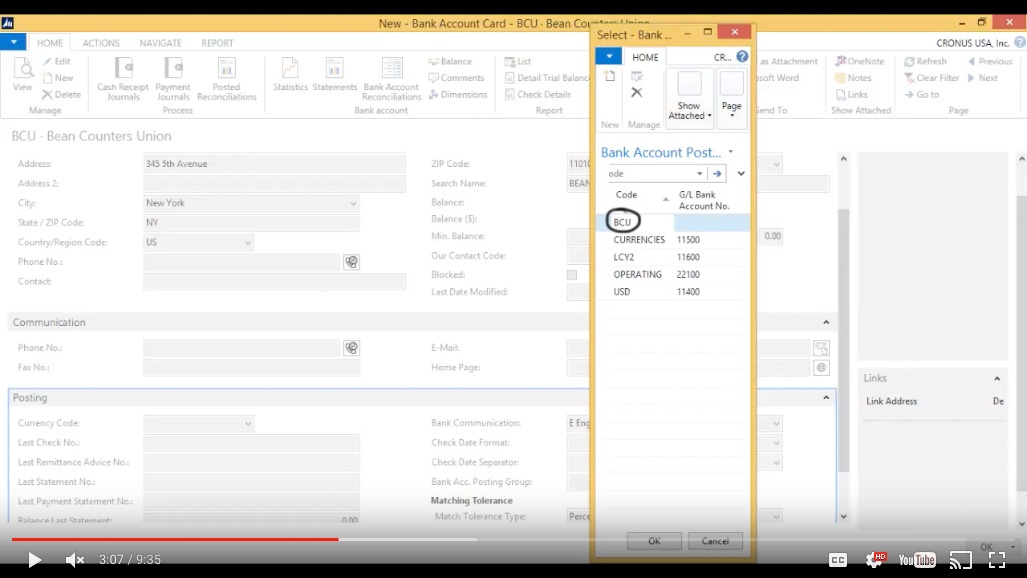
Call that BCU.
(Click image to view larger version)
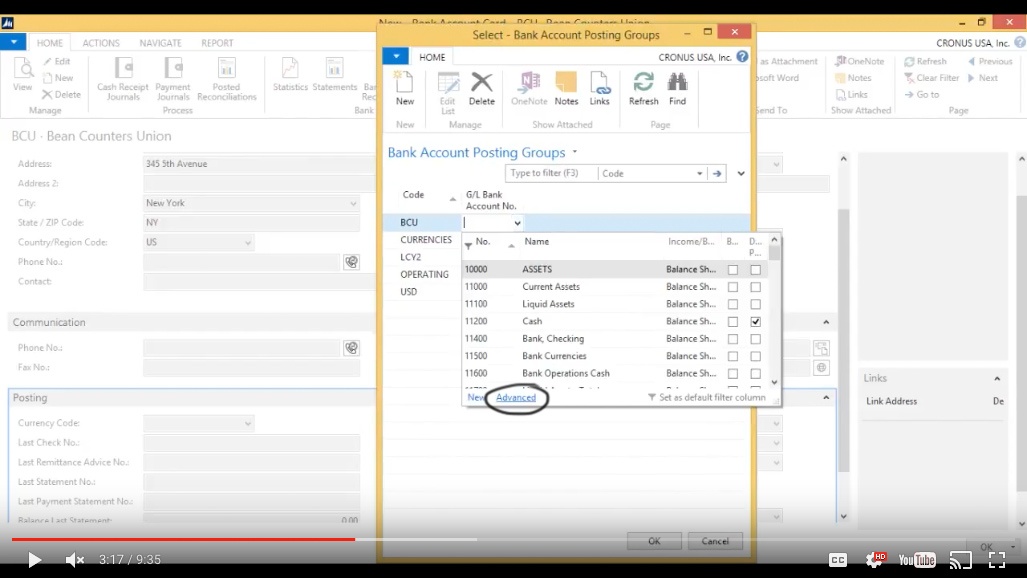
Now which GL Account should it go to? I’m going to go ahead and look up the GL accounts and hit Advanced.
(Click image to view larger version)
Now further we actually should set up a specific GL account for each bank and that’s also a best practice. This has to do with the reconciling of the bank account – it’s just much easier if each bank has one GL account.
Create a New GL Account
So I’m going to hit New here.
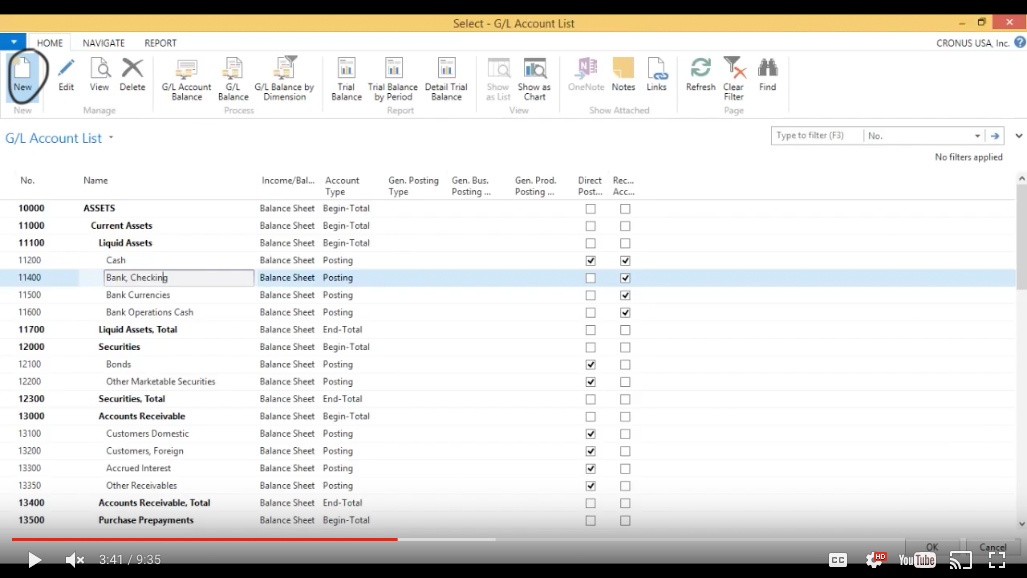
(Click image to view larger version)
And I’ll have it closed to the other banks so it’s going to be 11450, that’s fine, BCU bank. This is a balance sheet account. Now I’m not allowing any direct posting, I’ll explain this later but this is important in reconciliation again. And I’ll just hit OK.
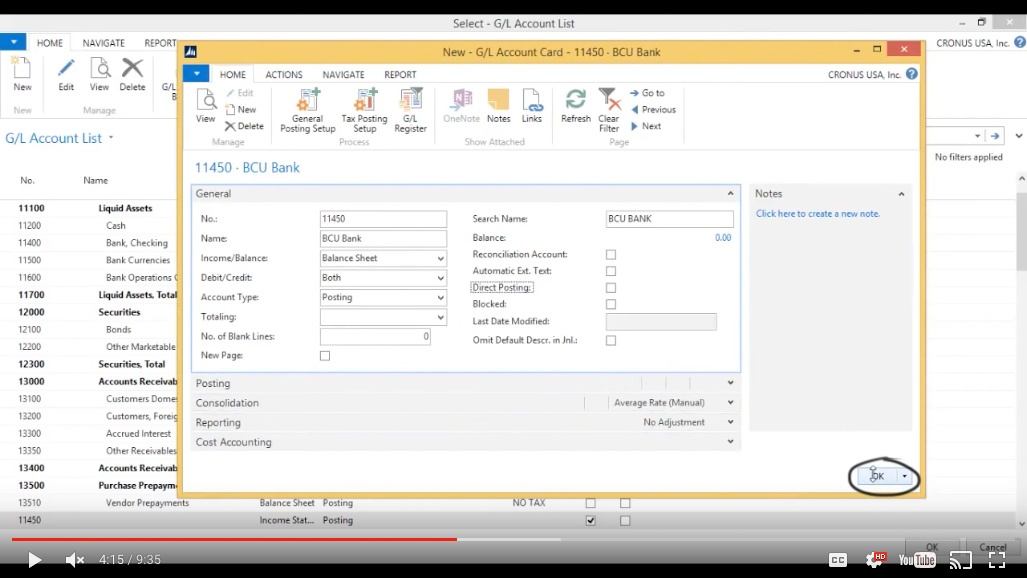
(Click image to view larger version)
Now I have BCU bank right here and that works out fine. I’ll hit OK.
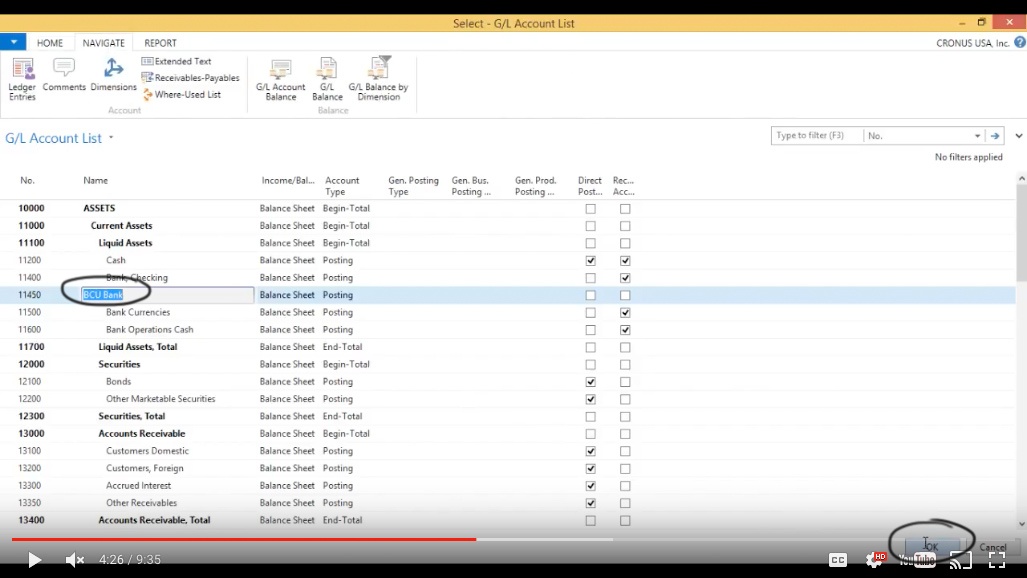
(Click image to view larger version)
Now I have 11450 as my GL, I hit OK.
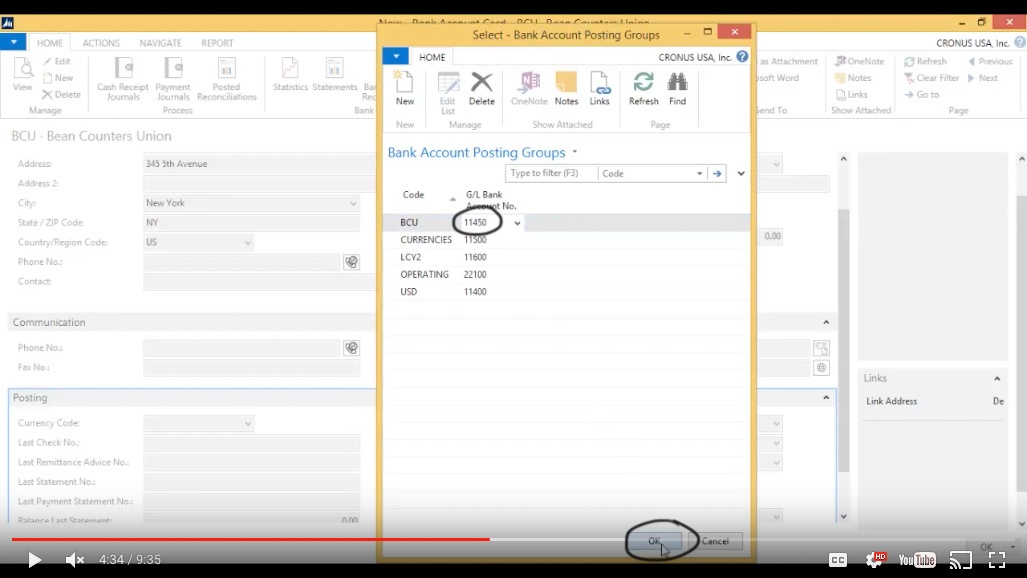
(Click image to view larger version)
And now my bank account Posting Group is set up. Right now that’s all I’m going to set up for the bank. I’ll hit OK.
(Click image to view larger version)
(Click image to view larger version)
Depositing a Check
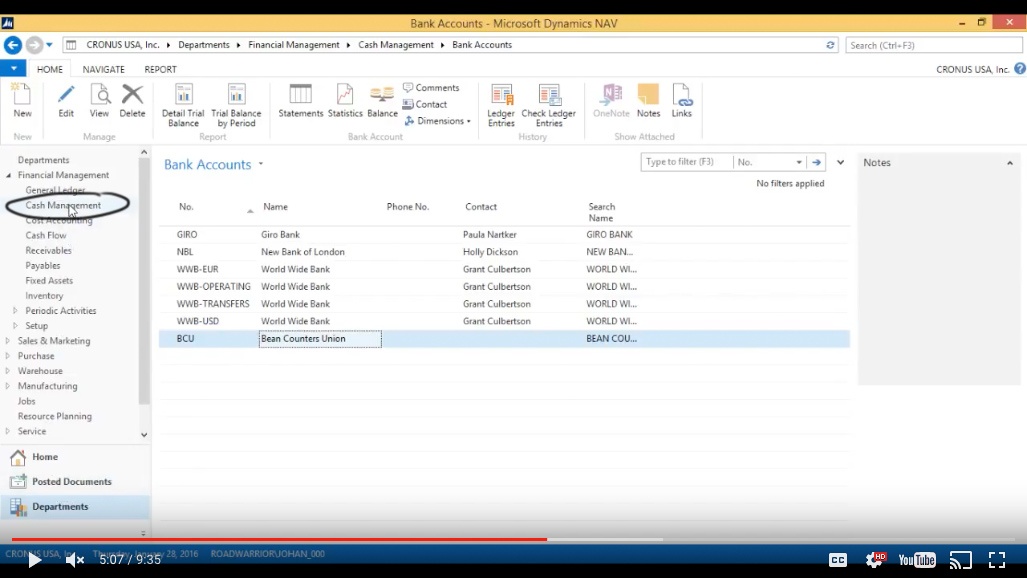
I’m going to take the check that I got from The Cannon Group as a payment and deposit that. I’m going to go back into Cash Management.
(Click image to view larger version)
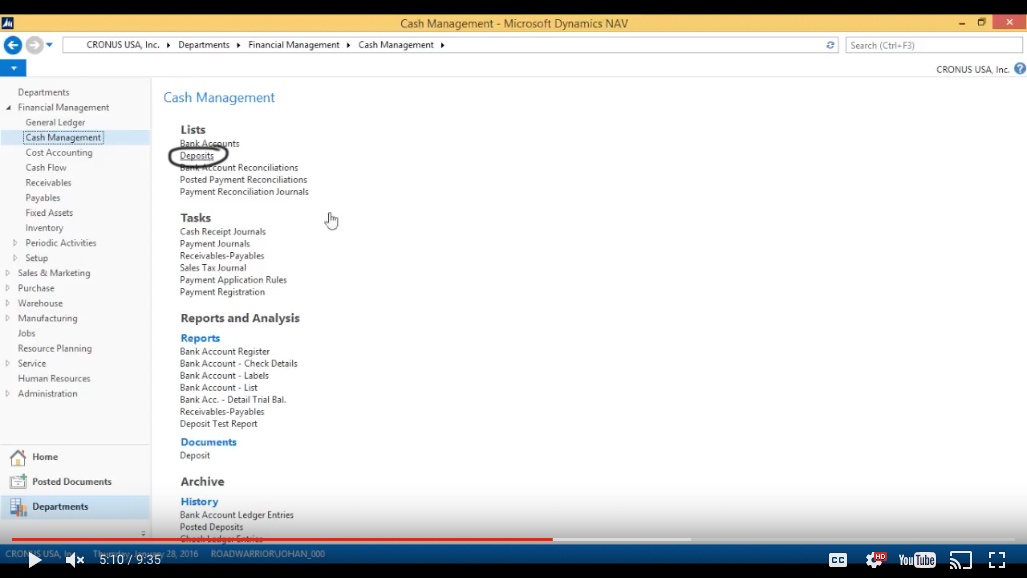
Go into Deposits.
(Click image to view larger version)
Hit New.
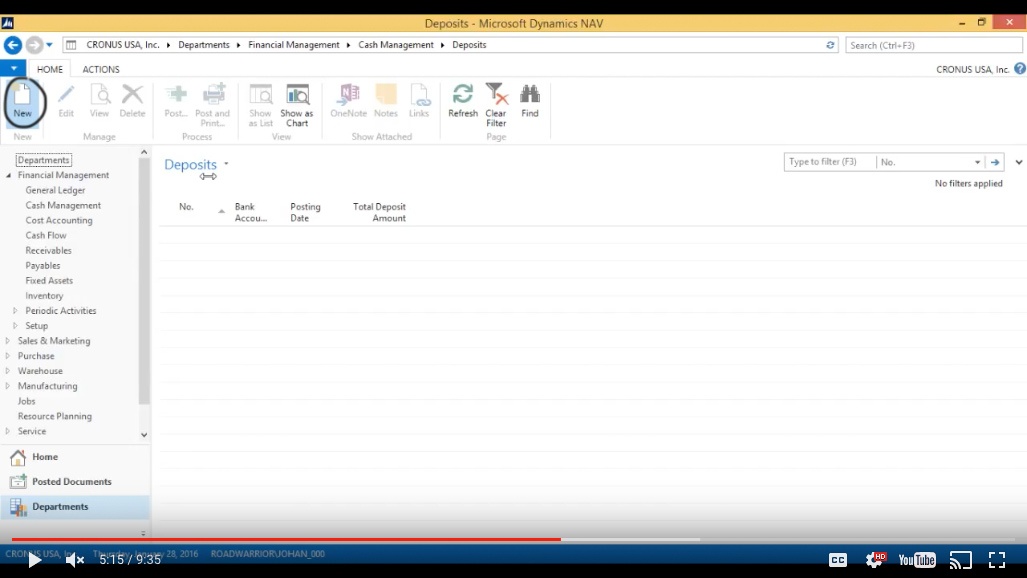
(Click image to view larger version)
Hit Enter to get a new deposit.
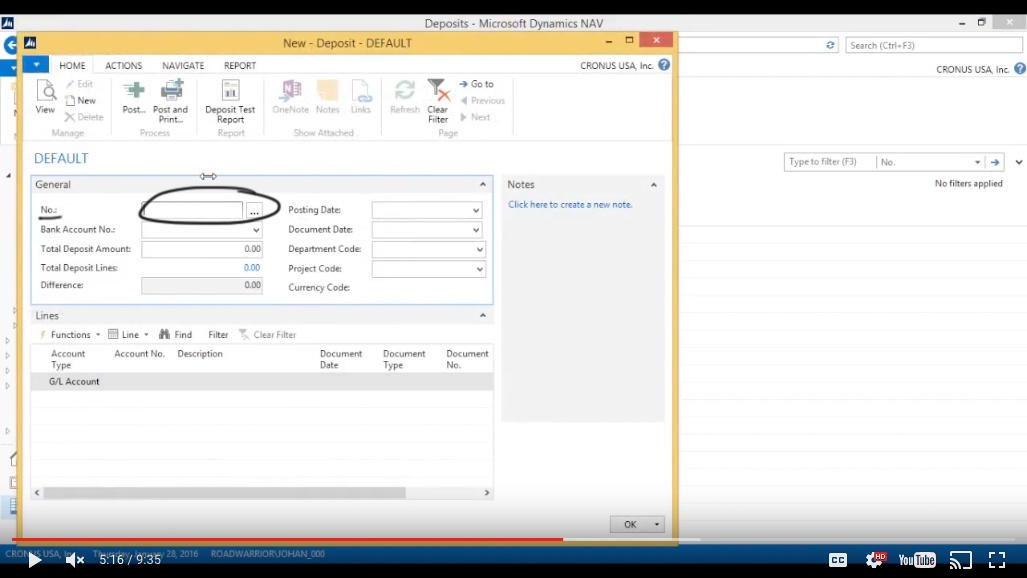
(Click image to view larger version)
Now I hit Bank Account. I’m going to pick BCU.
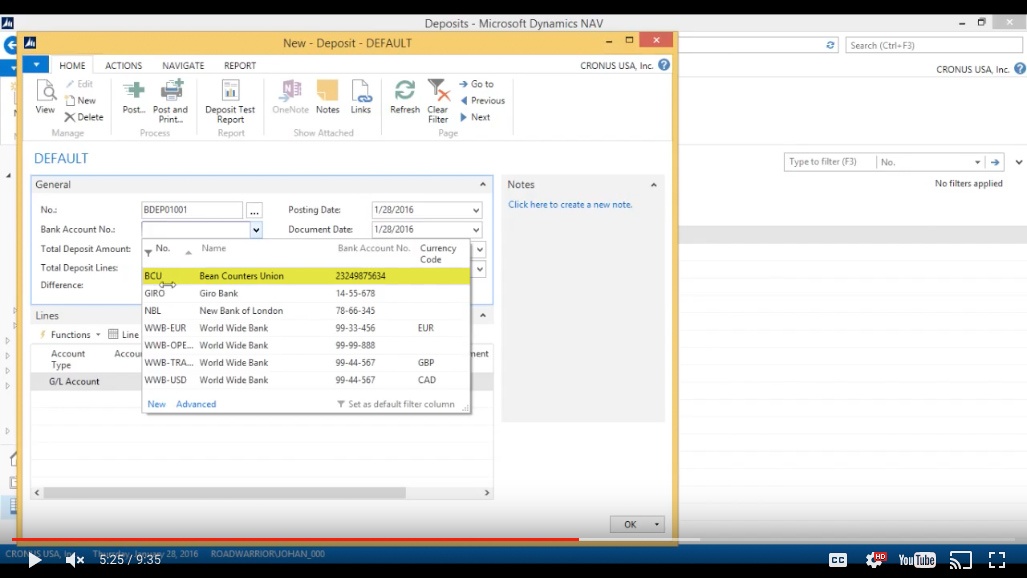
(Click image to view larger version)
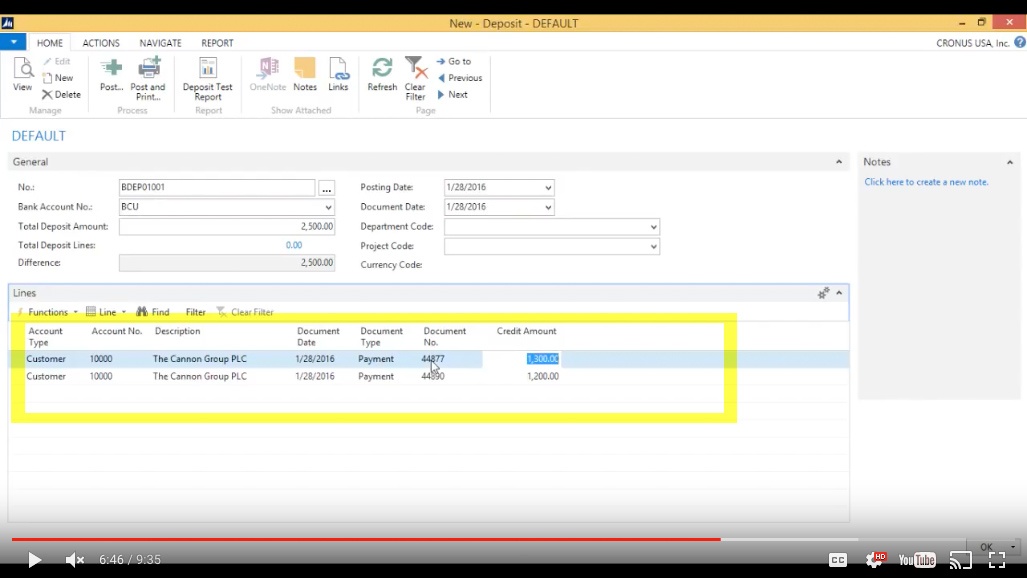
The Total Deposit that I got was $2500. So basically this is like a deposit slip that you would take to the bank; you’d say the total of the slip is X amount, in this case 2500 and then the lines are going to be the checks.
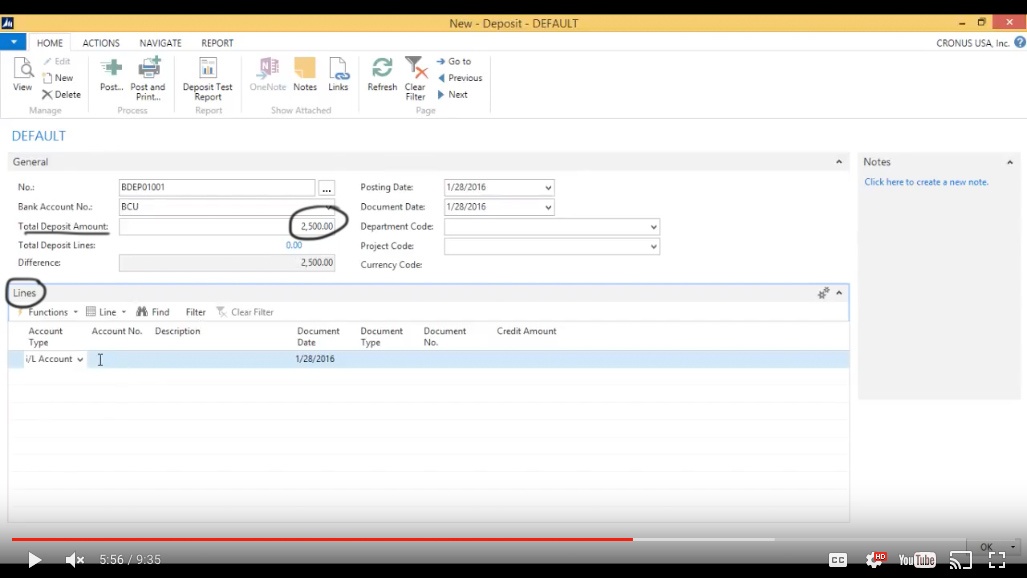
(Click image to view larger version)
I’m actually getting two checks from The Cannon Group, so I put in the document number, that’s the 28th of January; this is the check document number. Type is payment that means it’s just a payment from the customer. Document number is the check number which is 44877 and the amount on this check was $1300 and then I have another check from the same customer. Document number is 44890 and that’s for $1200.
(Click image to view larger version)
Applying Payments to Invoices
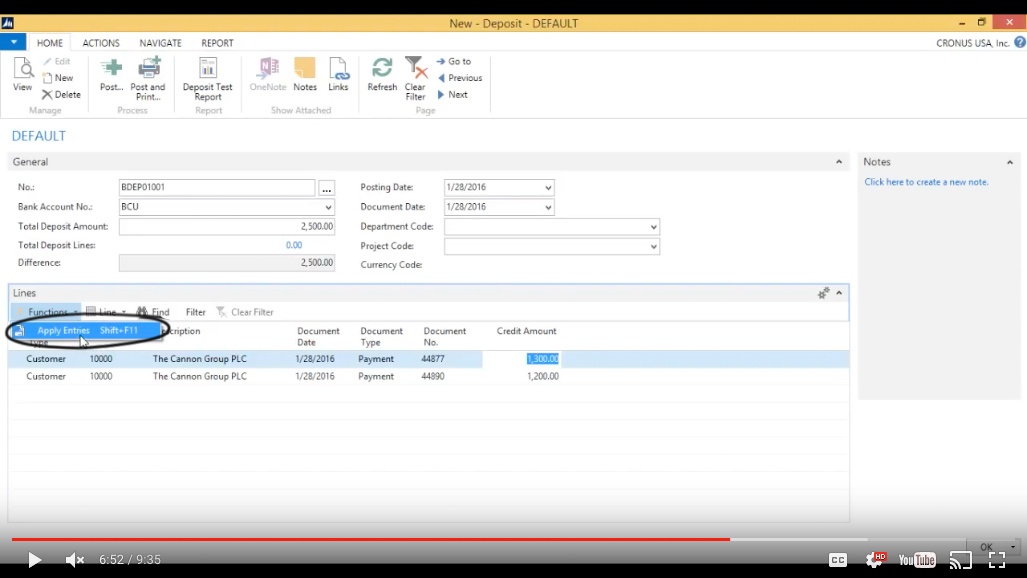
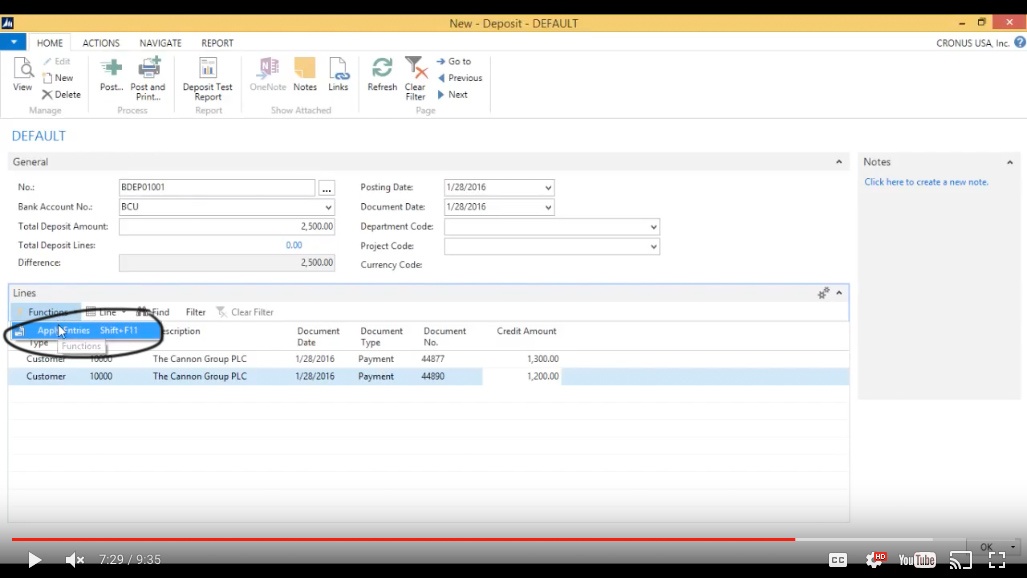
Now immediately here I can apply this to invoices by going into Functions: Apply Entries.
(Click image to view larger version)
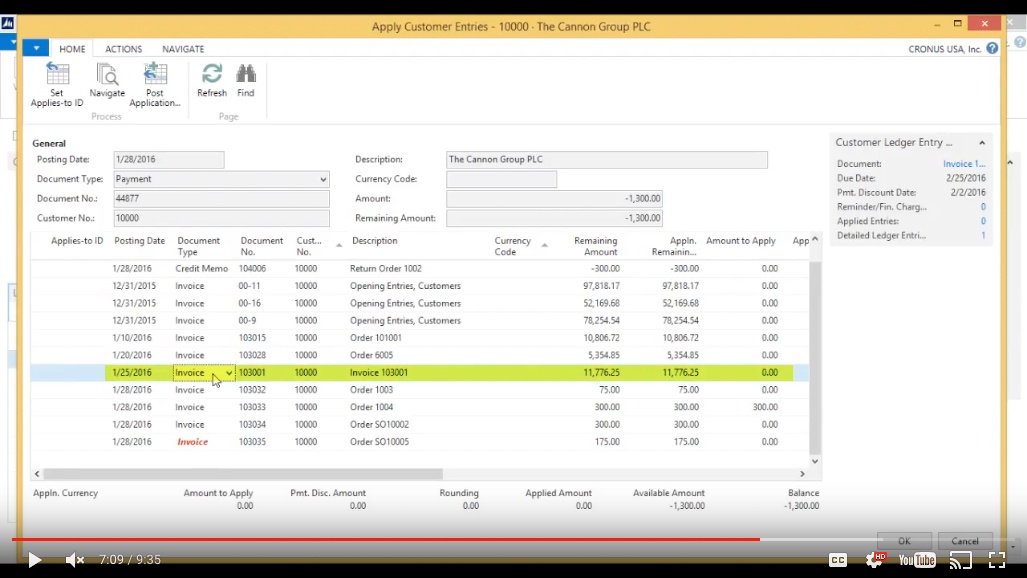
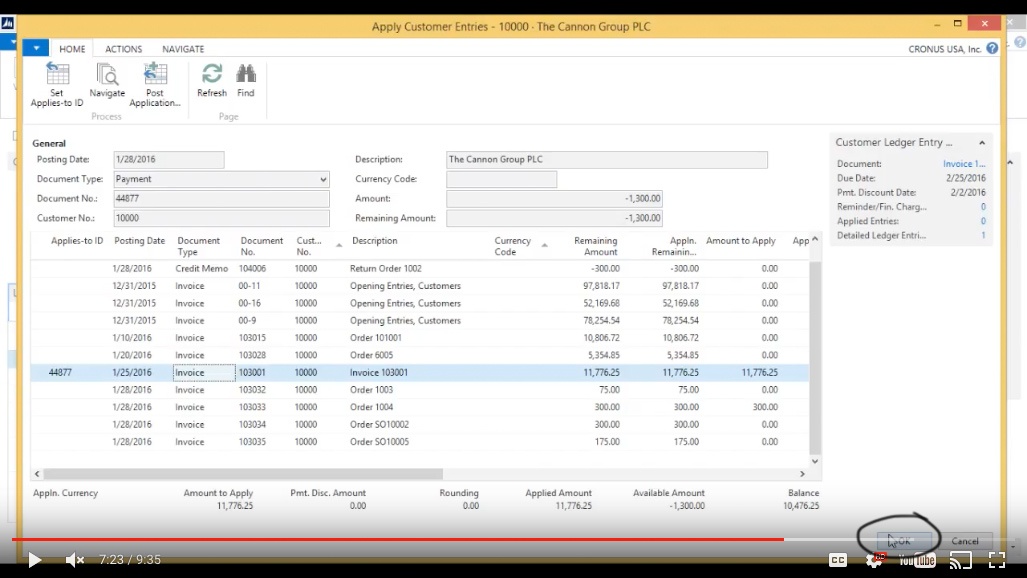
And you can see here that they have a few outstanding invoices. So the $1300 one is going to close out this invoice here, actually pay up into this invoice here.
(Click image to view larger version)
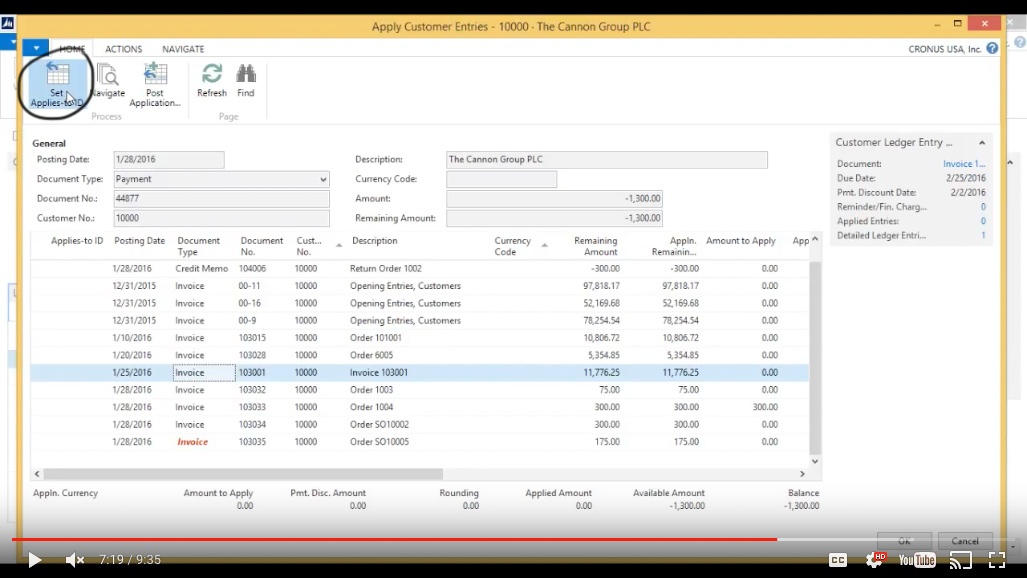
In order to apply to that invoice I hit Set Applies To ID.
(Click image to view larger version)
And I just hit OK.
(Click image to view larger version)
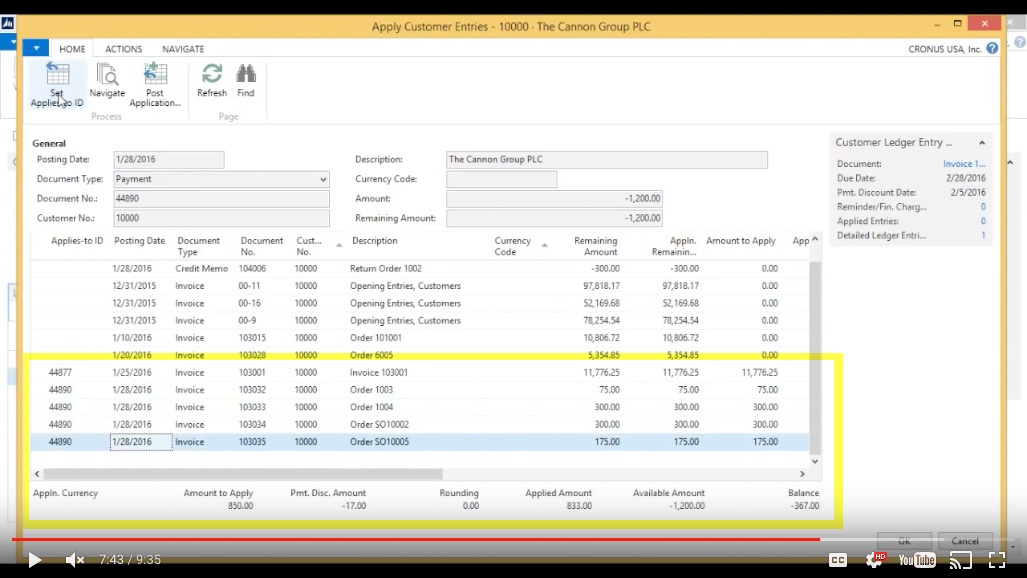
And the $1200 one I’m also going to apply that one. Hit Apply Entries.
(Click image to view larger version)
That payment is going to pay several smaller invoices. So I select several, leaving a balance of $367. I’ll actually leave that balance open. Now I have everything that I need, posting date is the 28th which is correct.
(Click image to view larger version)
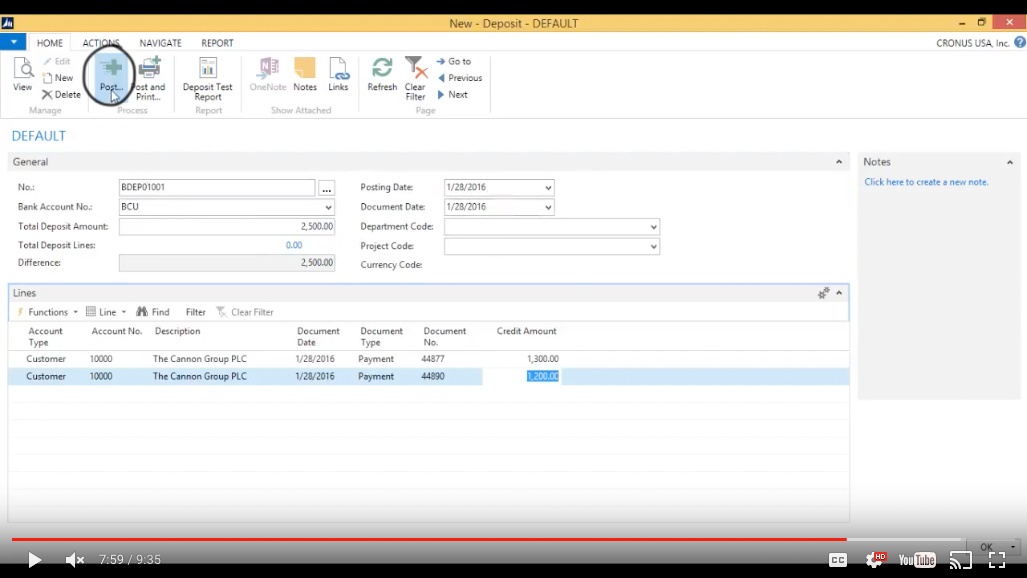
I’ll just hit Post, to Post the Deposit.
(Click image to view larger version)
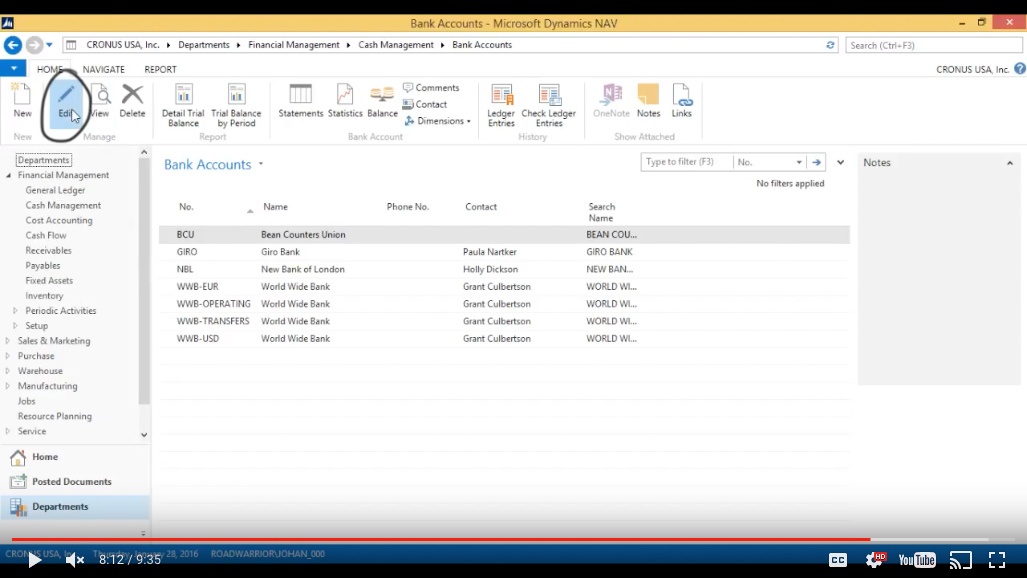
If I go into Cash Management again > Bank Accounts > Edit.
(Click image to view larger version)
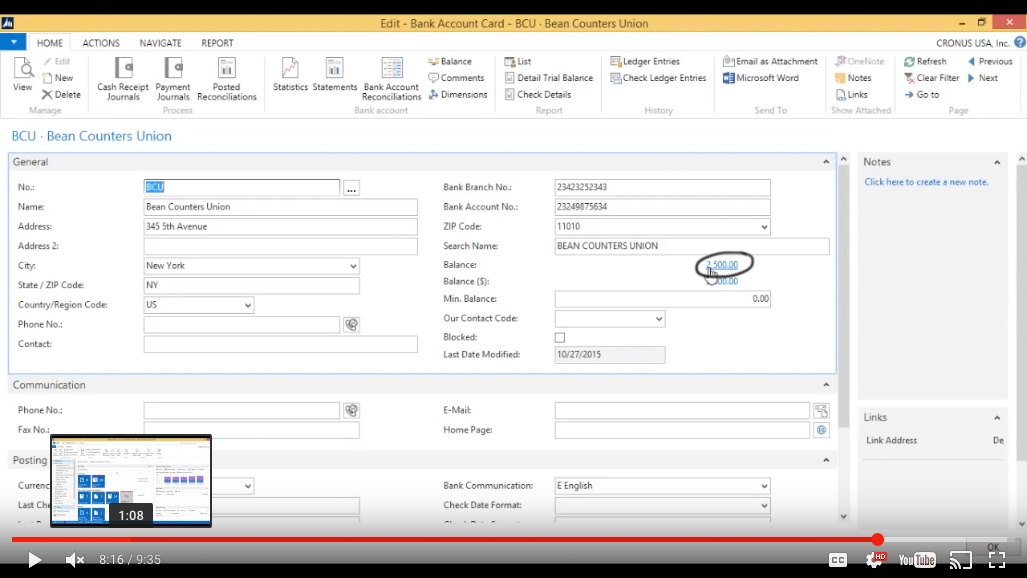
The Bean Counters Union balance is $2500, I click on that.
(Click image to view larger version)
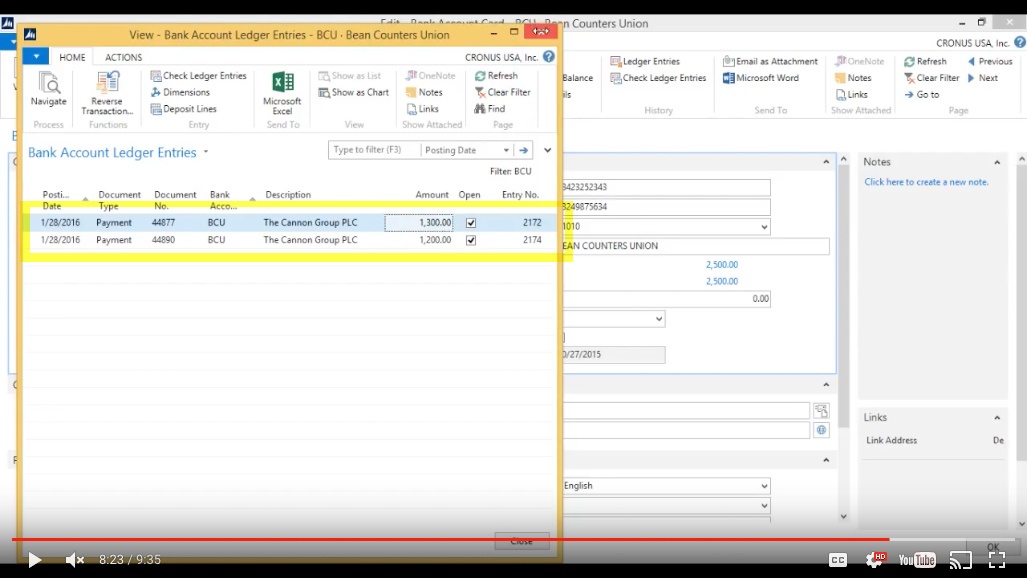
I have my checks $1300 and $1200 from The Cannon Group.
(Click image to view larger version)
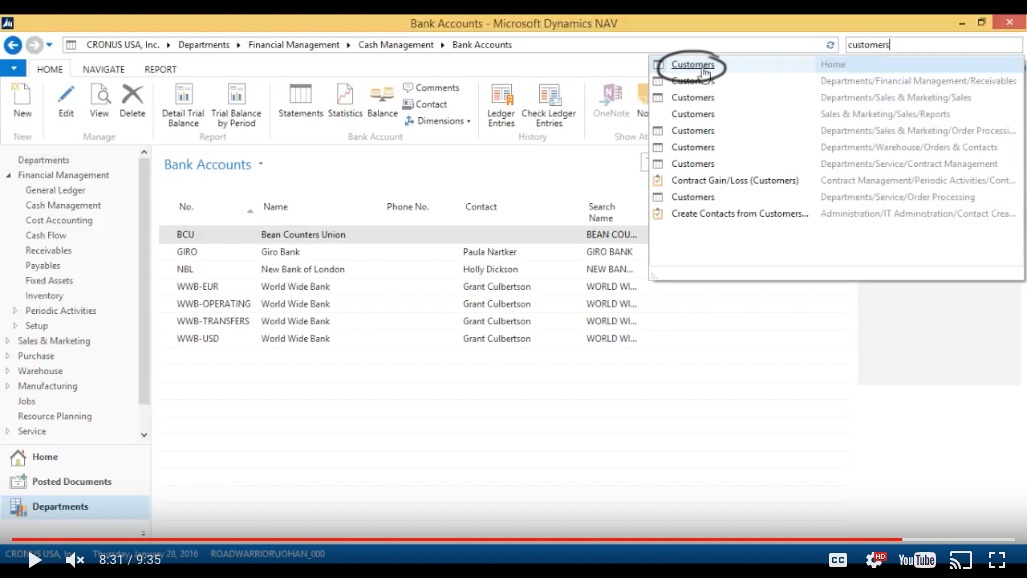
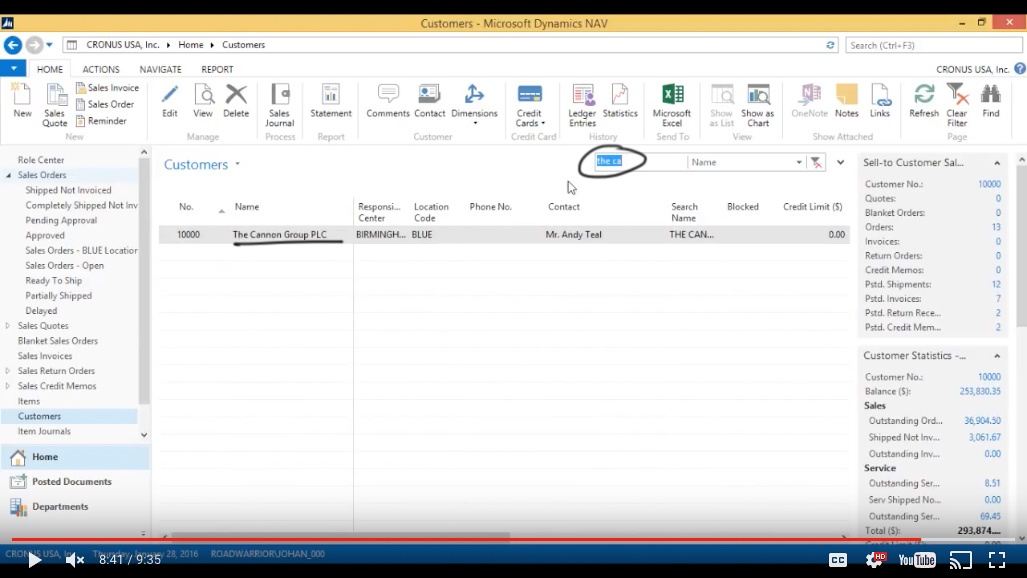
I can also look at The Cannon Group if I go into Customers.
(Click image to view larger version)
Look for The Cannon Group.
(Click image to view larger version)
Review Your Work
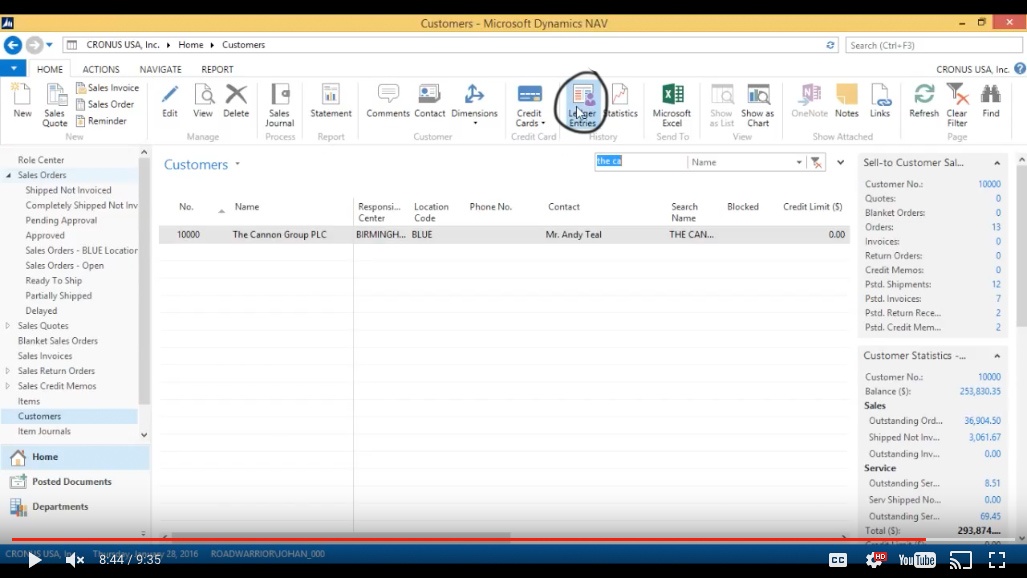
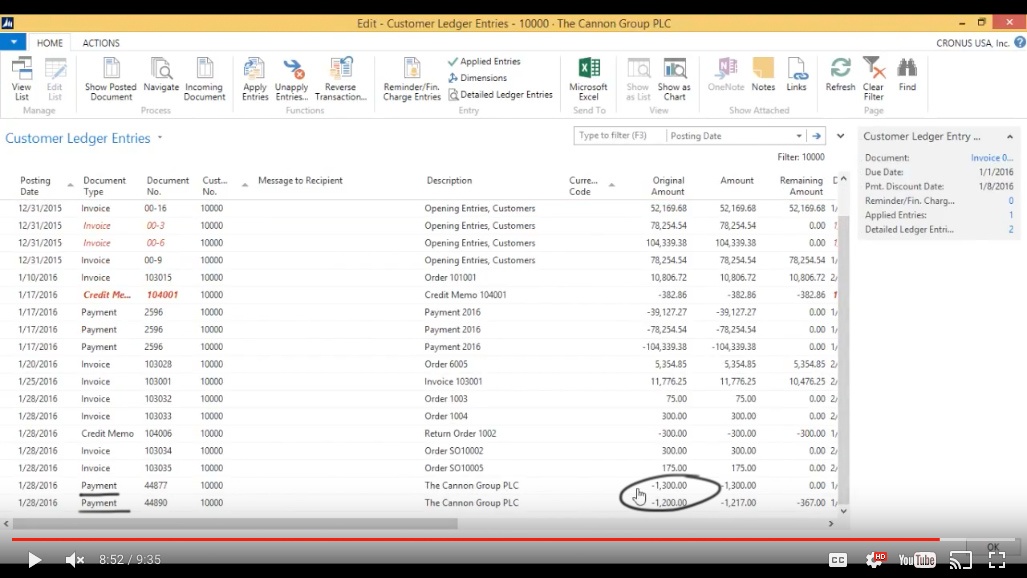
And go into the Ledger Entries for the customer.
(Click image to view larger version)
These are all the transactions for the customer, I can see both checks came in.
(Click image to view larger version)
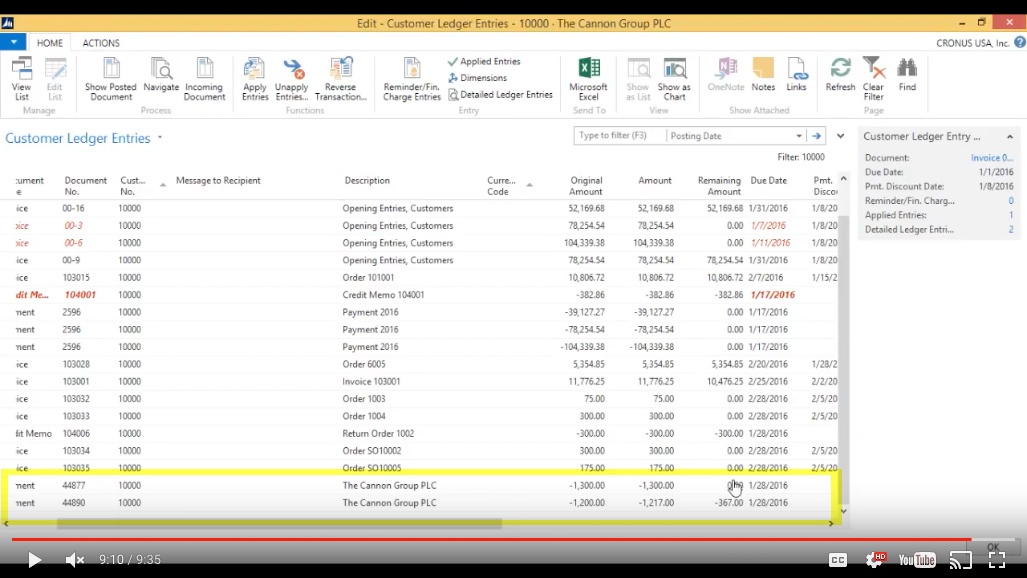
One of them has been applied perfectly to this transaction and the other one has been applied, except for $367, to the smaller transactions.
(Click image to view larger version)
That’s how we receive checks and apply them and create a bank account in NAV.
You've learned some of the many ways your business can benefit from using inecta Food. It's trusted by other businesses in your industry and can work just as well (or better) for you. inecta Food is easy to implement. It's easy on your budget with monthly subscription payments. Take the next step to ensure your food business is running the right kind of business software. Software for your food safety, increased efficiency, and stronger revenue growth.
Curious about implementation costs, training, getting a customized demo & detailed estimate, booking a discovery call?

Global Headquarters:
225 Broadway #660,
New York, NY 10007
1-800-632-0573
©2023 INECTA LLC
Global Headquarters: 179 Franklin Street, New York, NY 10013
©2020 INECTA LLC