Filter and Tailor List Views in Microsoft Dynamics NAV 2015
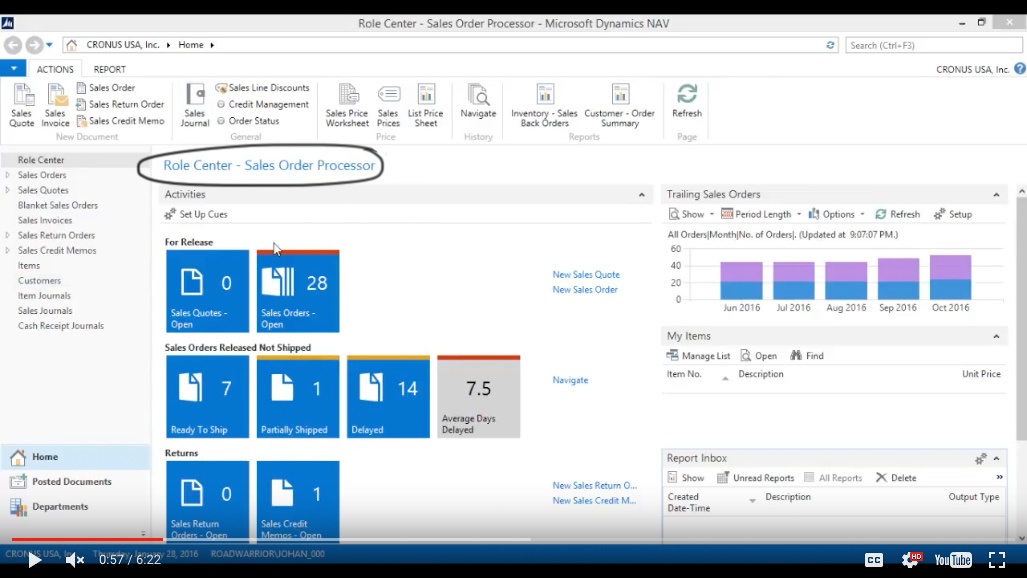
What I wanted to go over in this session is how to filter and change the sorting etc and move around in lists in NAV. Right now I have this screen which is my role center; I’m the Sales Order Processor.
(Click image to view larger version)
Changing List Views and Filtering in a Sales order
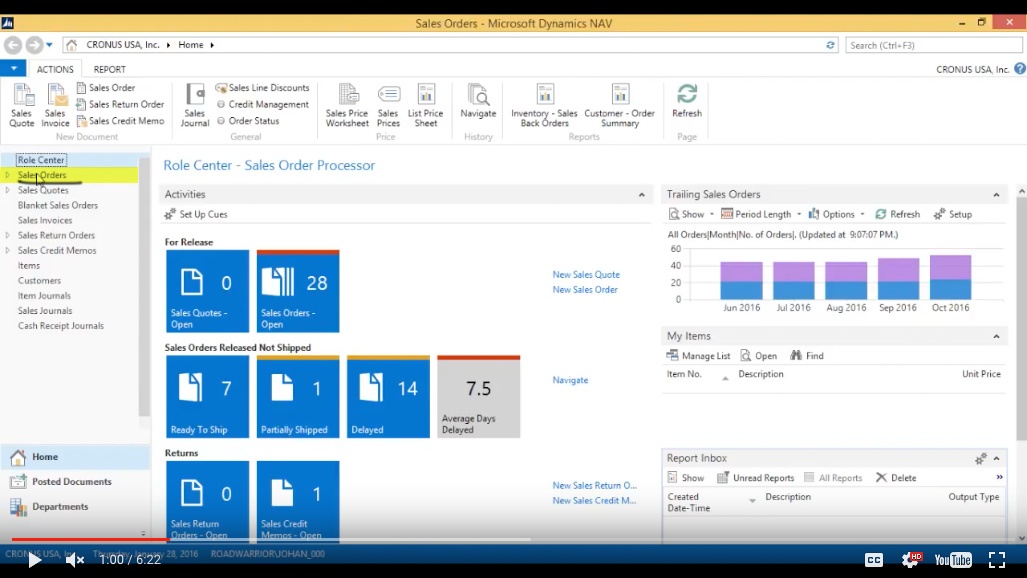
For example when I look at Sales Orders.
(Click image to view larger version)
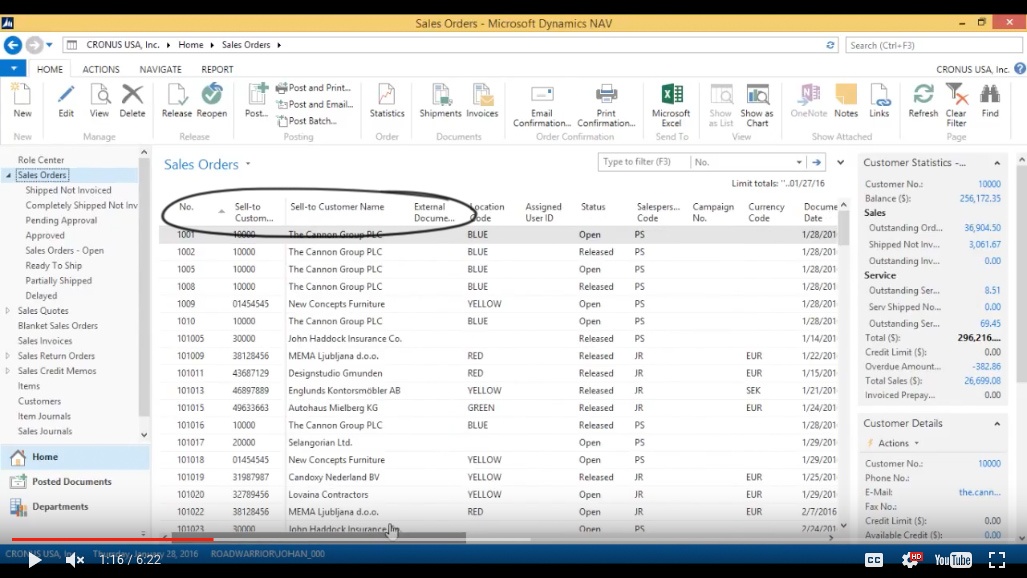
I see here I have the Number, Sell to Customer Number, Sell to Customer Name, External Document Number. Now some of these columns I don’t really want to see, so I’m going to tailor it around a little bit.
(Click image to view larger version)
Customizing Columns
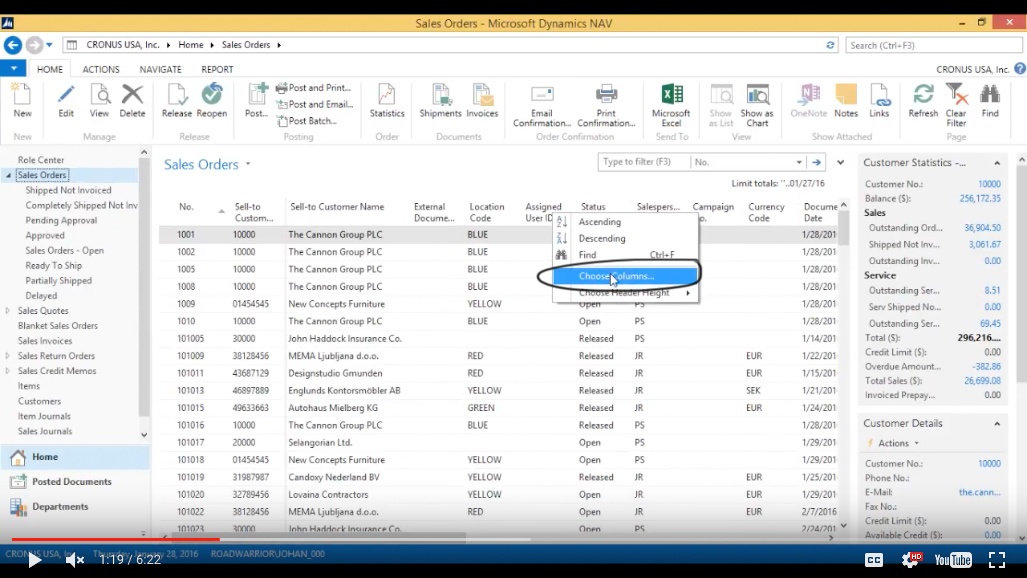
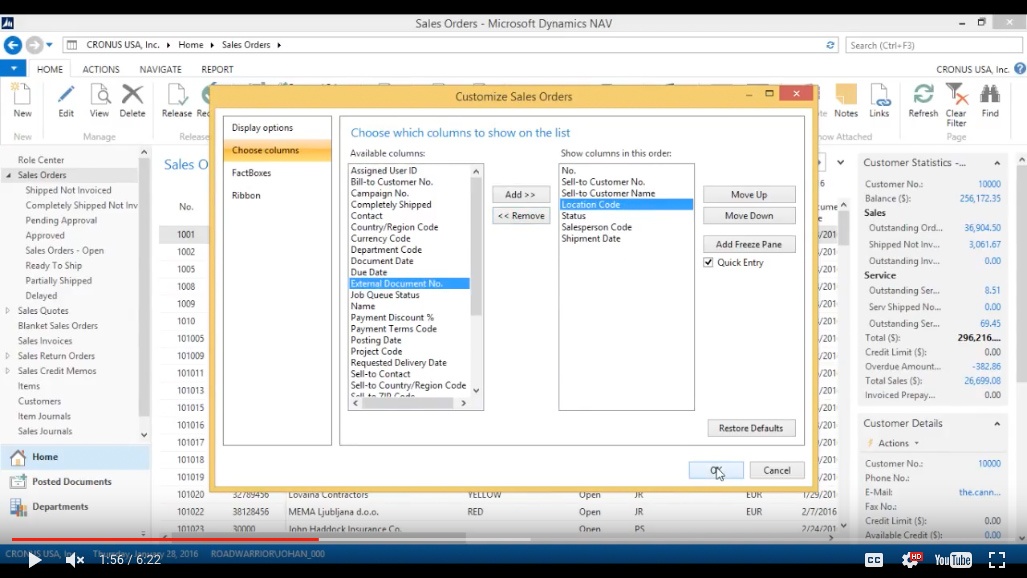
So I can actually go up here, right-click and say Choose Columns.
(Click image to view larger version)
I take a look at what I have; I’m not interested in having the Project, Department, Shipping Agent , whether it’s completely shipped, Shipping Advice, none of that.
I’ll have the Shipment Date, not interested in the Document Date or the Posting Date. Everything is in the US so no Currency, no Campaign. I do want to know who the Sales Person is, the Status and what location it’s going out of. And that’s pretty much it.
(Click image to view larger version)
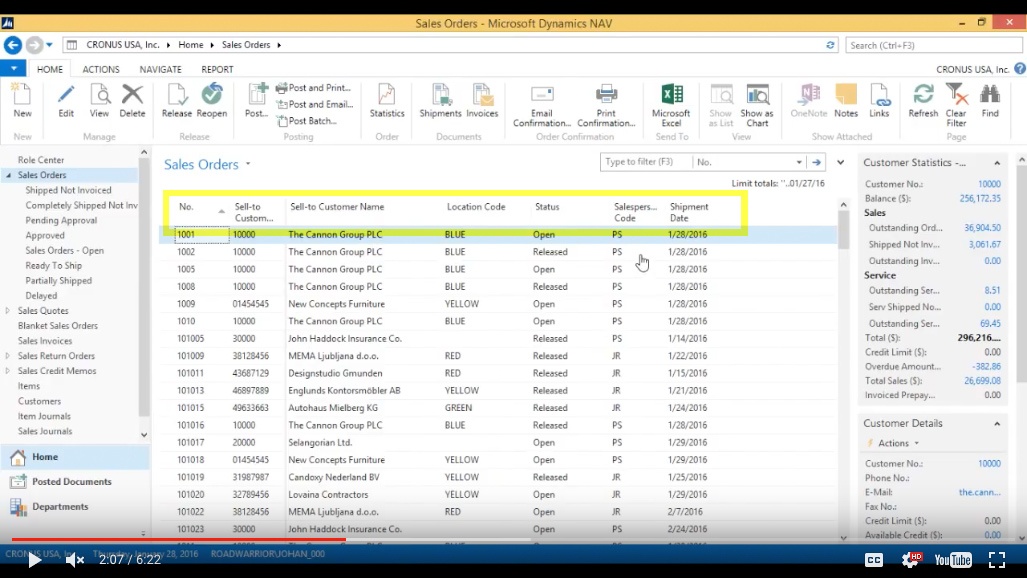
So I’ve cleaned it up a lot now I only have these columns. So this is much cleaner, much easier to work with.
(Click image to view larger version)
Sorting
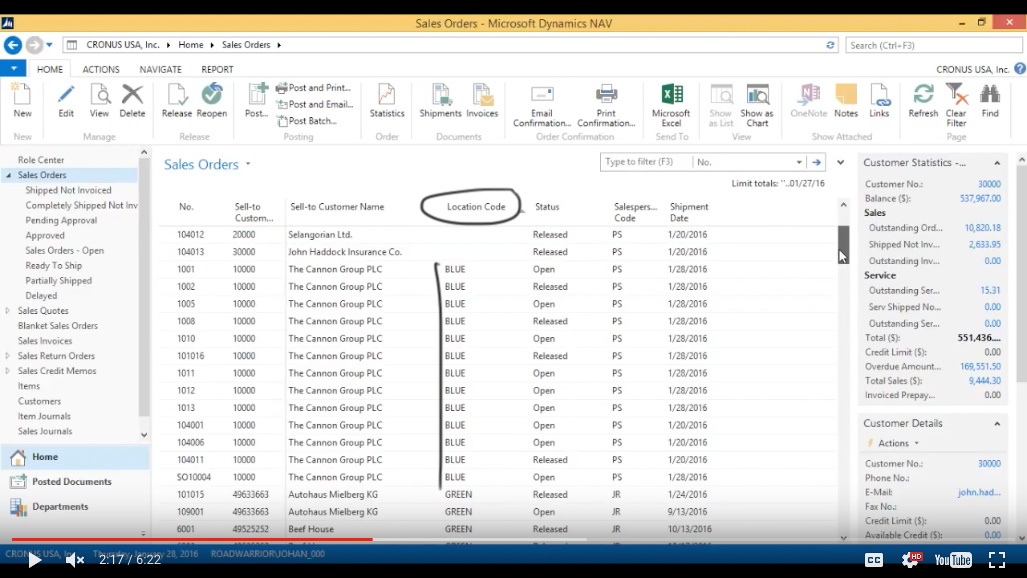
Also, I can sort by any column I want, so if I want to see everything that is in the Blue location together, I can just click on the Location Code and see that it sorts and then Green, Red, White etc.
(Click image to view larger version)
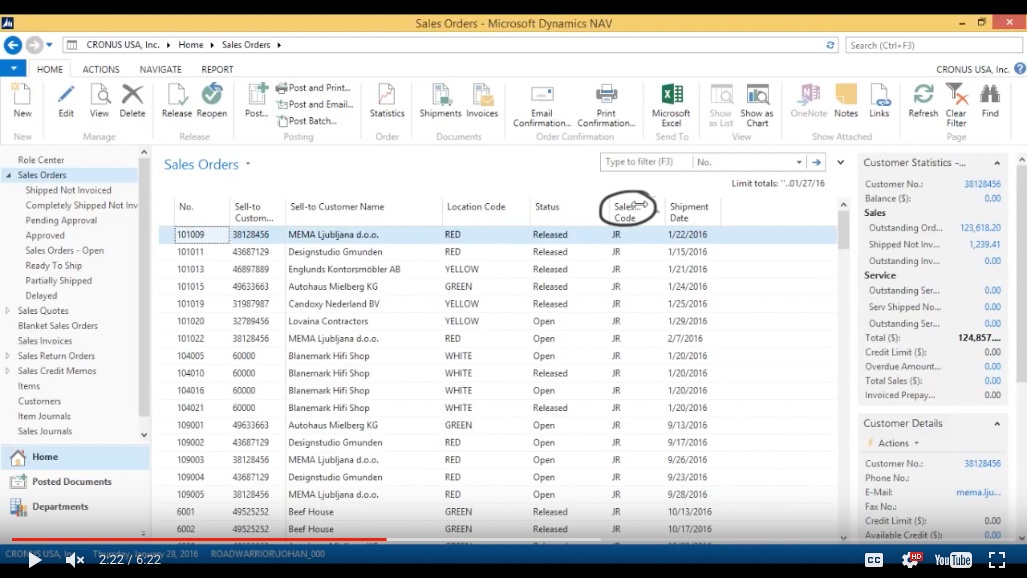
I can do the same with the Sales Person and see it sorted like that.
(Click image to view larger version)
Filtering
Now if I want to see only what is being shipped out on the 20th 2016, I can right click and say Filter to This Value.
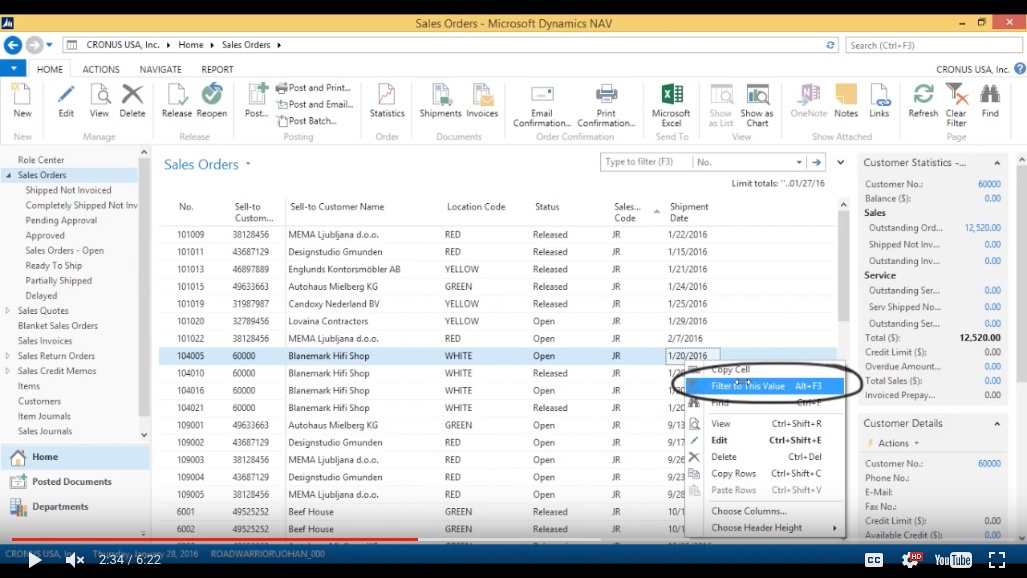
(Click image to view larger version)
Now I see everything that’s on the 20th. Let’s see everything that’s on the 20th going out of the Blue location. Again Filter to This Value and now I have filtered both the location and the shipment.
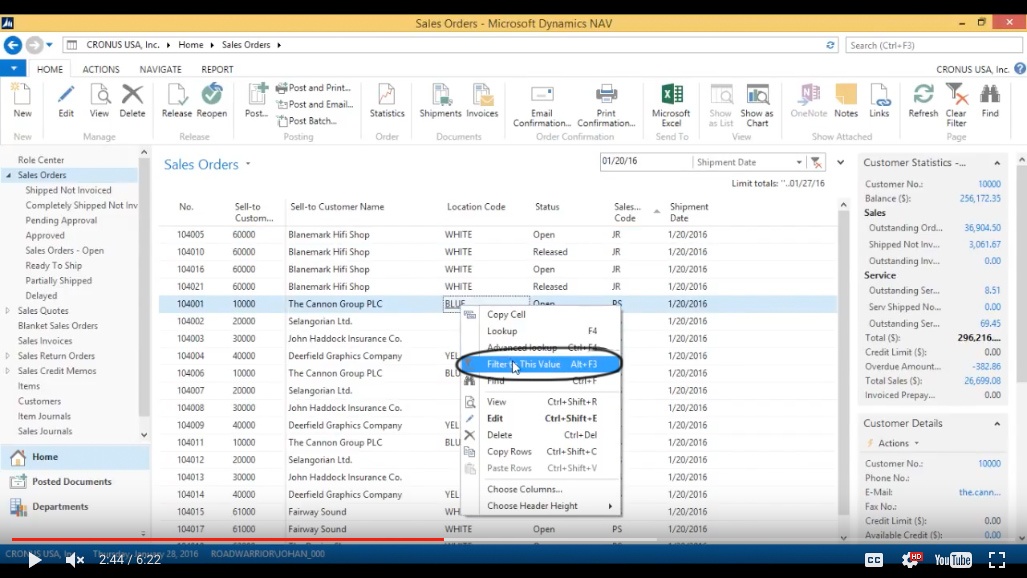
(Click image to view larger version)
Now how do I see what I’ve filtered on? If I go up here I can click on Expand and it actually drops down into filters on the list.
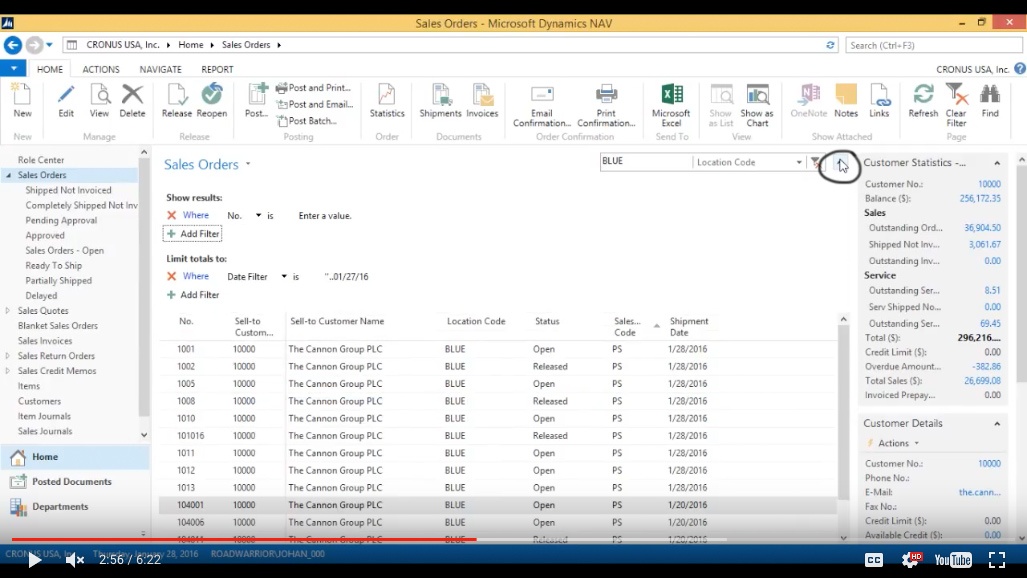
(Click image to view larger version)
Here I can see what filters have been applied. Actually in here it does not show the filters I applied in the list as you can see. But in order to take those filters off all I have to do is click here and then it opens it all up again.
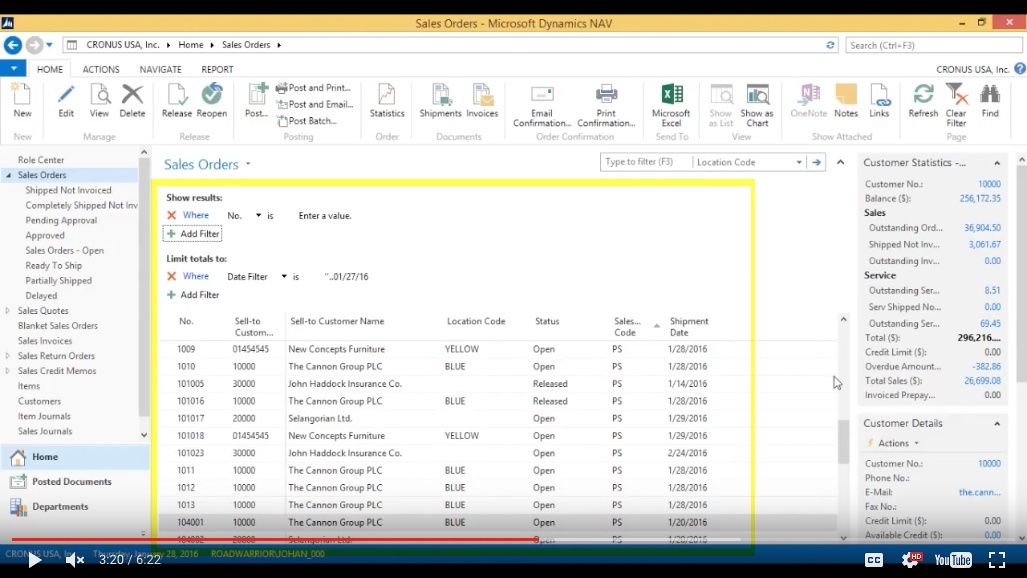
(Click image to view larger version)
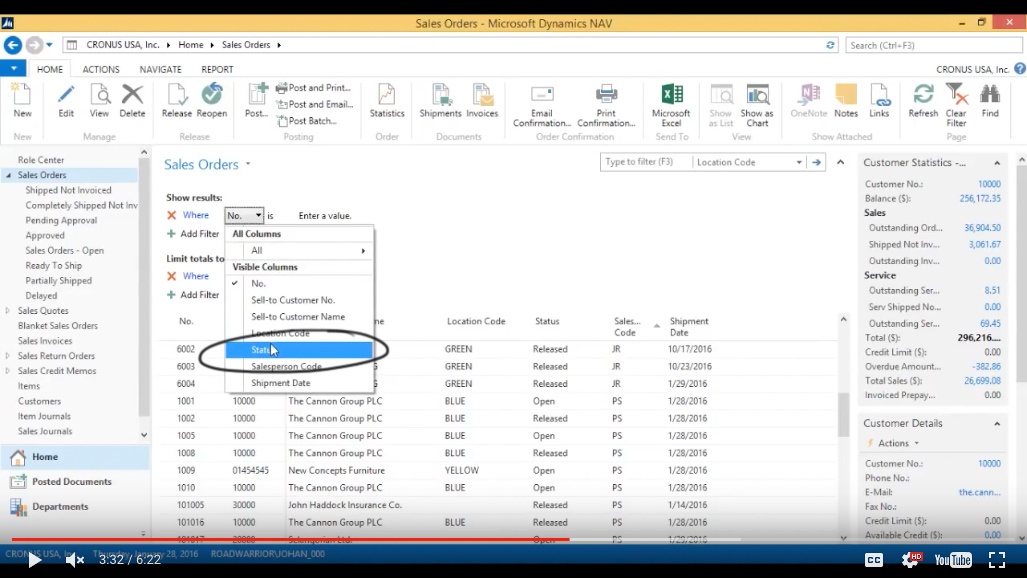
Now if I wanted to filter using this drop down, I can go ahead and do that. So for example, I can go ahead and take a look at Status.
(Click image to view larger version)
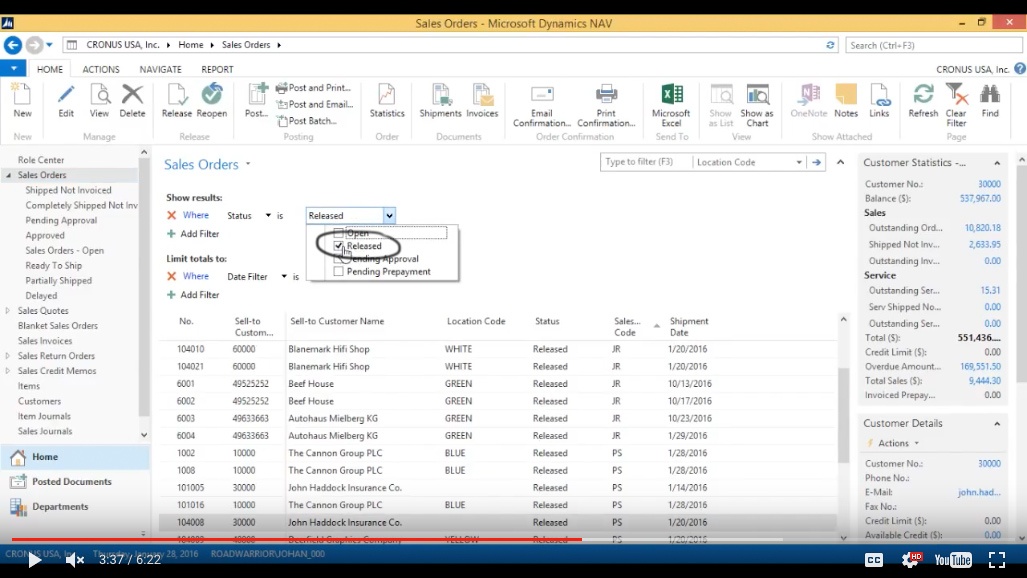
And I only want to see Released and now the list is getting filtered again.
(Click image to view larger version)
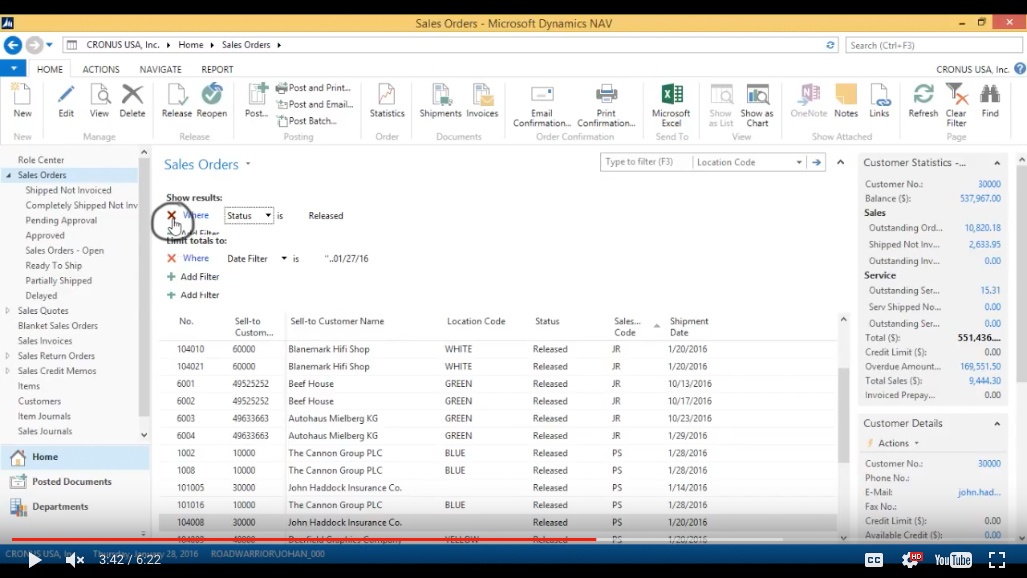
How to turn that off? Click here and it’s off.
(Click image to view larger version)
So that’s how you can manipulate filters in a list.
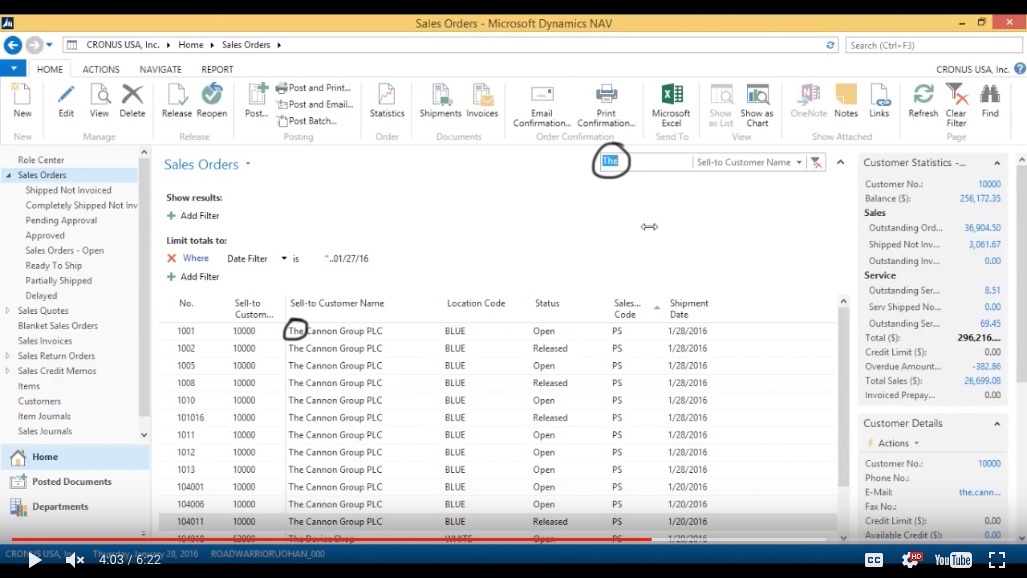
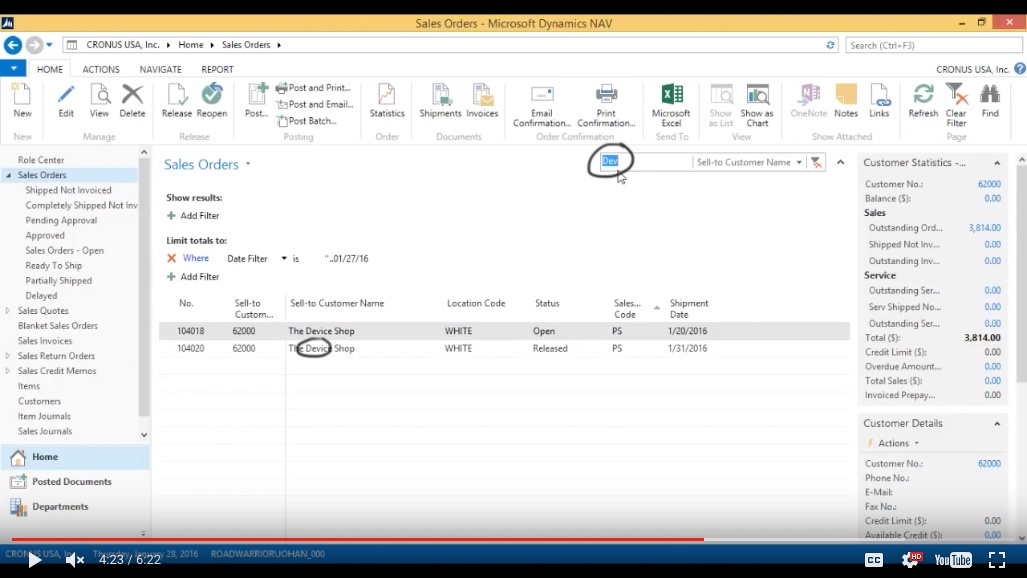
Further there are some rules we could use. For example I want to filter the customer name by anything that starts with ‘The’. If I type in ‘The’ it automatically picks that up.
(Click image to view larger version)
I can also say anything that has a ‘dev’ in it, if I do like this, it picks that up. So it tries to figure out what you want to filter by when I put this in here.
(Click image to view larger version)
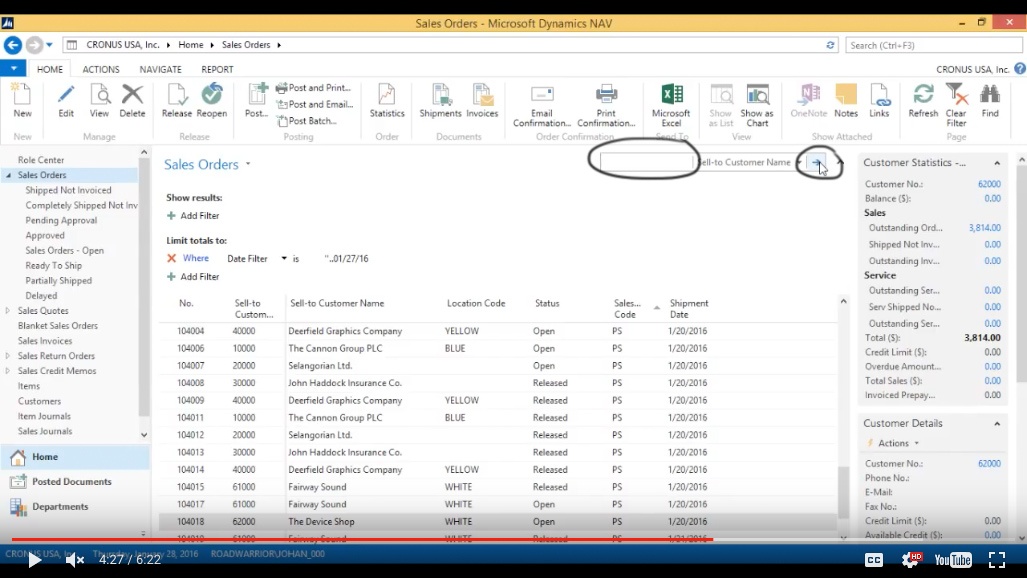
If I then clear it again, and that’s off.
(Click image to view larger version)
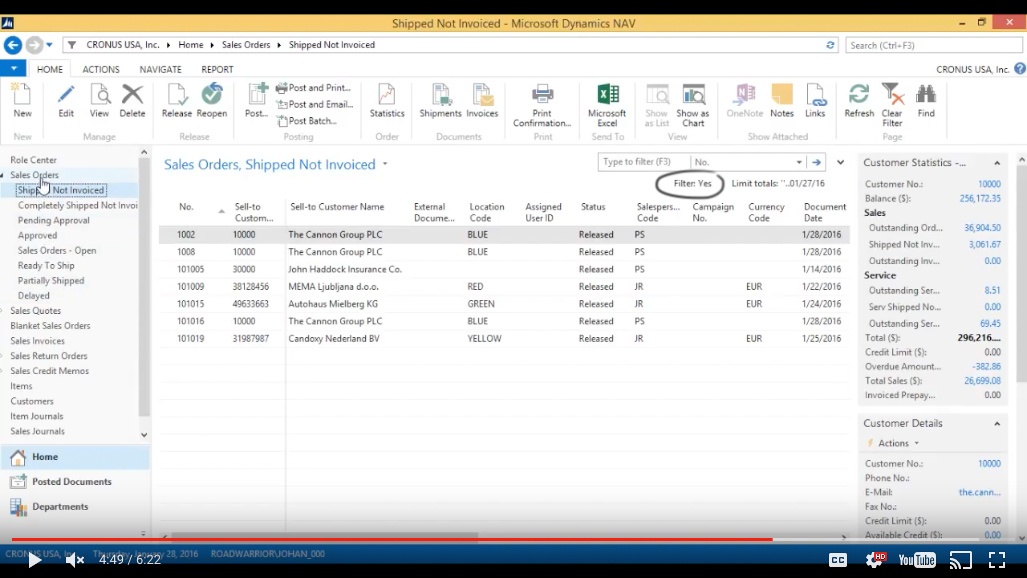
Now here I have Sales Orders and I have all kinds of filtered sales orders. like what is ‘Approved’ and now I get my list again that’s not with the columns that I want, but you see that they have all special filters.
(Click image to view larger version)
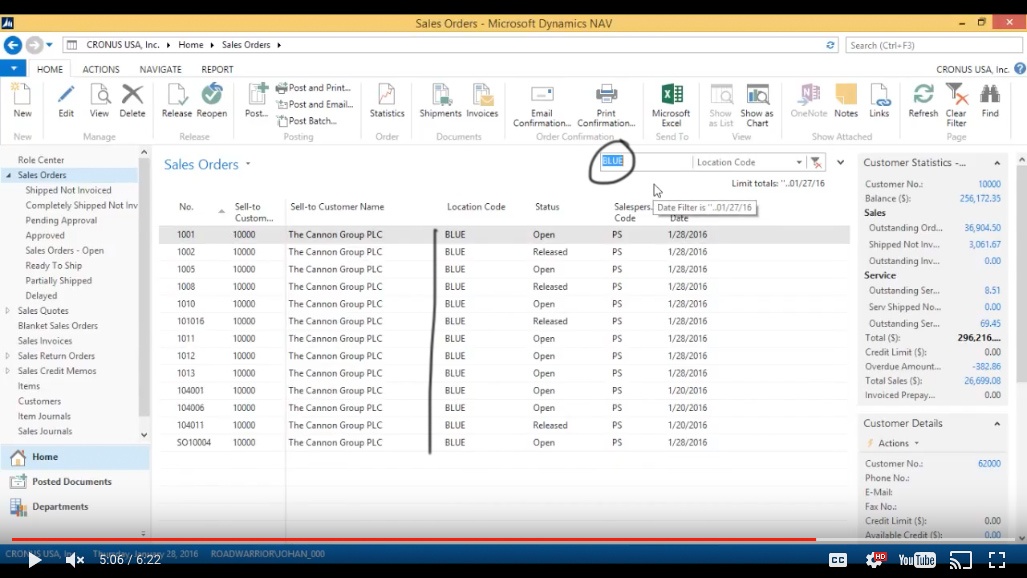
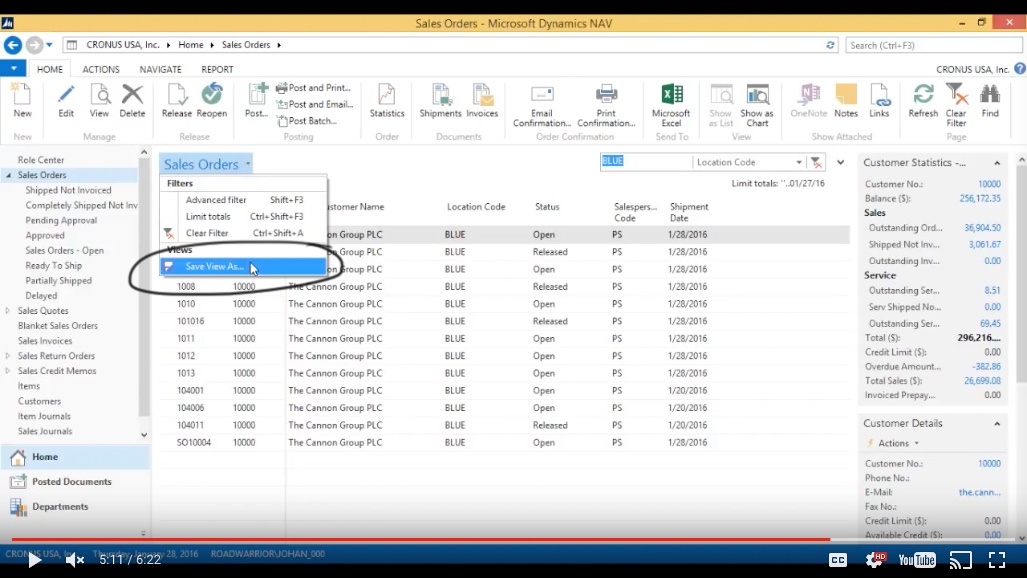
Now how do I create these filtered ones? Let’s say I only want to see the Sales Orders that are in the location Blue. So all I have to do here is start by entering a filter. I’m going to go to the Location Code, type in Blue, and now I have that.
(Click image to view larger version)
Saving Views
And I can actually go here and say Save View As.
(Click image to view larger version)
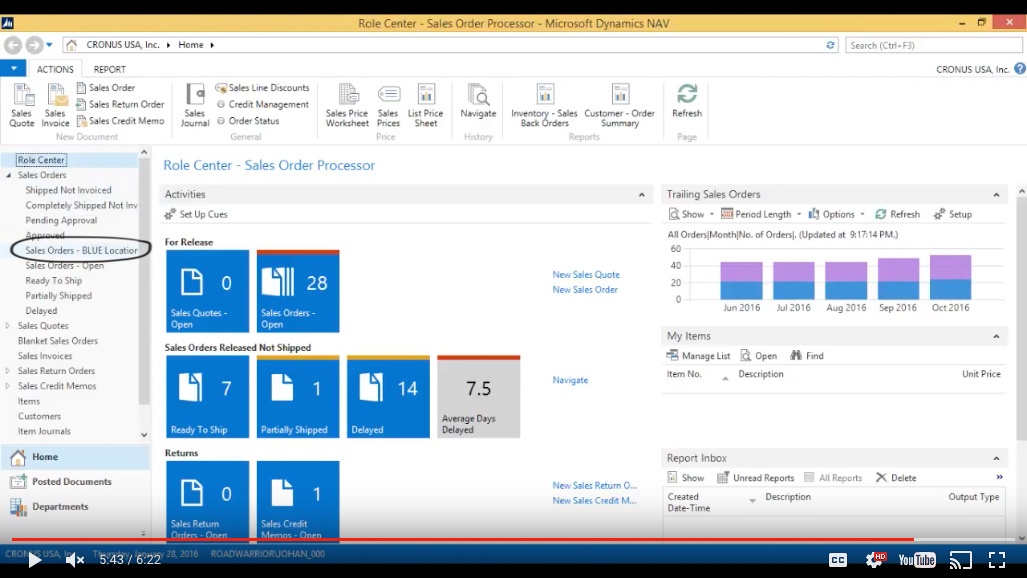
Now what I’m doing is saving the Sales Orders as a link on my left hand side. And I’m actually going to call that ‘Sales Orders Blue Location.’ And I hit OK.
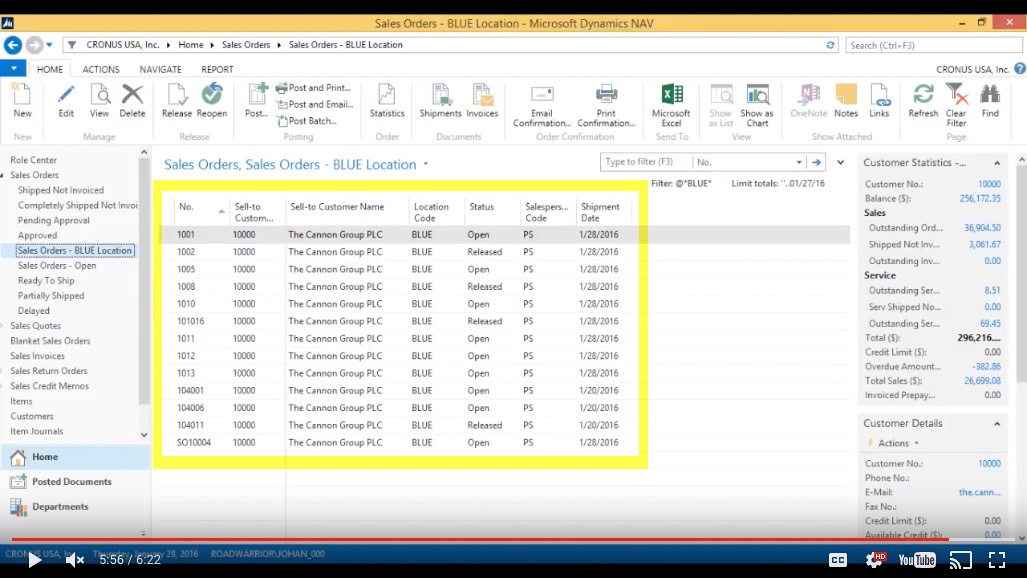
Now I’m actually getting refreshed and I go into the Sales Orders. Now I see I have an extra column here called…or extra link called Sales Orders in the Blue Location. I click on that.
(Click image to view larger version)
Bringing up a Saved View
Then I only see that and I actually see it with the column layout that I had set up which is very convenient.
(Click image to view larger version)
So that was a quick way of how to manipulate lists and filters in NAV and tailoring that as we go.
You've learned some of the many ways your business can benefit from using inecta Food. It's trusted by other businesses in your industry and can work just as well (or better) for you. inecta Food is easy to implement. It's easy on your budget with monthly subscription payments. Take the next step to ensure your food business is running the right kind of business software. Software for your food safety, increased efficiency, and stronger revenue growth.
Curious about implementation costs, training, getting a customized demo & detailed estimate, booking a discovery call?

Global Headquarters:
225 Broadway #660,
New York, NY 10007
1-800-632-0573
©2023 INECTA LLC
Global Headquarters: 179 Franklin Street, New York, NY 10013
©2020 INECTA LLC