How to create a transfer order in Microsoft Dynamics NAV 2015
In this video I am actually going to demonstrate how we can move some inventory between locations. I’m going to take a look at my coffee mug and see how we’re doing.
View Item Availability by Location
I go into the Items.
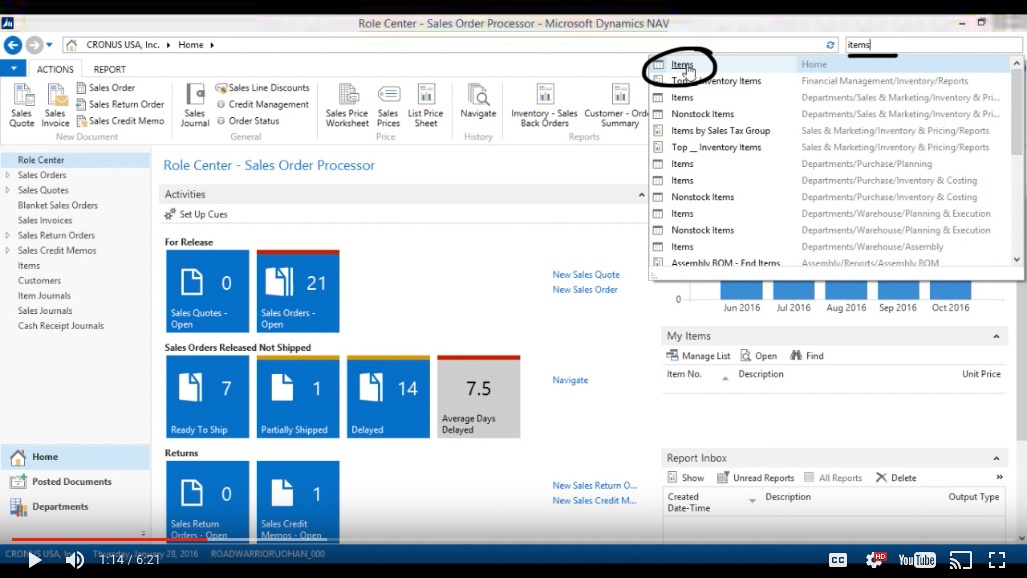
(Click image to view larger version)
And take a look at my Item List to find the coffee mug. So I go ahead and filter on that.
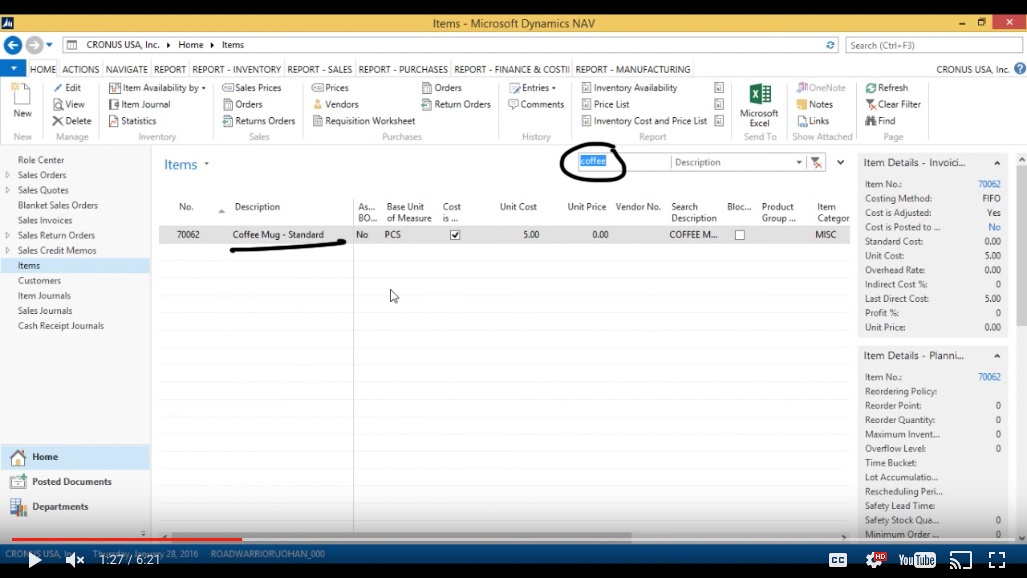
(Click image to view larger version)
I'll take a look at my Inventory Availability by > Location.
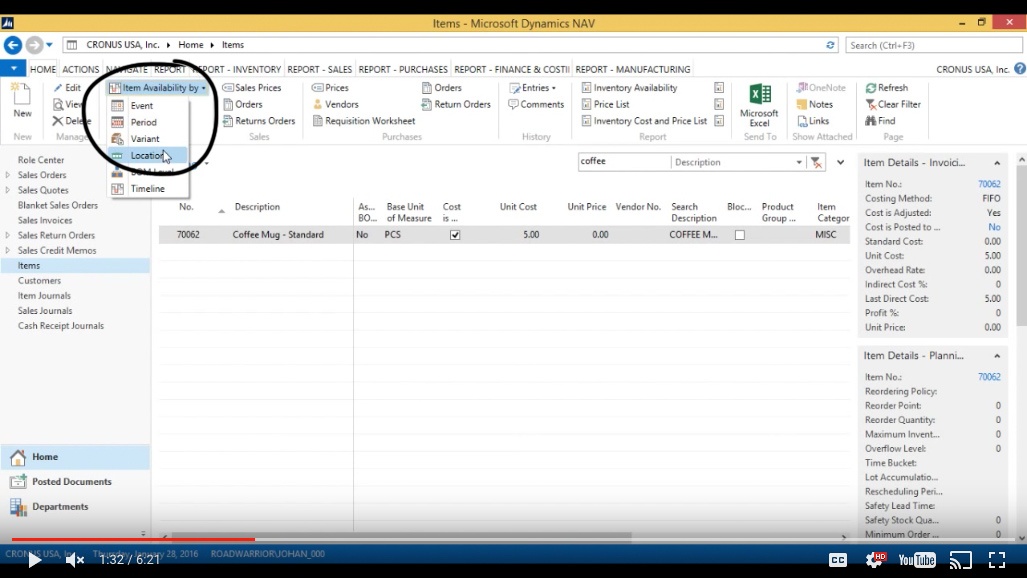
(Click image to view larger version)
If I look at this particular screen, it tells me that I have “985” pieces in blue. It says “Projected Available Balance” because it actually is taking into account inventory on hand, purchase orders arriving in by the day, today, and sales orders going out.
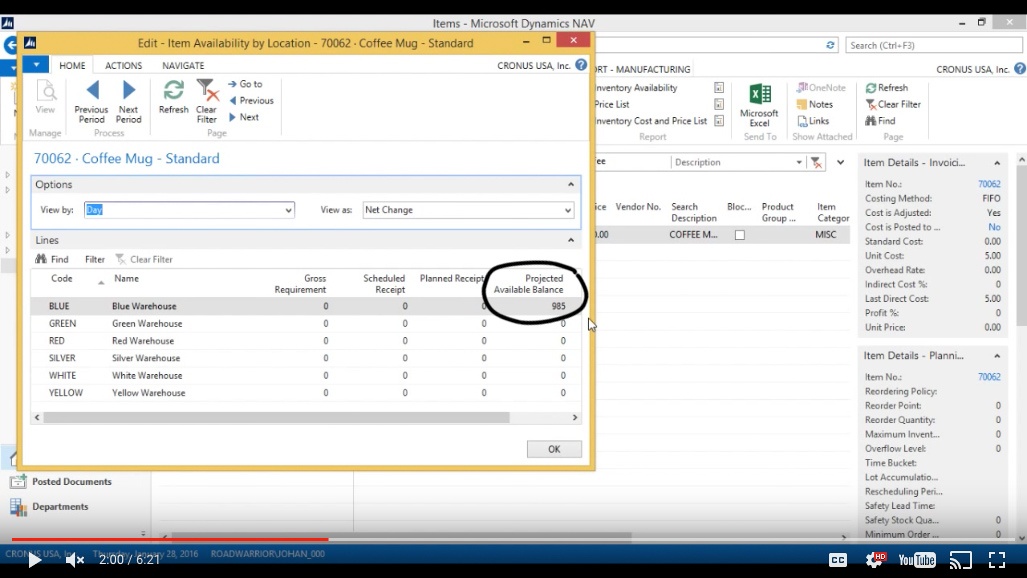
(Click image to view larger version)
Now however, I don’t have any of those, I only have inventory on hand and that’s included in this number, so it’s just going to show “985”.
Moving Inventory between locations
Now what I want to do is move some of this inventory across town into another location that we have, which is the Red Warehouse. What we’re going to do is actually move that with our own truck that comes to pick up 200 coffee mugs and I’m going to put that on the truck and actually get that over to the Red Warehouse. Now how do I do that?
Create a Transfer Order
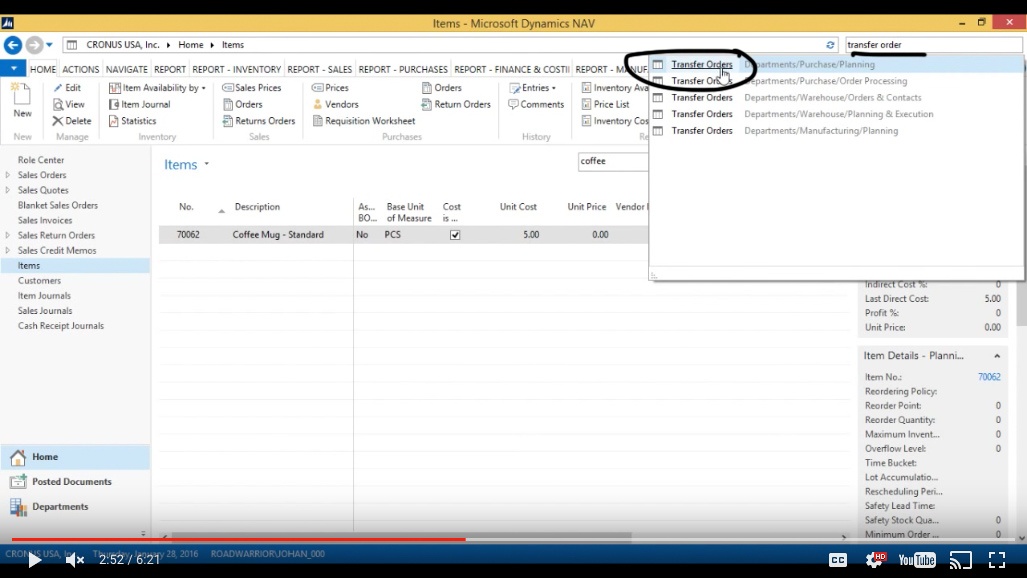
In order to do that, we’re going to use a Transfer Order. So I go here and go search for my “Transfer Orders”.
(Click image to view larger version)
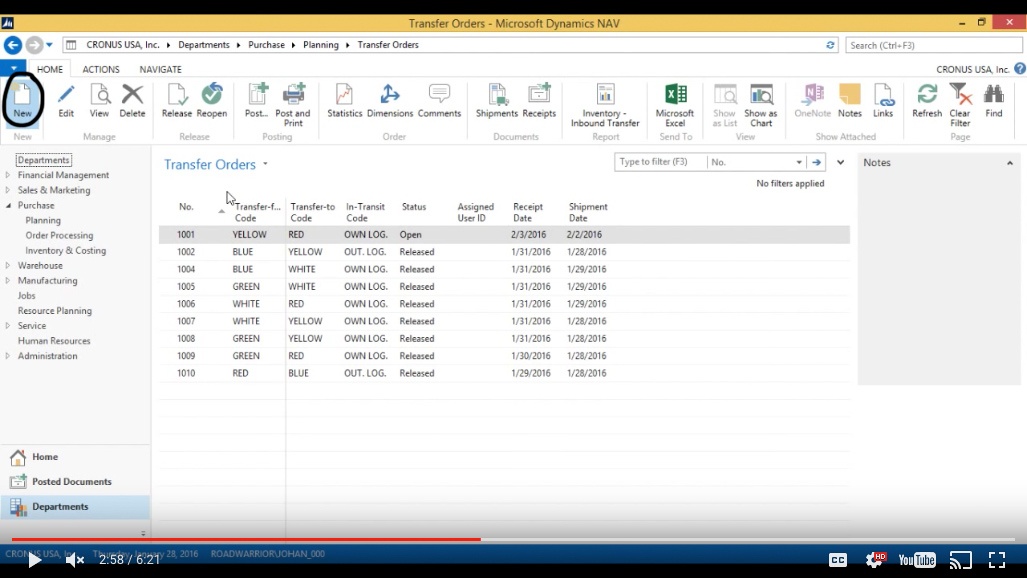
There they are: I’ve got a bunch of them already created; I’m going to create a new one.
(Click image to view larger version)
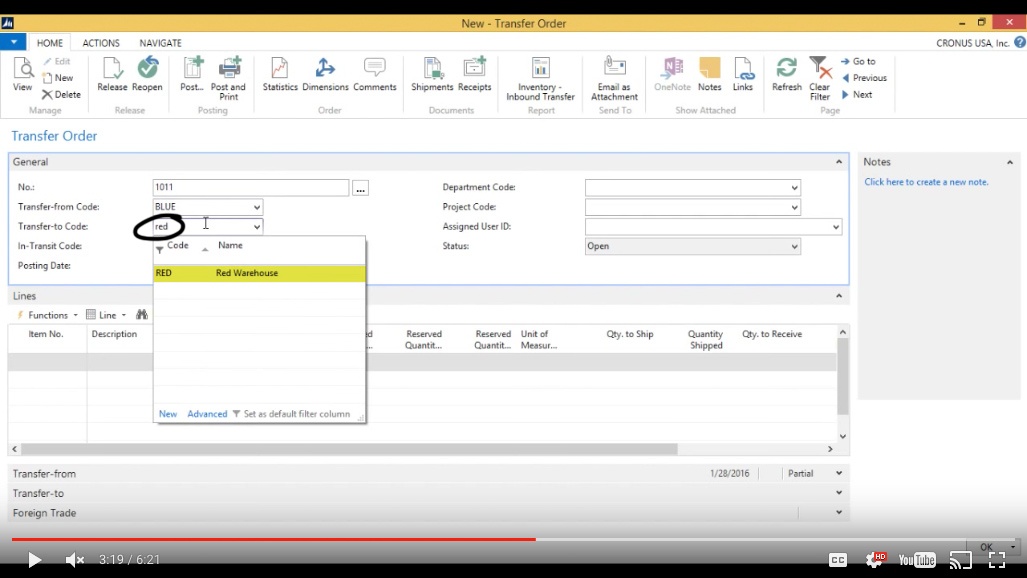
Now it asks me ‘ok, from what location do you want to transfer from?’ I want to transfer from the “Blue” location in “Transfer-from Code” because I have everything there. And then in “Transfer-to Code” I’ll select the “Red” location.
(Click image to view larger version)
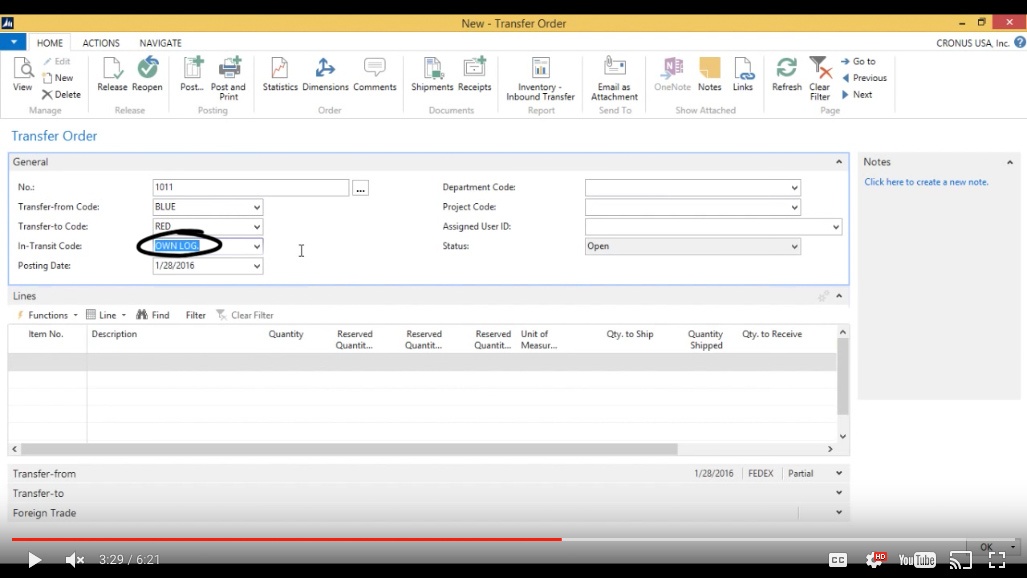
And what is my “In-Transit Code” location? It’s either Outsourced Logistics or Own Logistics. I’m going to use Own Logistics because this is our own truck.
(Click image to view larger version)
I could have used Outsourced Logistics if we hired the truck to do this. I could have also created an In-Transit location like a Boat or a Rail or something like that to signify other means of transport.
And I’m just going to ahead and put the coffee mug here under “Lines” by filtering in the “Item Number” field.
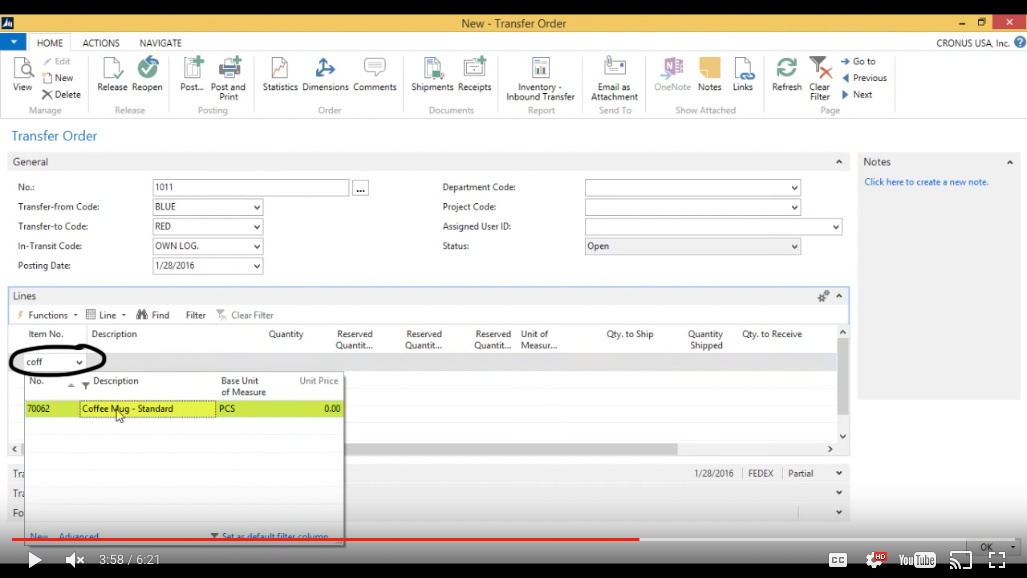
(Click image to view larger version)
I said I wanted to move 200, so I add that in the “Quantity” field.
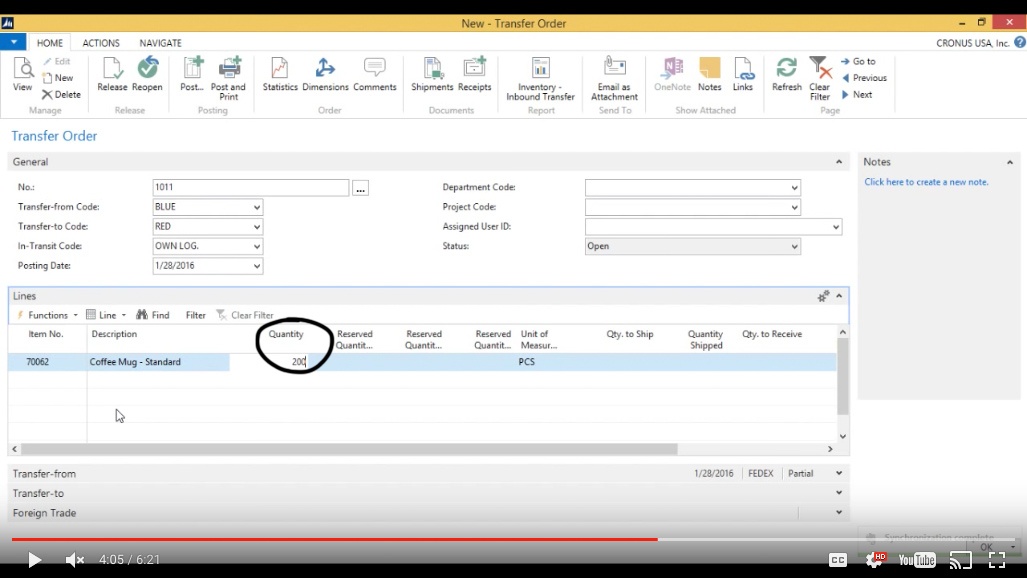
(Click image to view larger version)
And then it tells me ok I have 200 to ship and I have nothing to receive.
What this means is that if I ship this it will actually move from the “Blue” location to Own Logistics onto the truck.
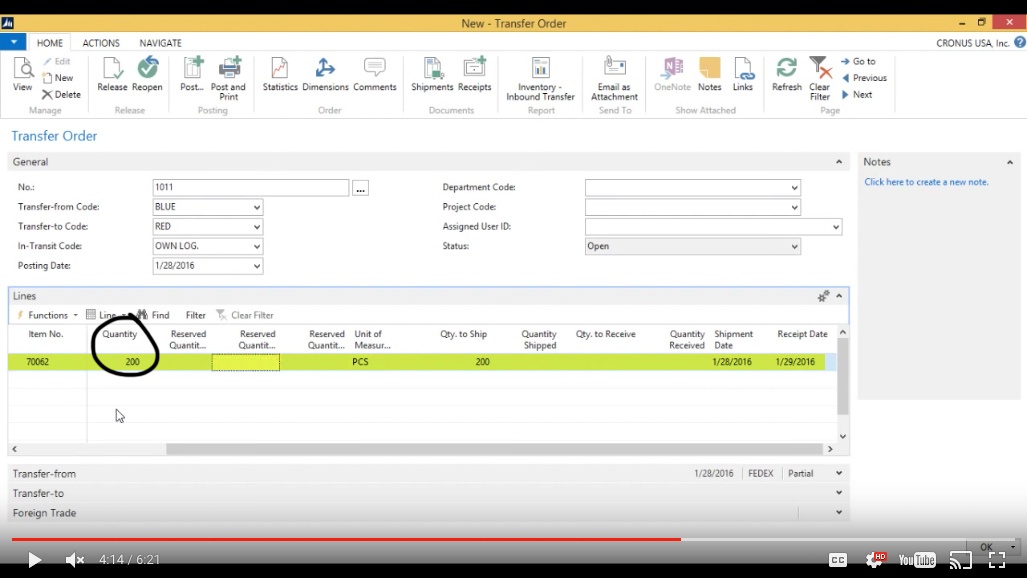
(Click image to view larger version)
Post
So I’m going to go ahead and “Post”.
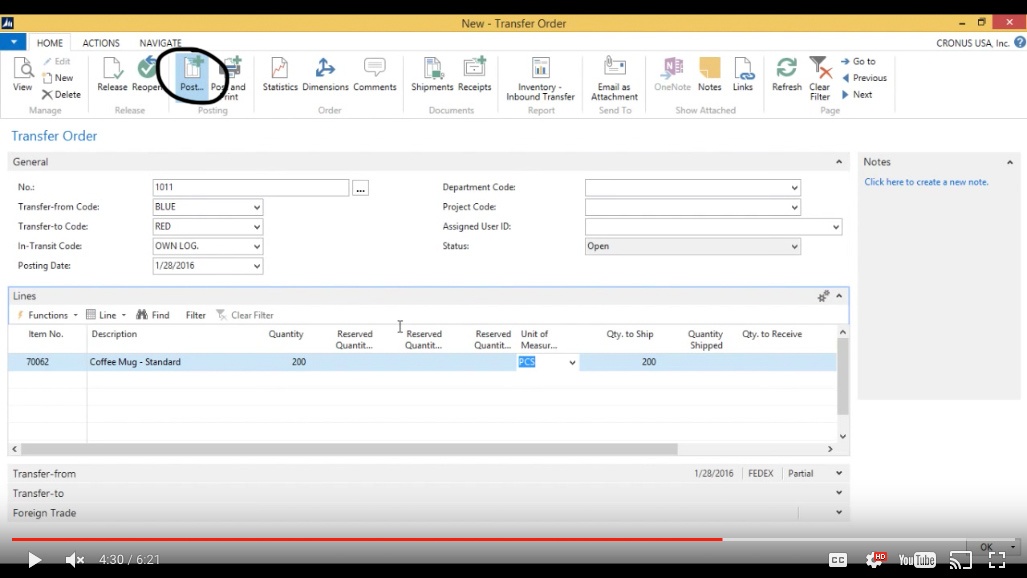
(Click image to view larger version)
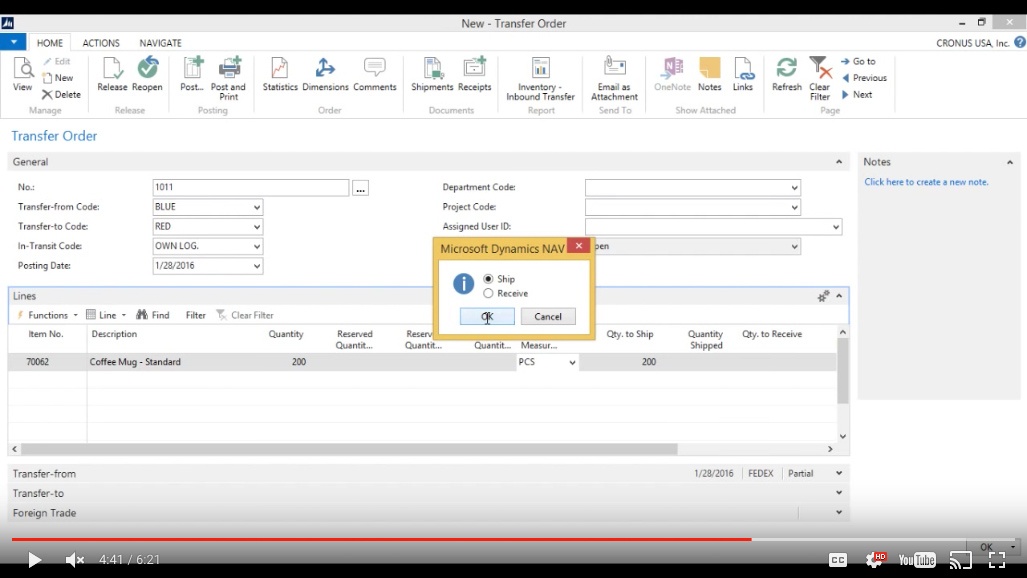
It asks me: ‘do you want to Ship or Receive?’ I have nothing to receive since I haven’t shipped anything into my truck so I’ll just ship and then it goes ahead and posts.
(Click image to view larger version)
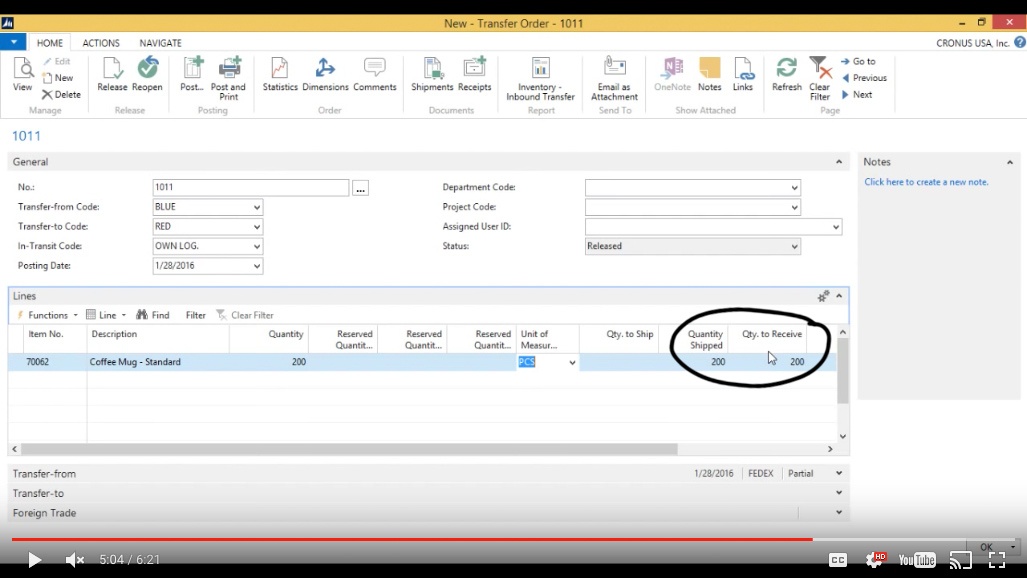
Now my inventory is no longer in the “Blue” location, it’s in the “Own Logistics” location and it has moved from “Quantity to Ship” to “Quantity Shipped” and now we have 200 to receive.
(Click image to view larger version)
Post again
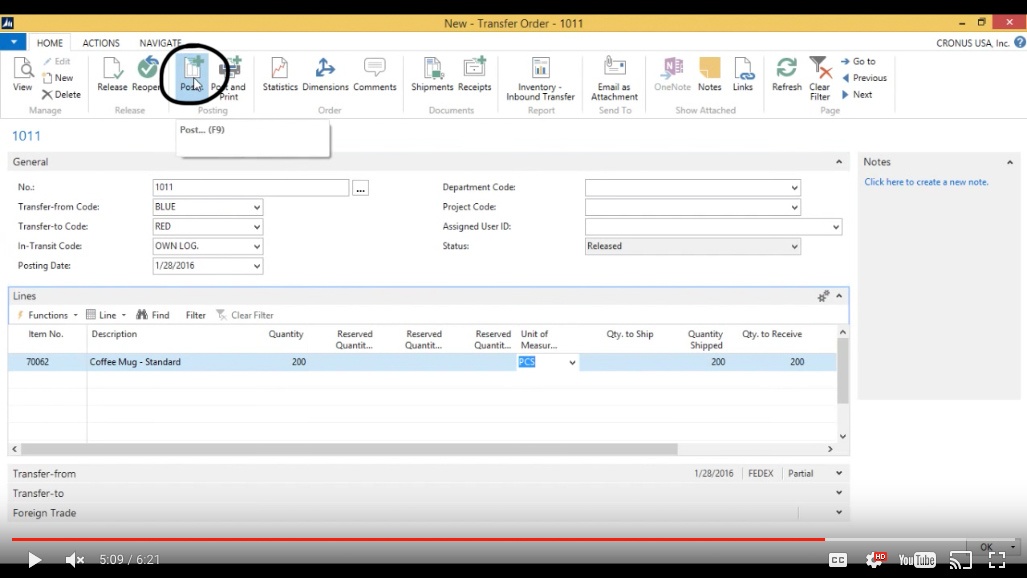
So let’s go ahead and receive this. So I post again.
(Click image to view larger version)
And now it receives and the order is complete.
View Item Inventory
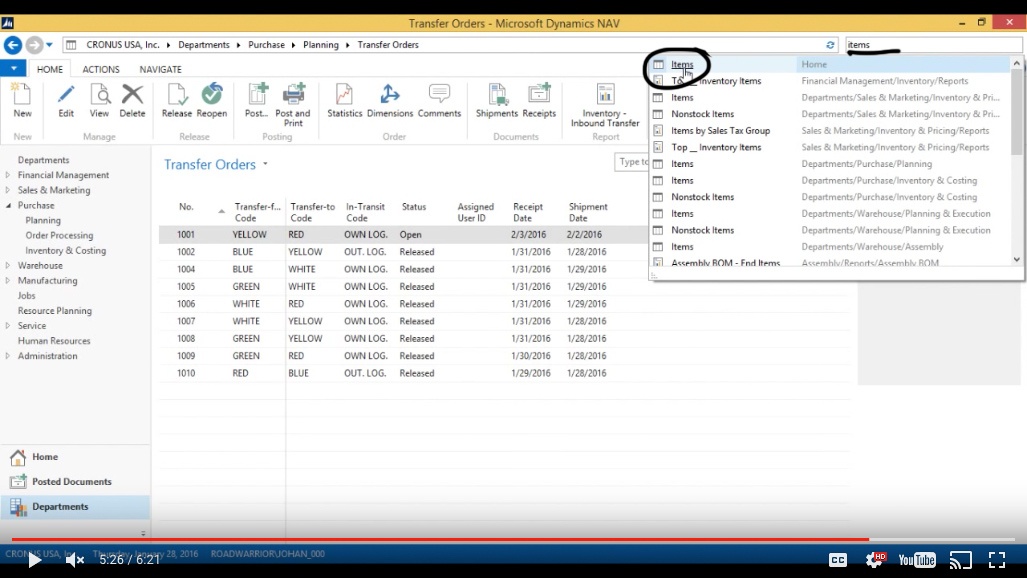
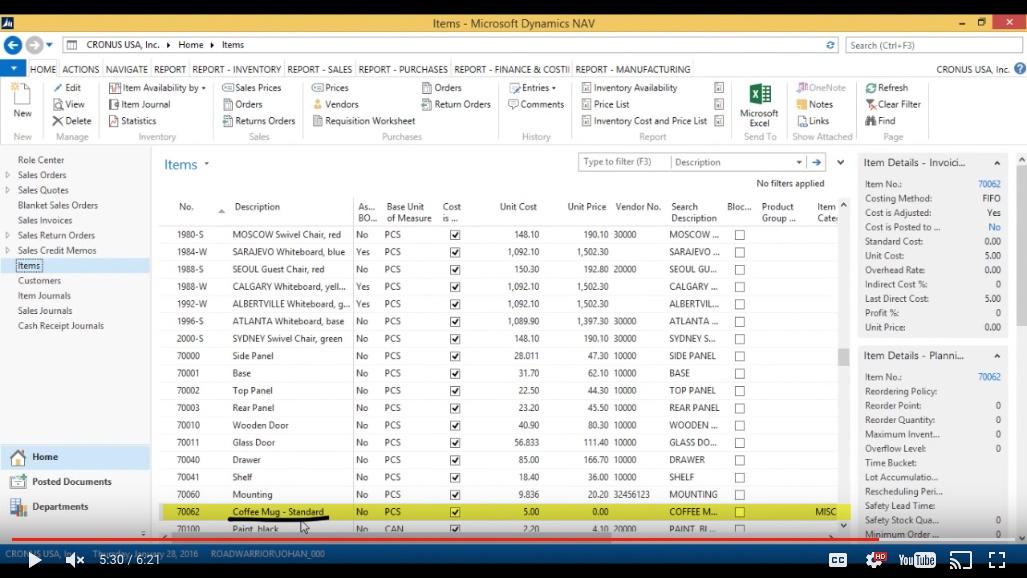
If I take a look at my inventory, back to the item.
(Click image to view larger version)
Here’s my coffee mug.
(Click image to view larger version)
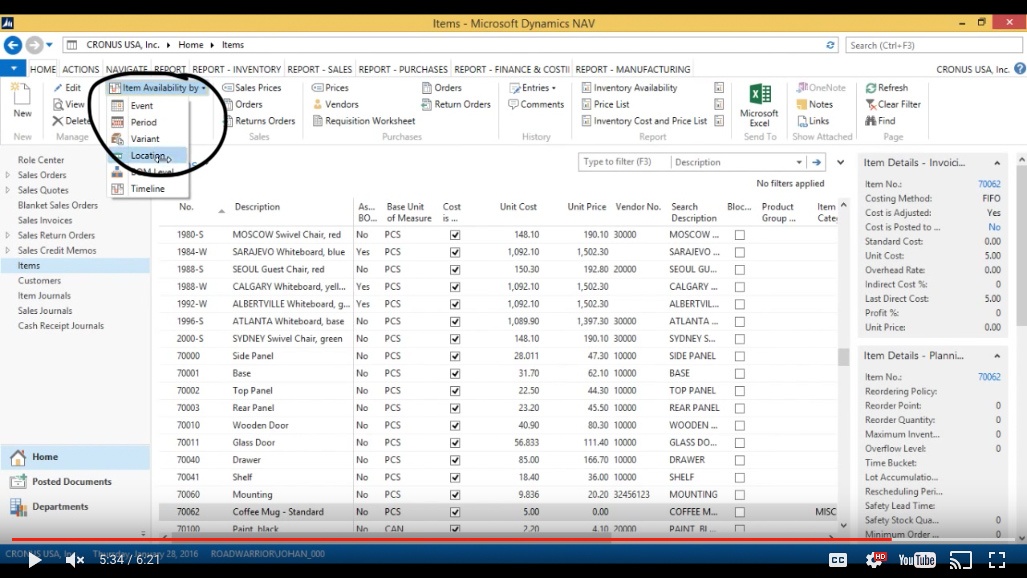
View Item Availability by > Location
I look at the Item Availability by Location.
(Click image to view larger version)
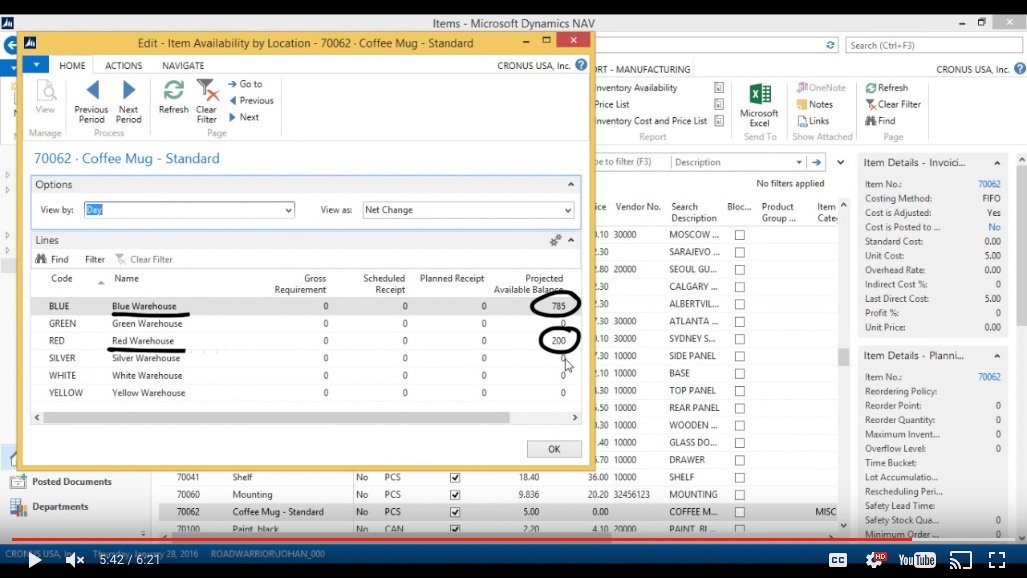
I can see now that I have “785” in the “Blue” Warehouse and “200” in the “Red” Warehouse.
(Click image to view larger version)
I have effectively moved 200 pieces from blue to red via a transfer order that moved inventory to a truck and then from the truck to the “Red” Warehouse.
You've learned some of the many ways your business can benefit from using inecta Food. It's trusted by other businesses in your industry and can work just as well (or better) for you. inecta Food is easy to implement. It's easy on your budget with monthly subscription payments. Take the next step to ensure your food business is running the right kind of business software. Software for your food safety, increased efficiency, and stronger revenue growth.
Curious about implementation costs, training, getting a customized demo & detailed estimate, booking a discovery call?

Global Headquarters:
225 Broadway #660,
New York, NY 10007
1-800-632-0573
©2023 INECTA LLC
Global Headquarters: 179 Franklin Street, New York, NY 10013
©2020 INECTA LLC