How to use Cross References in Microsoft Dynamics NAV 2015
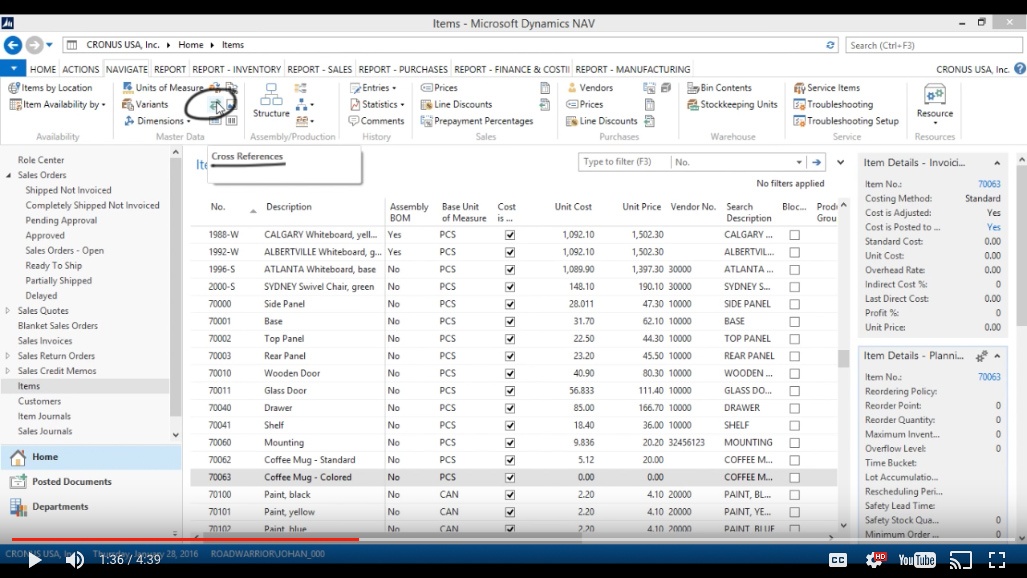
What I’m going to show today are Cross References. Basically we have a new coffee mug which is colored and has variants, which signify the color, and the options we have now are red, green and blue.
The manufacturer who sent this coffee mug to us actually has barcoded them, which is really nice of them, however the barcode is not our number and we want to be able to scan it onto our order. So we need to put in their number in our system and have that tie to each one of the colors.
Add Cross Reference Entries
So right now I’m in the item list and I go to the colored coffee mug. I can go up here to these arrows and hit Cross References.
(Click image to view larger version)
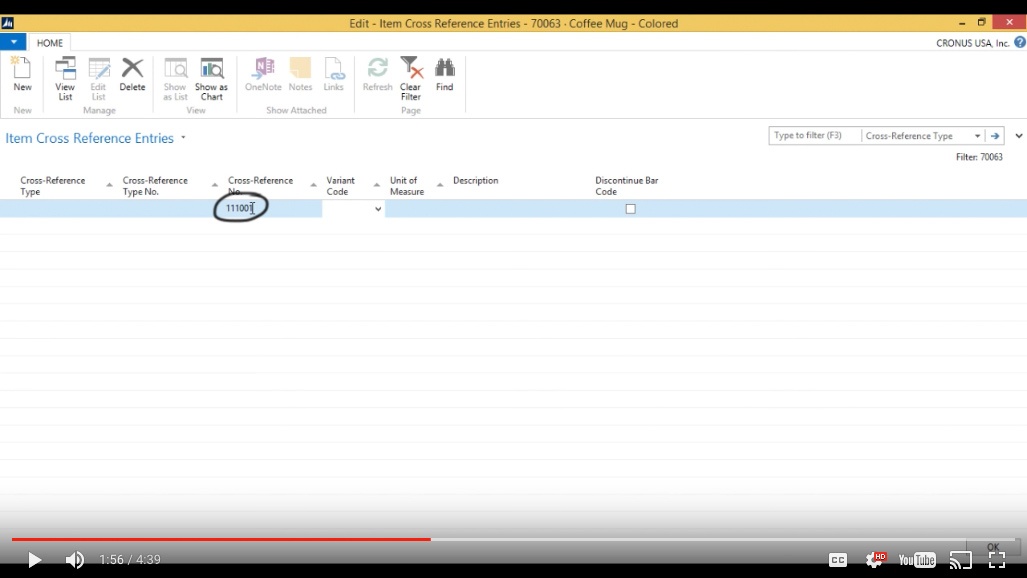
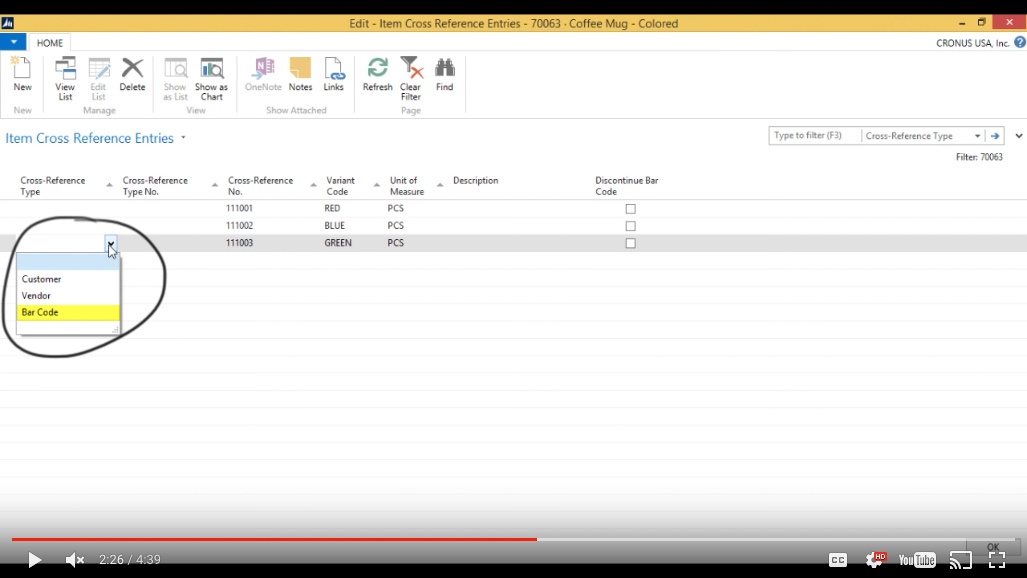
Since I’m going to have this work for the item everywhere in the system, I’m going to just fill in the cross reference number and that’s going to be 111001, which is the barcode for Red.
(Click image to view larger version)
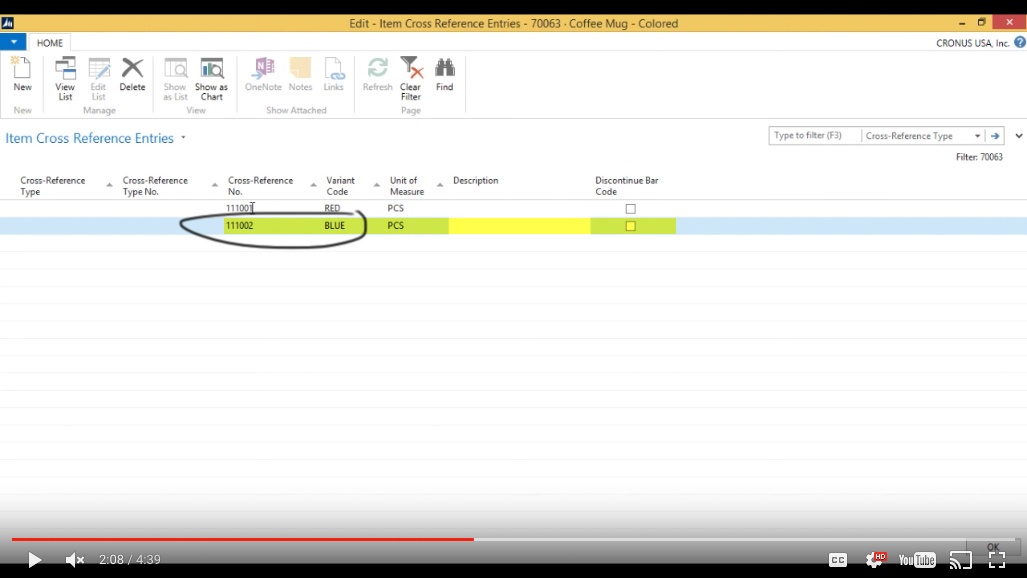
I also have 111002 which is for Blue. The Unit of Measure is pieces (PCS).
(Click image to view larger version)
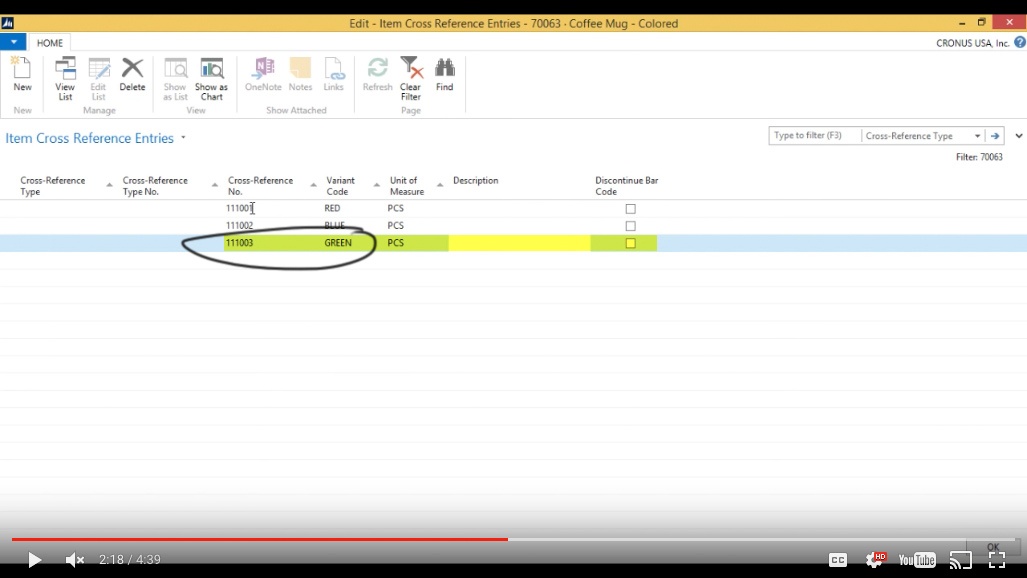
Then I have 111003, which is for Green.
(Click image to view larger version)
Now I’ve set up the cross references. I could have also done this specifically for a Customer, Vendor or even said that it’s a Bar Code; I don’t have to specify that, but I can.
(Click image to view larger version)
So, I’ll close this one out and I’ll show you how this works on a sales order.
Create a Sales Order with Cross References
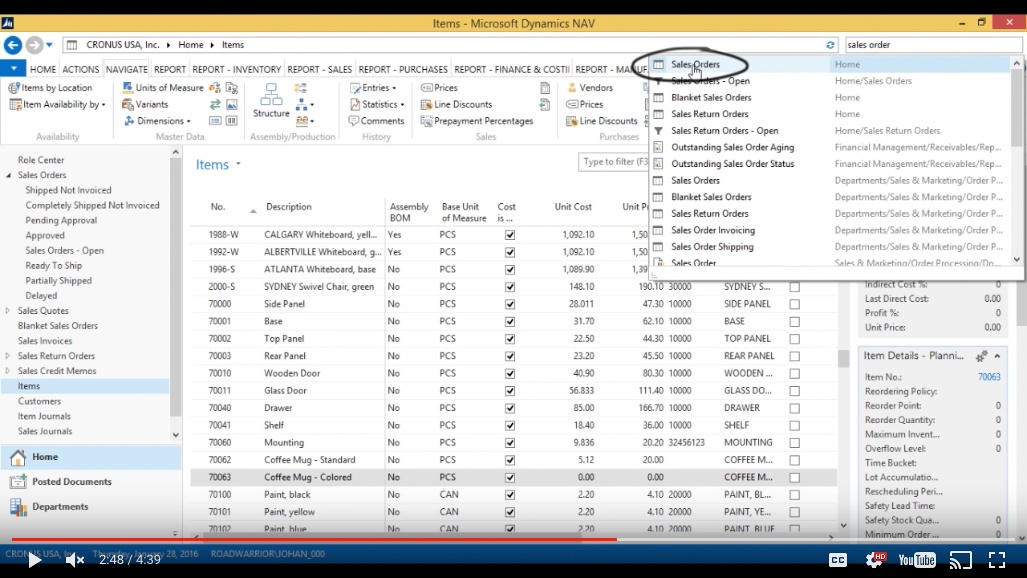
I’ll go to Sales Orders.
(Click image to view larger version)
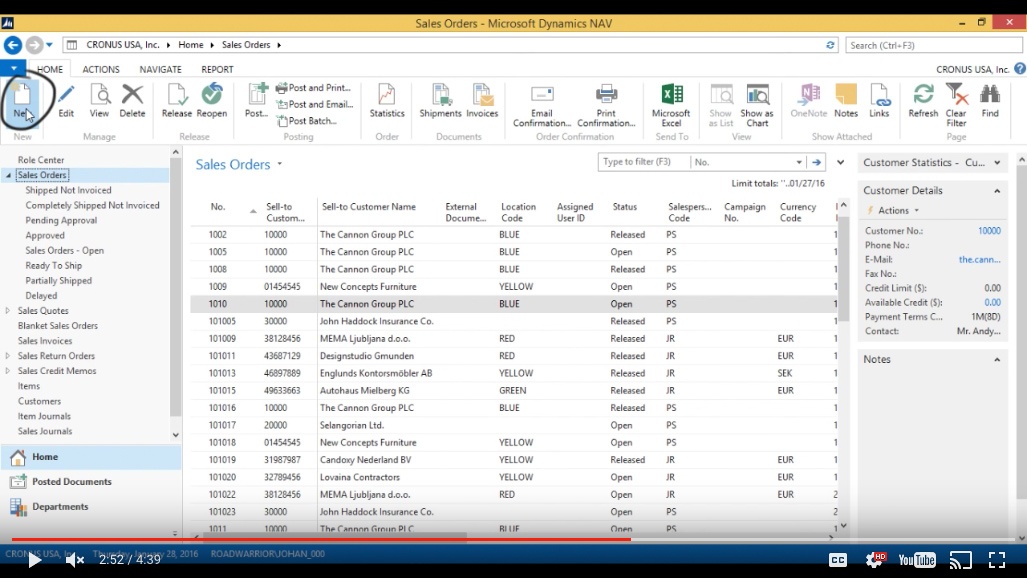
Create a new Sales Order.
(Click image to view larger version)
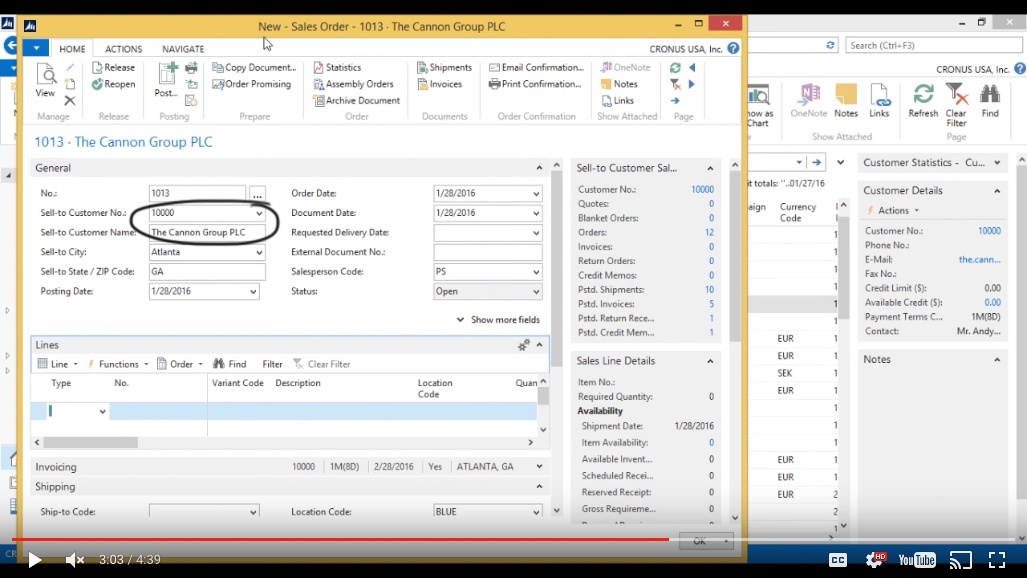
Make it for The Cannon Group.
(Click image to view larger version)
And I go to the Type and its Item.
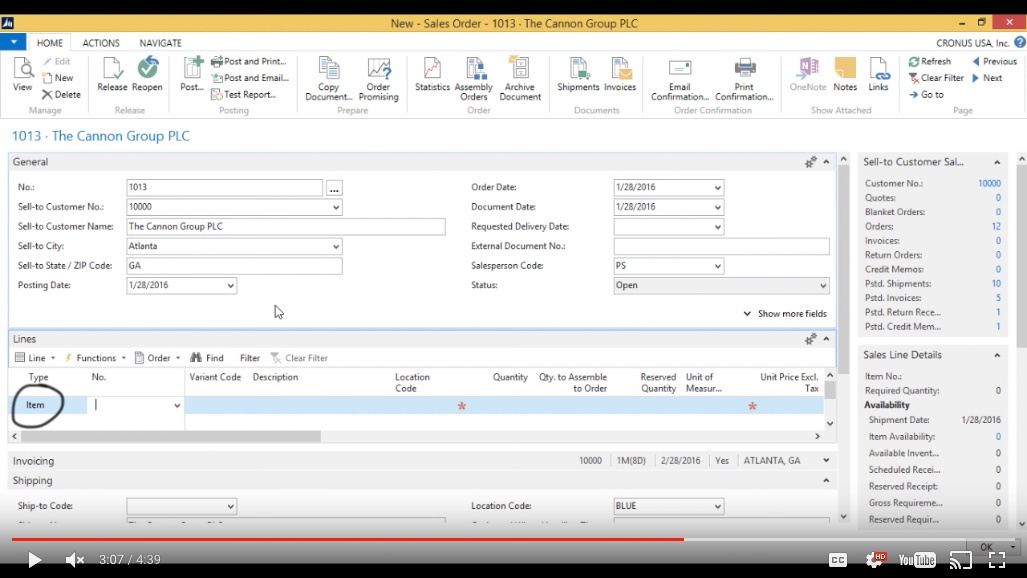
(Click image to view larger version)
Now - I can’t put in the number here under the Number (No.) column.
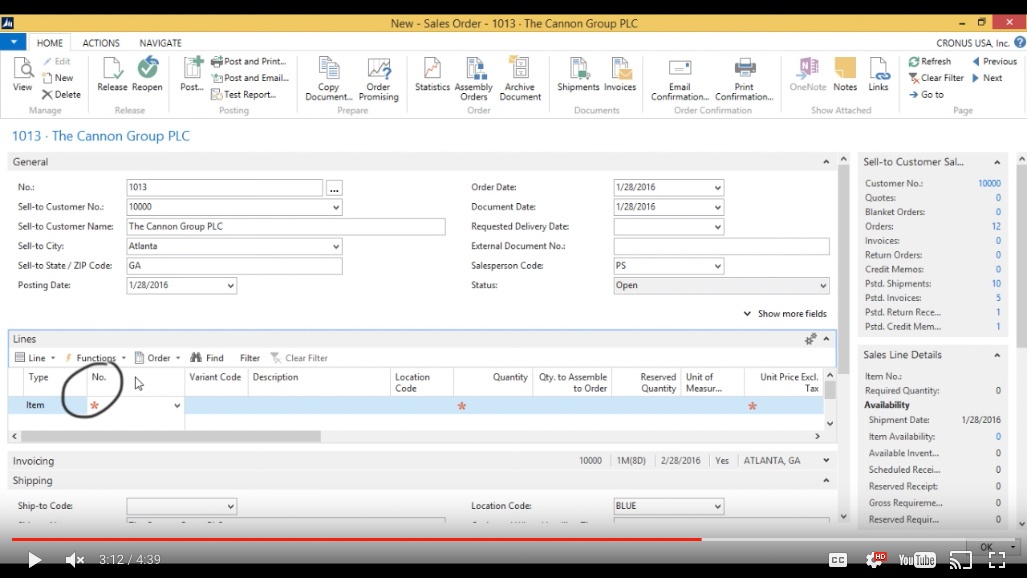
(Click image to view larger version)
What I want to show is the Cross Reference number. That’s a field that is not currently shown, so we want to add that.
Add the Cross Reference Number column
I right-click and go into Choose Columns.
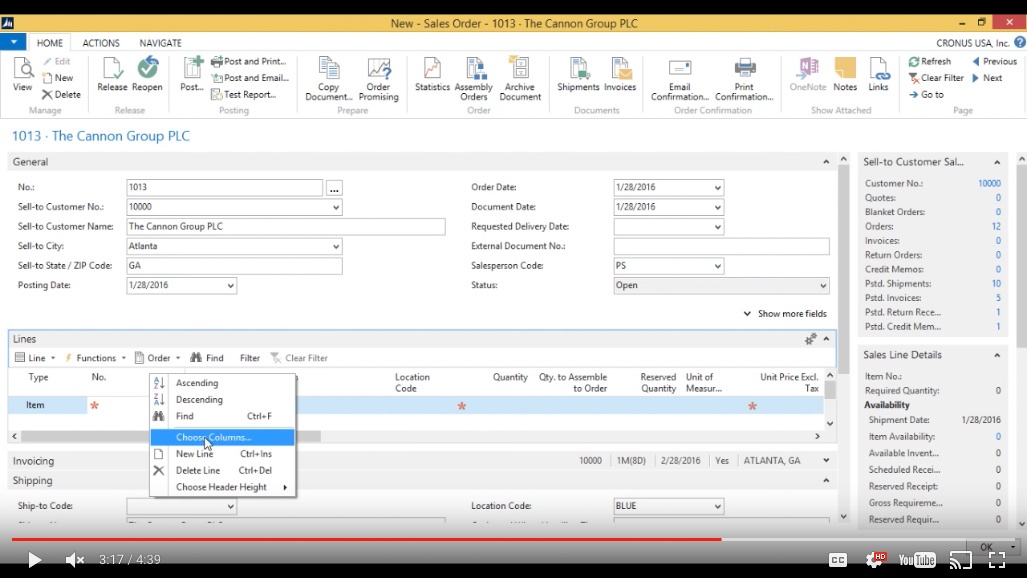
(Click image to view larger version)
Over here I see the cross reference number – I add that.
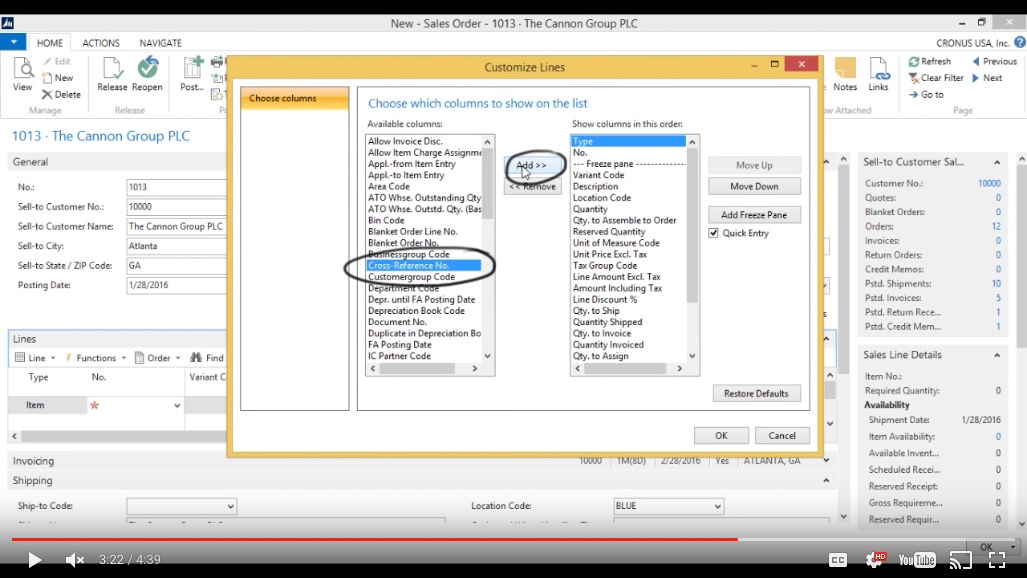
(Click image to view larger version)
I’m going to move that actually all the way up to above Freeze Pane.
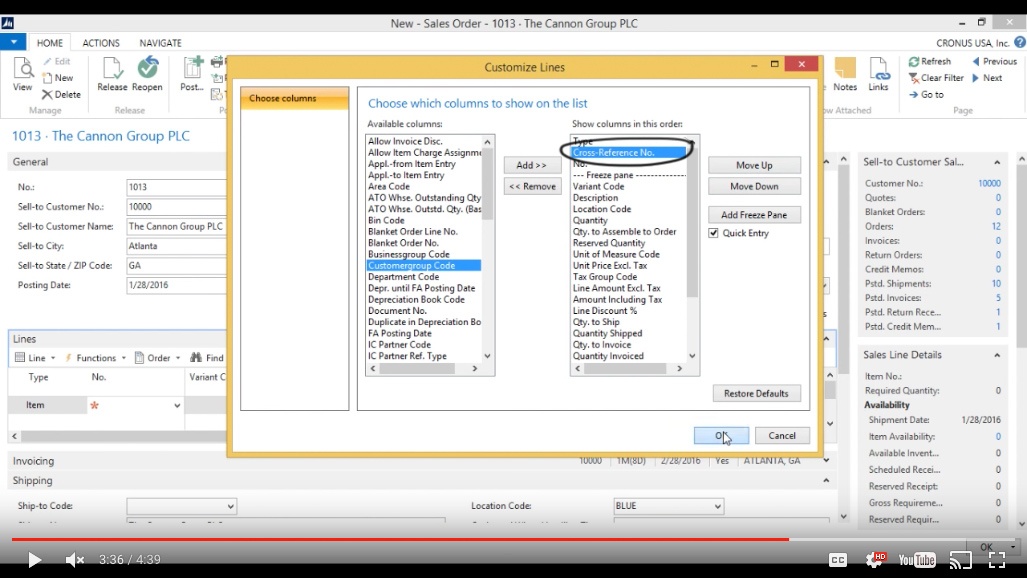
(Click image to view larger version)
Then it opens up, now I have the Cross Reference Number column.
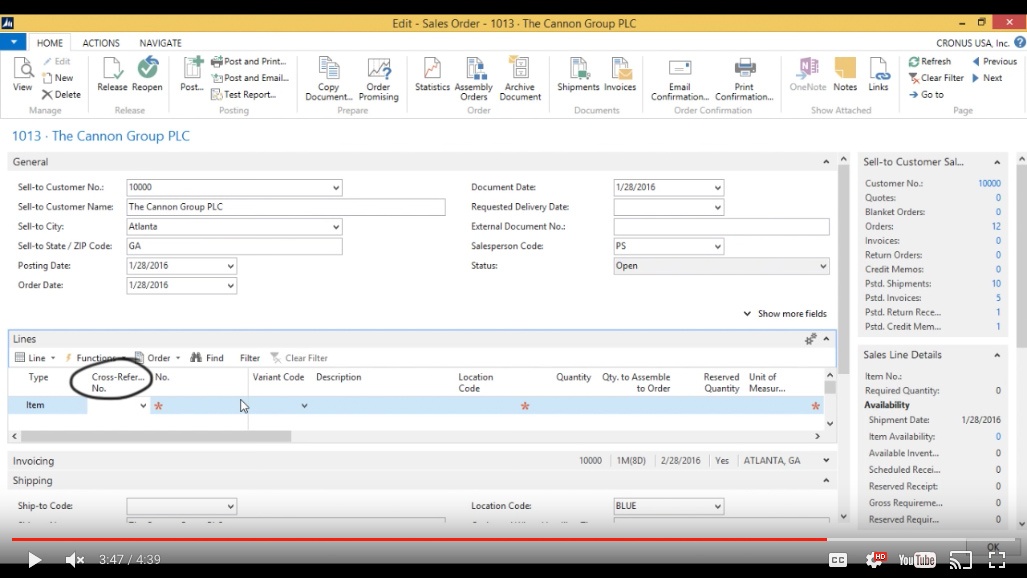
(Click image to view larger version)
Scanning the Bar Code
Now we all know the coffee mug is a 7000 series, however the barcode is 111001 for the Red one. So now I’m going to scan the barcode - or pretend to - and the system automatically identifies that as the red coffee mug.
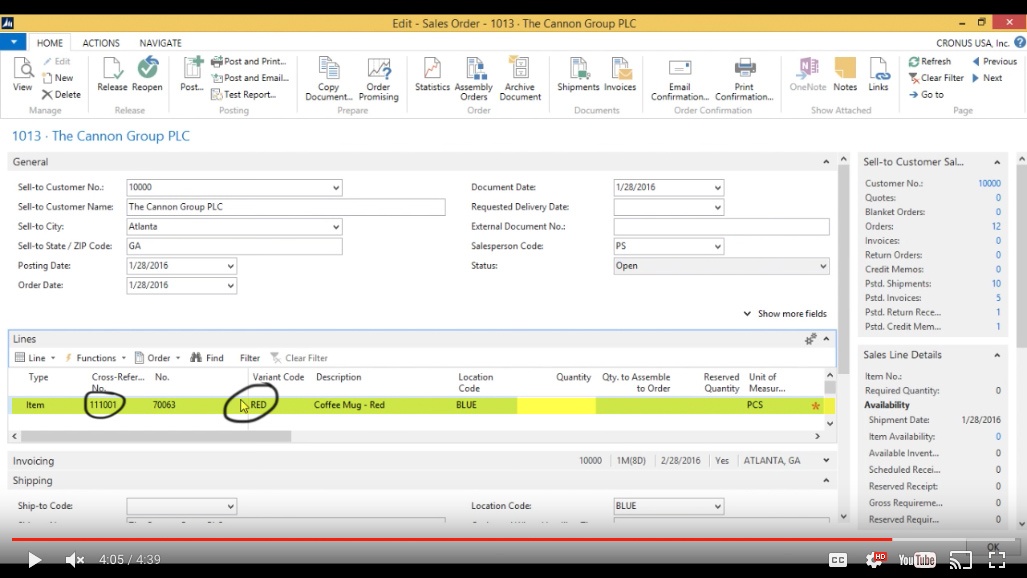
(Click image to view larger version)
And that was it for the Cross References.
You've learned some of the many ways your business can benefit from using inecta Food. It's trusted by other businesses in your industry and can work just as well (or better) for you. inecta Food is easy to implement. It's easy on your budget with monthly subscription payments. Take the next step to ensure your food business is running the right kind of business software. Software for your food safety, increased efficiency, and stronger revenue growth.
Curious about implementation costs, training, getting a customized demo & detailed estimate, booking a discovery call?

Global Headquarters:
225 Broadway #660,
New York, NY 10007
1-800-632-0573
©2023 INECTA LLC
Global Headquarters: 179 Franklin Street, New York, NY 10013
©2020 INECTA LLC