How to create a Sales Order in Microsoft Dynamics NAV 2015
We’ve previously created the item “Coffee Mug - Standard” and we’ve put that on a Purchase Order.
Now we’re going to take a look at how to create a Sales Order in NAV 2015.
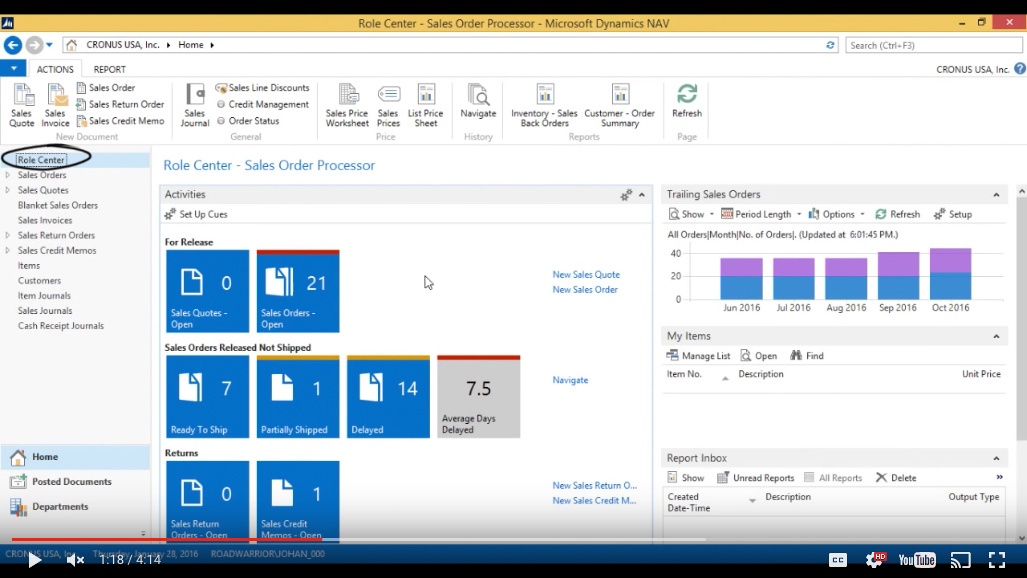
Click on “Role Center” to get started.
(Click image to view larger version)
There a few ways that I can get into the sales order (on the top, left and right).
Creating a New Sales Order
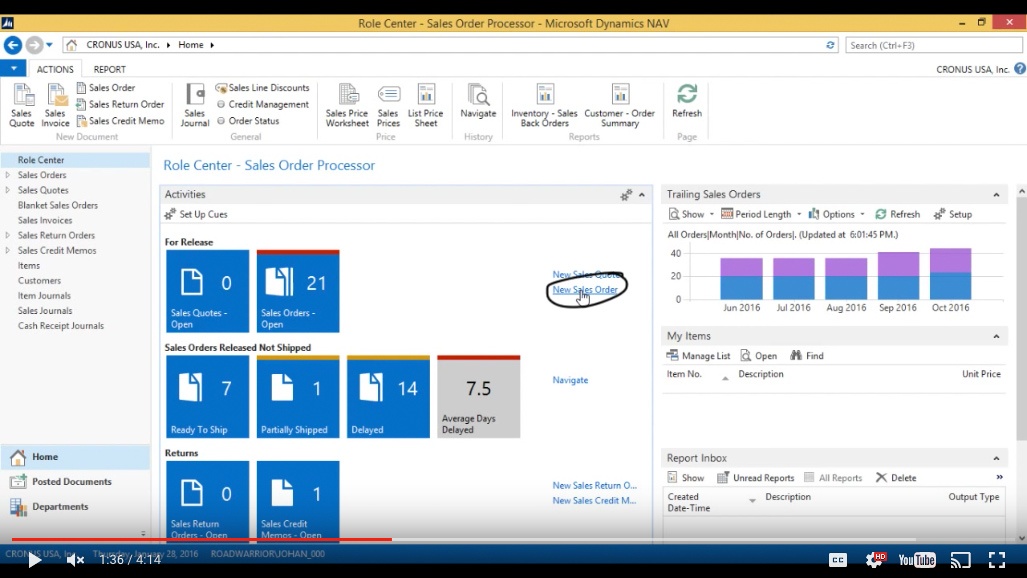
I’ll go ahead and click “New Sales Order”.
(Click image to view larger version)
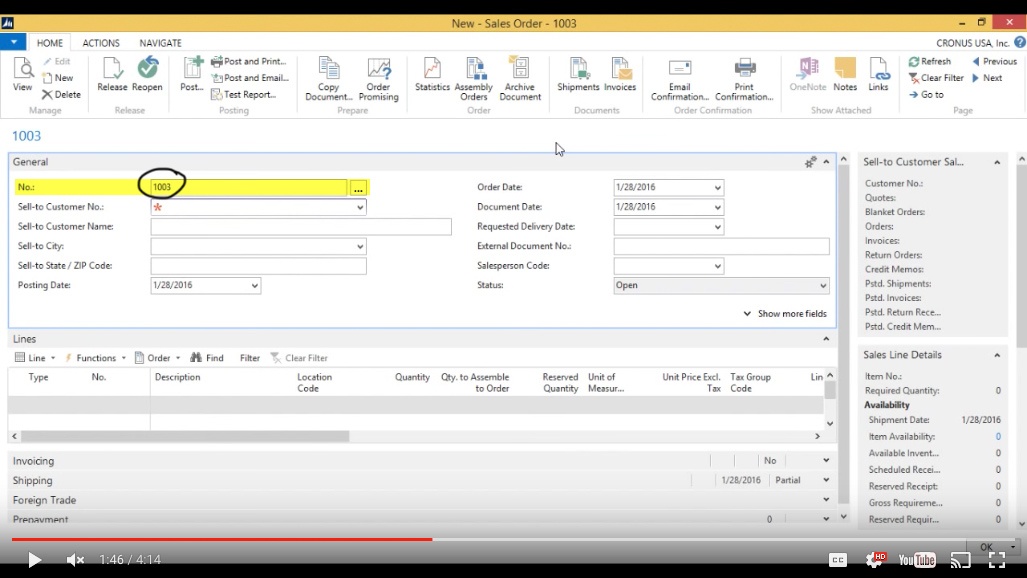
That brings up the “New- Sales Order” screen. I’ll maximize the window and hit enter in the “Number” field to get the next automatically assigned number in the sequence.
(Click image to view larger version)
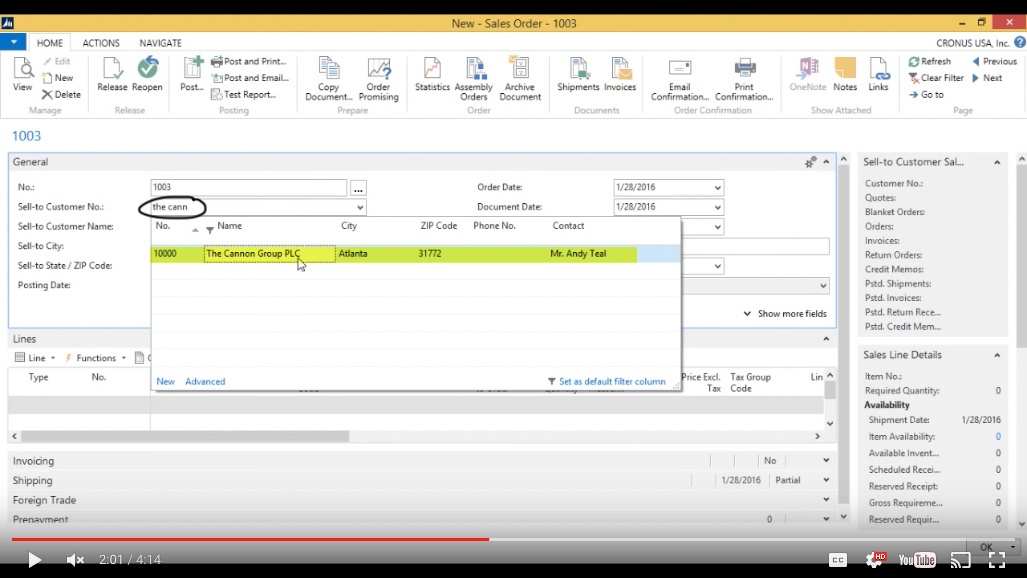
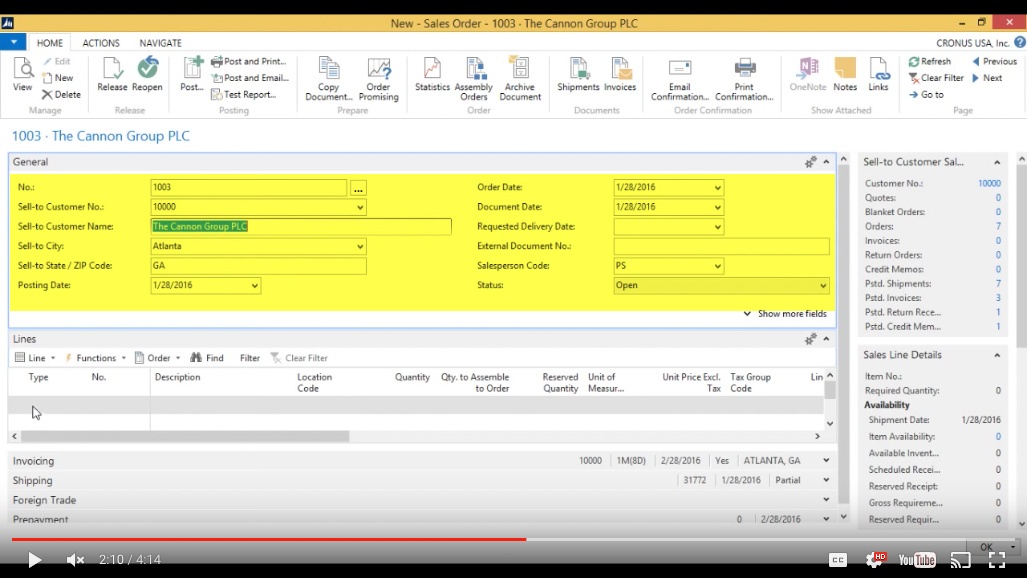
This sales order is going to go to “The Canon-Group” so I click on the field for “Sell-to Customer Number” and start typing “The Cannon...” and filter by “Name”. It brings it up in my customer list.
(Click image to view larger version)
I then hit enter and it populates the header with the customer information.
(Click image to view larger version)
Inputting the Line Info
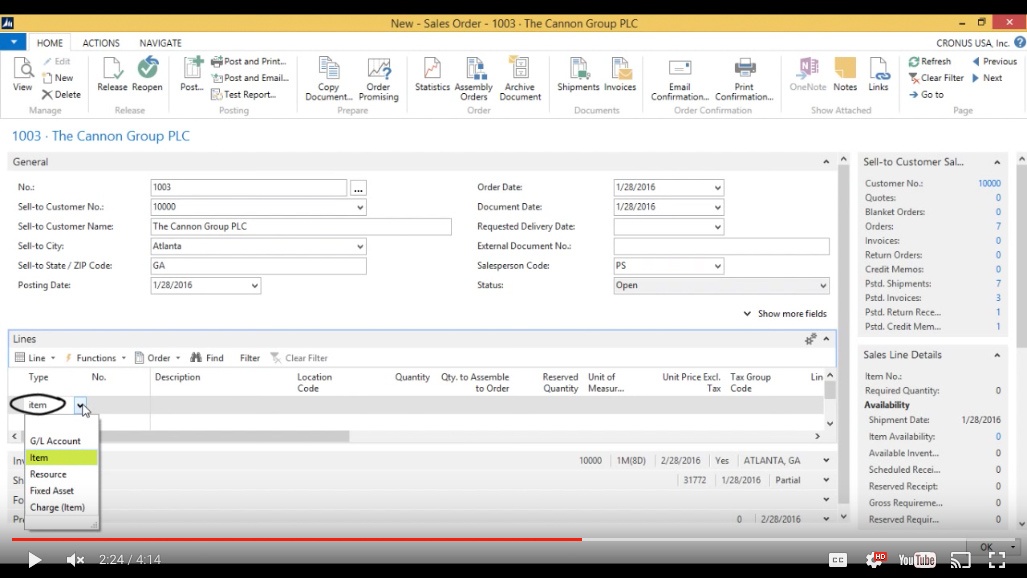
Then I go into the “Lines” and for the “Type”, I want to write “item”. In the dropdown it gives me several options but in this case I can just leave it as “item”.
(Click image to view larger version)
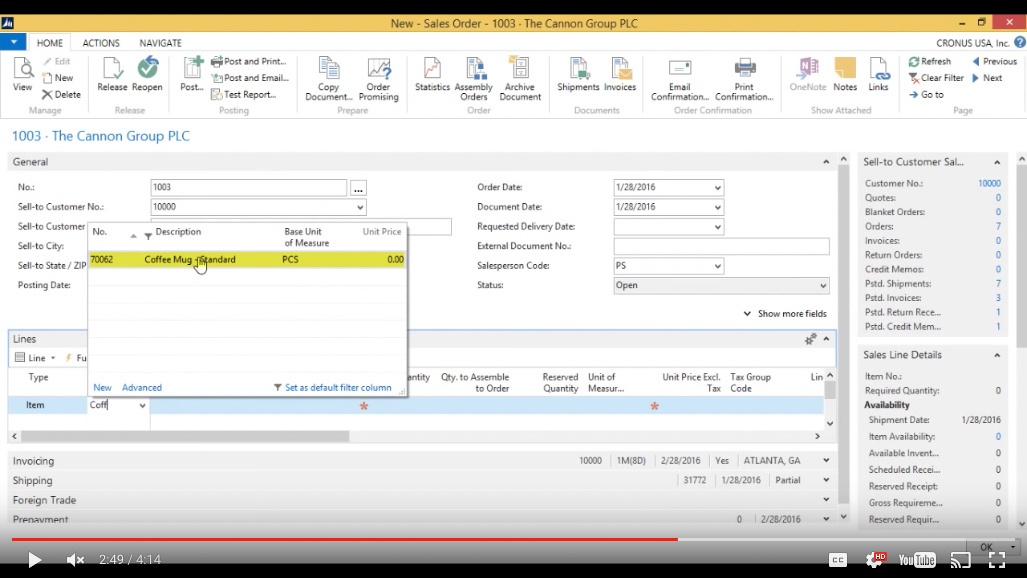
Then under “Number”, I click on the field and start typing “Coffee” and it shows me the Item which I then select.
(Click image to view larger version)
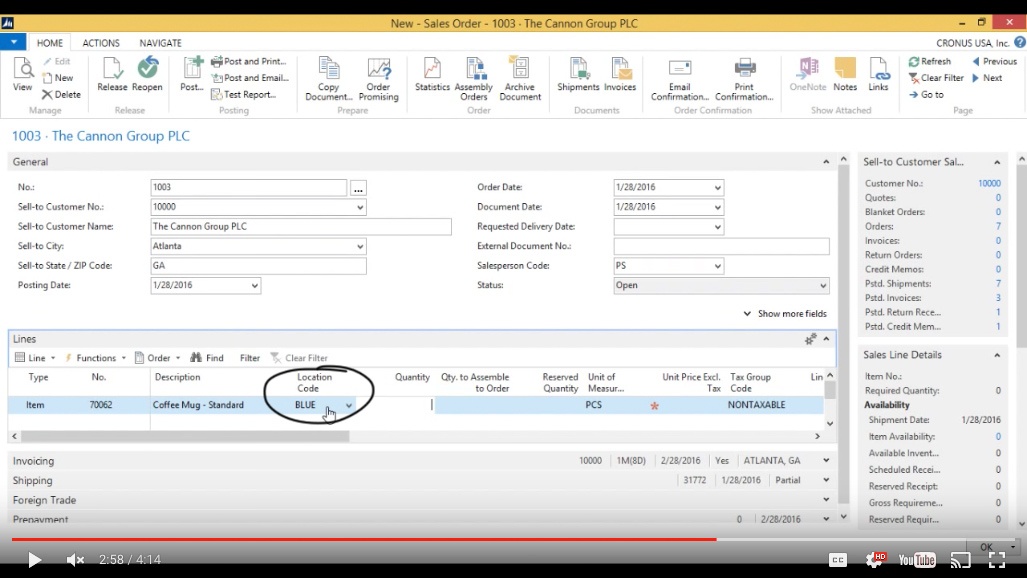
It then adds the “Number” and “Description” to the line I’m creating. It also adds the “Location Code” as the “blue” location. That’s where we’ll be selling from.
(Click image to view larger version)
Next, I add the “Quantity”, in this case “5”.
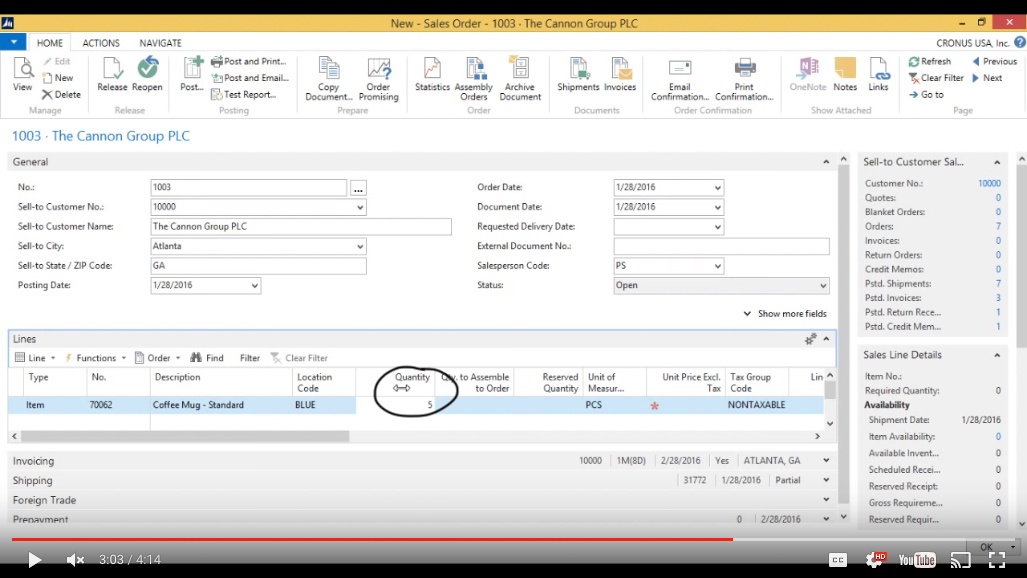
(Click image to view larger version)
Then I add the price under “Unit Price Excl. Tax””. In this case it’s “15” Dollars a piece.
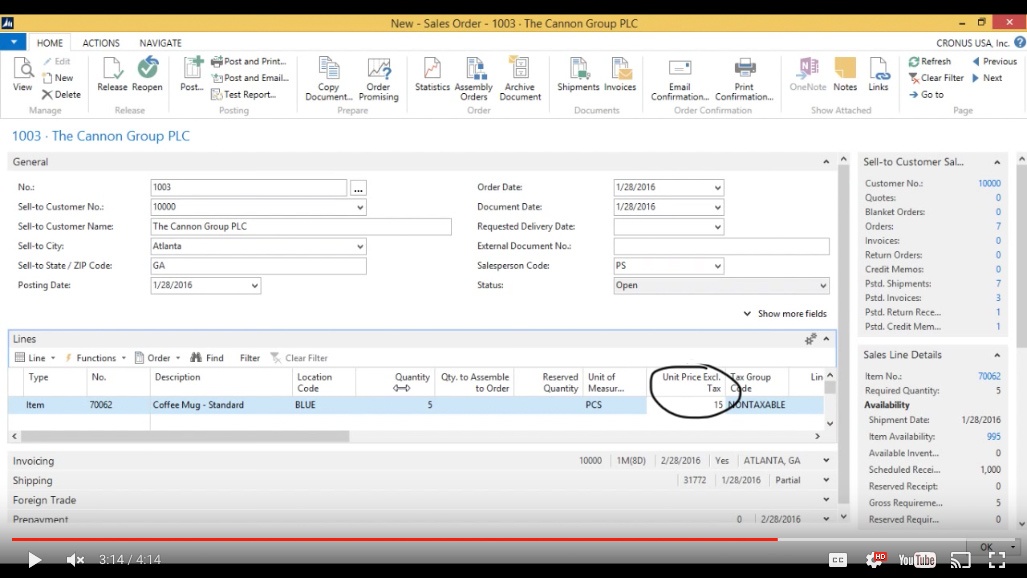
(Click image to view larger version)
Check Shipping Info
I want to check on the shipping so I click to open that.
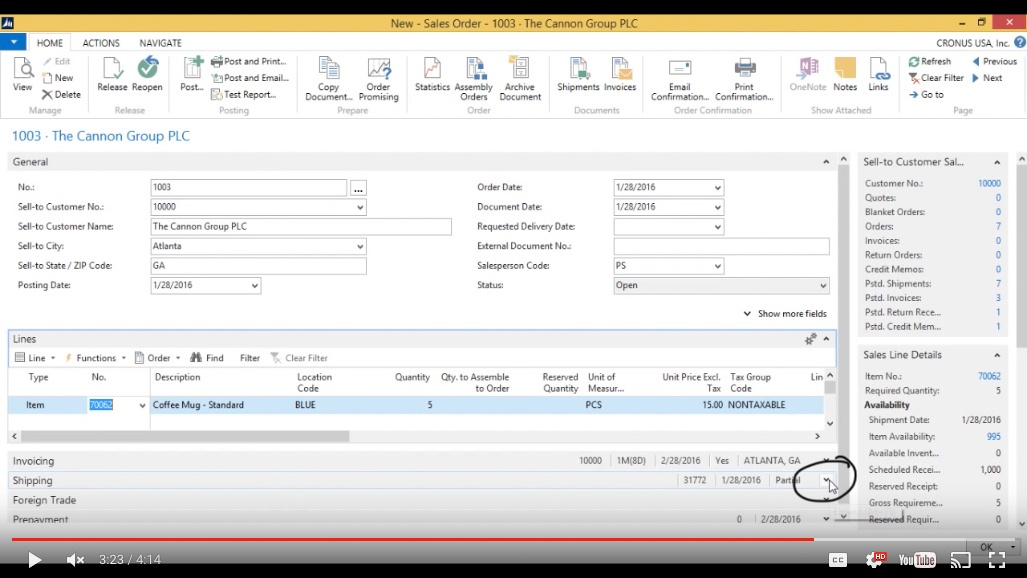
(Click image to view larger version)
I’m OK with the shipping going out today. I can see that it’s going out to “The Canon Group” in Atlanta.
I want to double check that everything is properly configured. It’s automatically set to go via DHL overnight. Something that’s already setup on the customer.
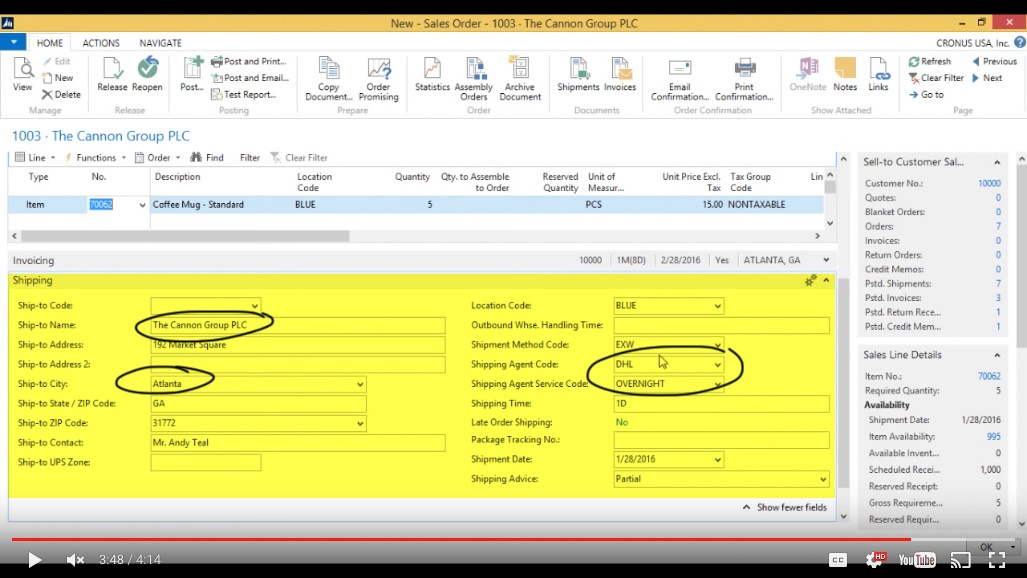
(Click image to view larger version)
And that’s it for setting up this Sales Order.
You've learned some of the many ways your business can benefit from using inecta Food. It's trusted by other businesses in your industry and can work just as well (or better) for you. inecta Food is easy to implement. It's easy on your budget with monthly subscription payments. Take the next step to ensure your food business is running the right kind of business software. Software for your food safety, increased efficiency, and stronger revenue growth.
Curious about implementation costs, training, getting a customized demo & detailed estimate, booking a discovery call?

Global Headquarters:
225 Broadway #660,
New York, NY 10007
1-800-632-0573
©2023 INECTA LLC
Global Headquarters: 179 Franklin Street, New York, NY 10013
©2020 INECTA LLC