Min/Max Inventory & Requisition in Microsoft Dynamics NAV 2015
What I want to show today is how to work with Min/Max inventory levels in NAV.
Basically we have requested that minimum inventory levels will be set for the coffee mugs. So I have to configure that and show you how we can actually fetch that information into something called the Requisition Worksheet.
Locate the Item
So the first thing is to go into the Items.
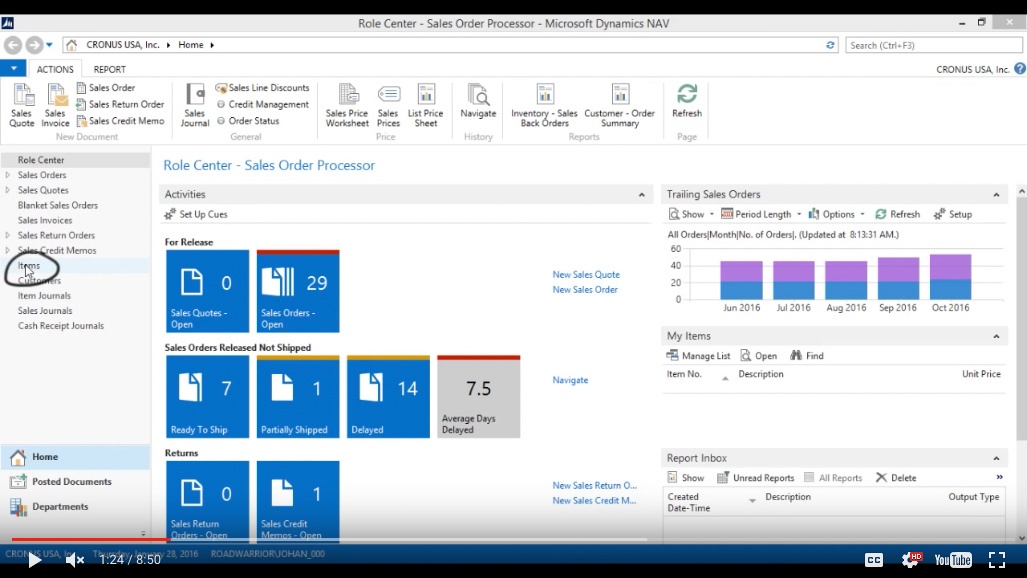
(Click image to view larger version)
I’m going to find my coffee cup, so I’m just going to do this on the Coffee Mug – Standard.
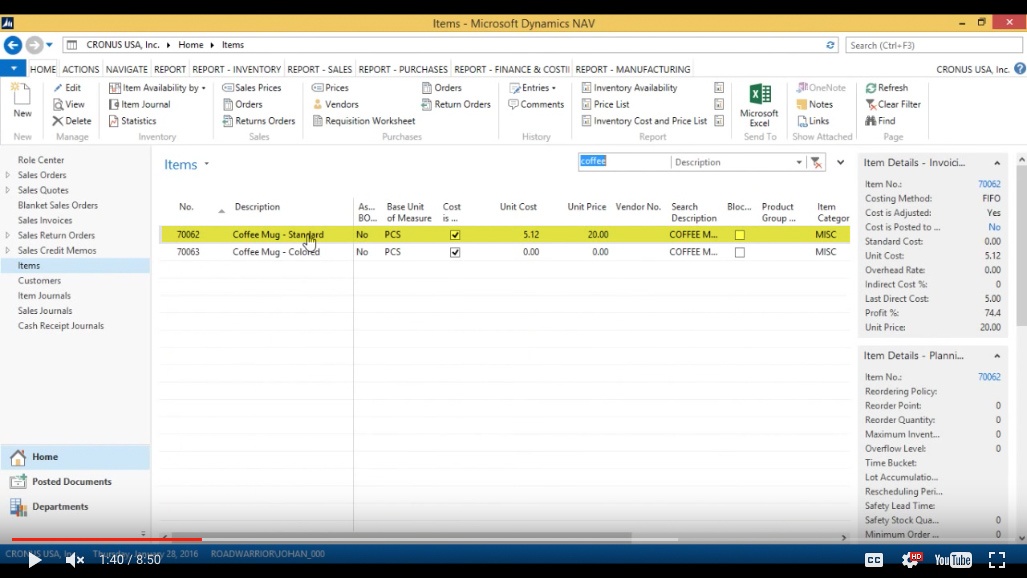
(Click image to view larger version)
Open Item Card and configure the Planning tab
Then I go into the card and on the card itself we have a Planning tab.
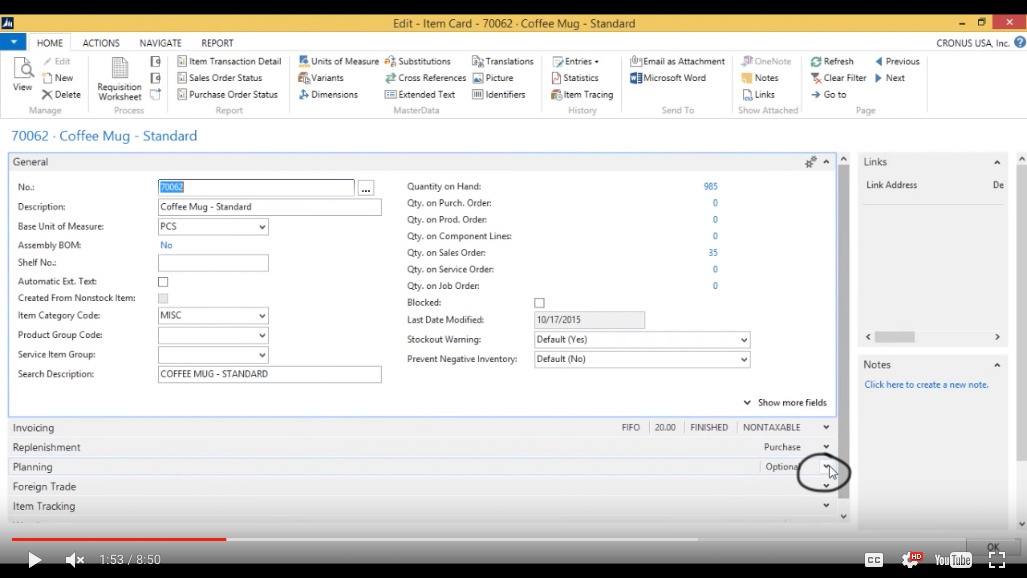
(Click image to view larger version)
Set values for Planning Supply based on Demand
Here are all the values that I can set to basically have the system plan the item.
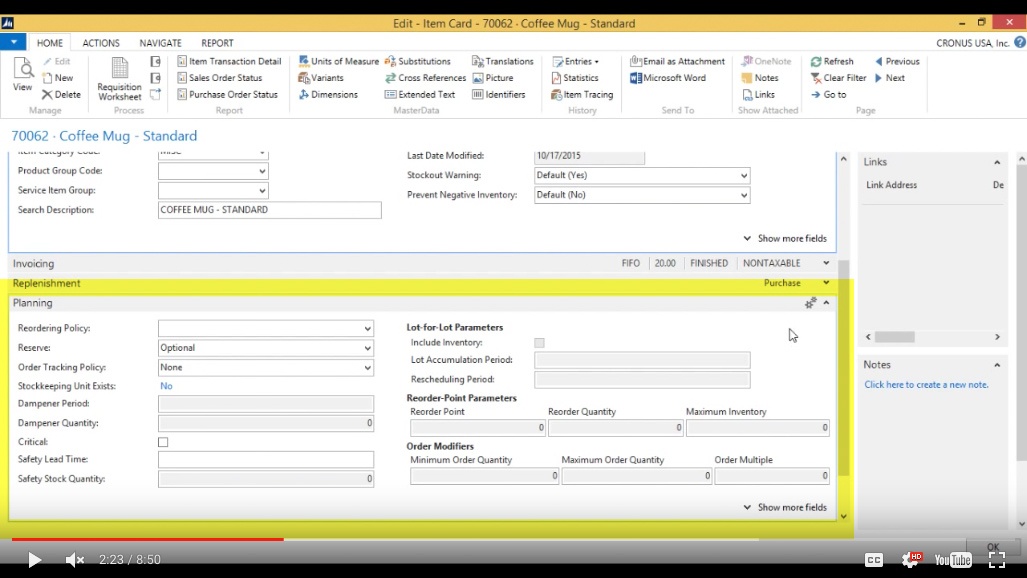
(Click image to view larger version)
What that means it’s planning the supply based on the demand. So this is truly what ERPs are designed for – it’s balancing out the supply and demand and so this is kind of the first step in that direction, that we are going to do in the videos.
So I’m going to change the Reordering Policy to be Fixed Reorder Quantity so that means now the system is going to consider this item in my planning.
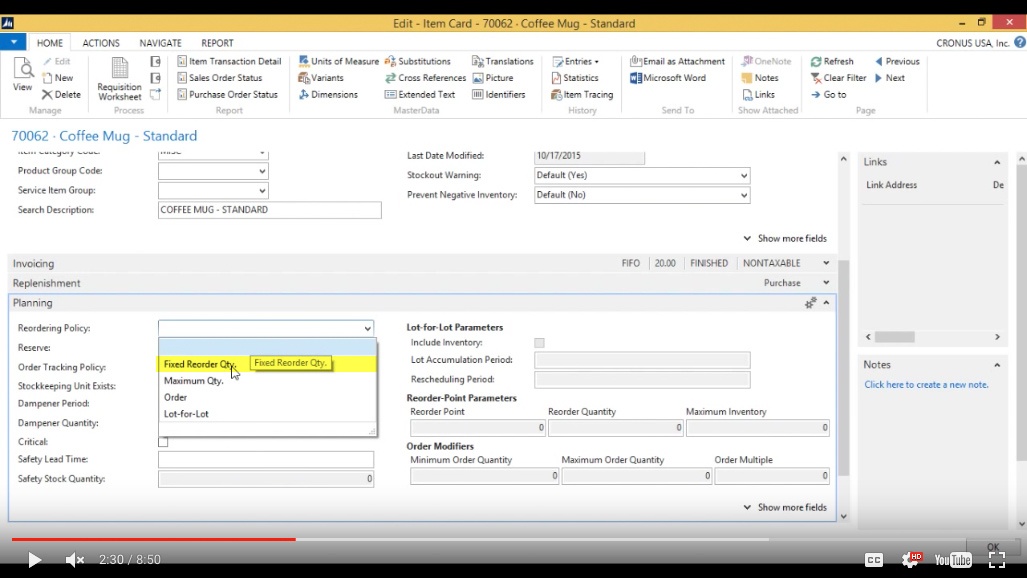
(Click image to view larger version)
I’m going to say the reorder point is 2000, so if it goes below 2000 coffee mugs then we are going to order 2500.
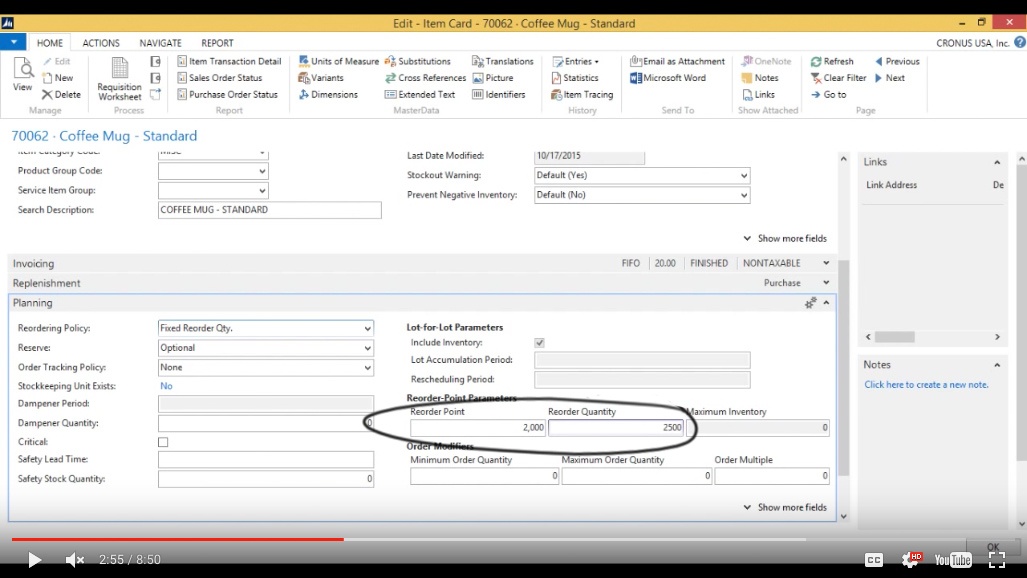
(Click image to view larger version)
We are starting to sell a lot of these coffee mugs and we need to have everything available. And that’s it. I’m just going to set this. It includes the Inventory Level so basically if I go below 2000 then it orders 2500.
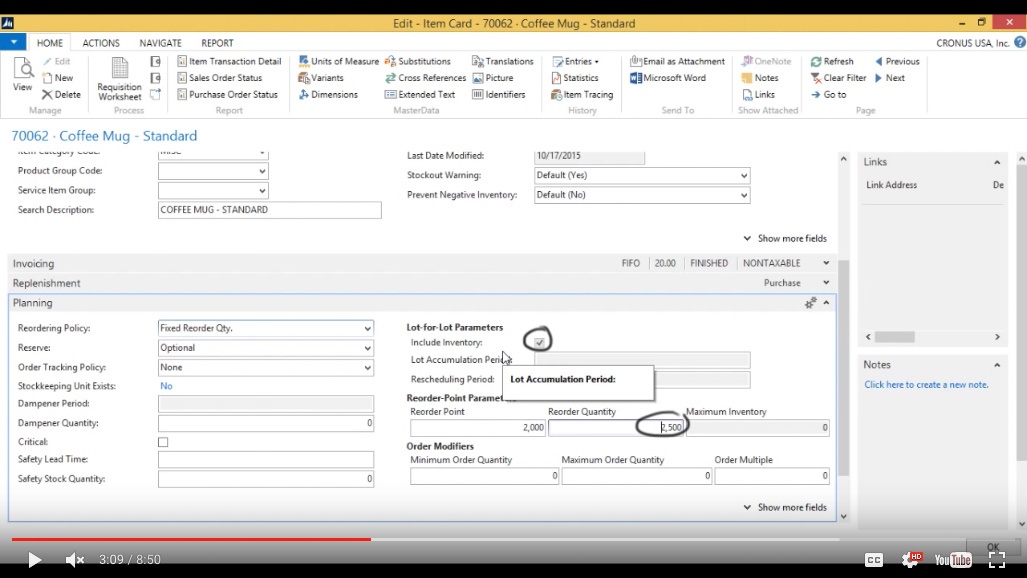
(Click image to view larger version)
I can go up here and see that right now we have 985, Quantity on Hand.
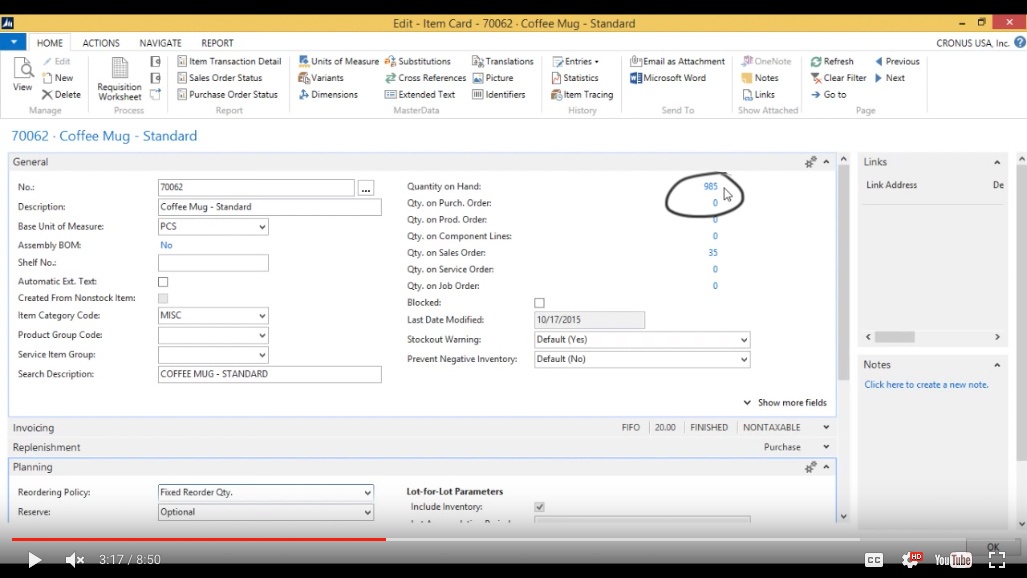
(Click image to view larger version)
Requisition Worksheet
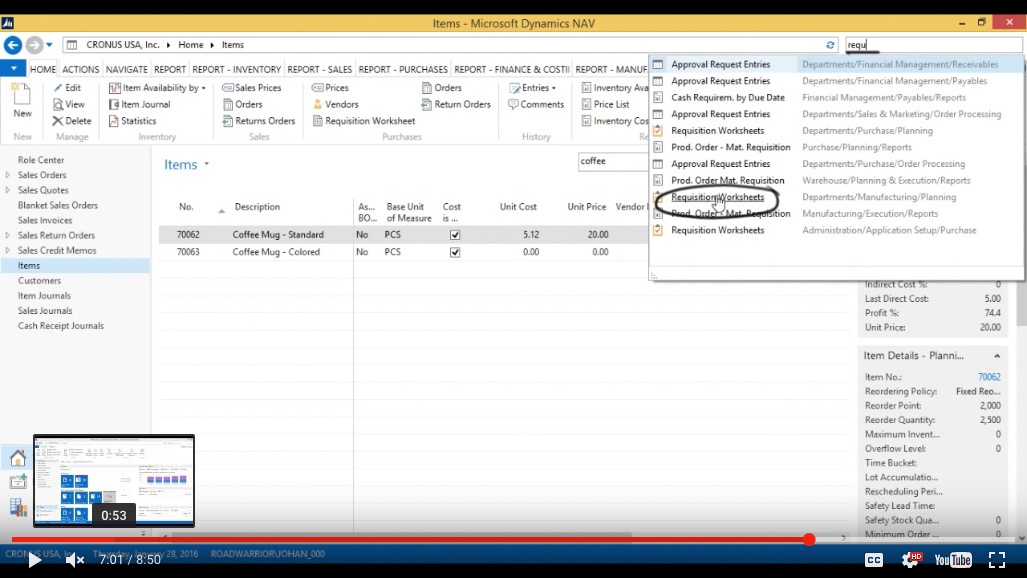
So if I run the Requisition Worksheet it should bring it up. Let me go there.
Go into the Requisition Worksheets.
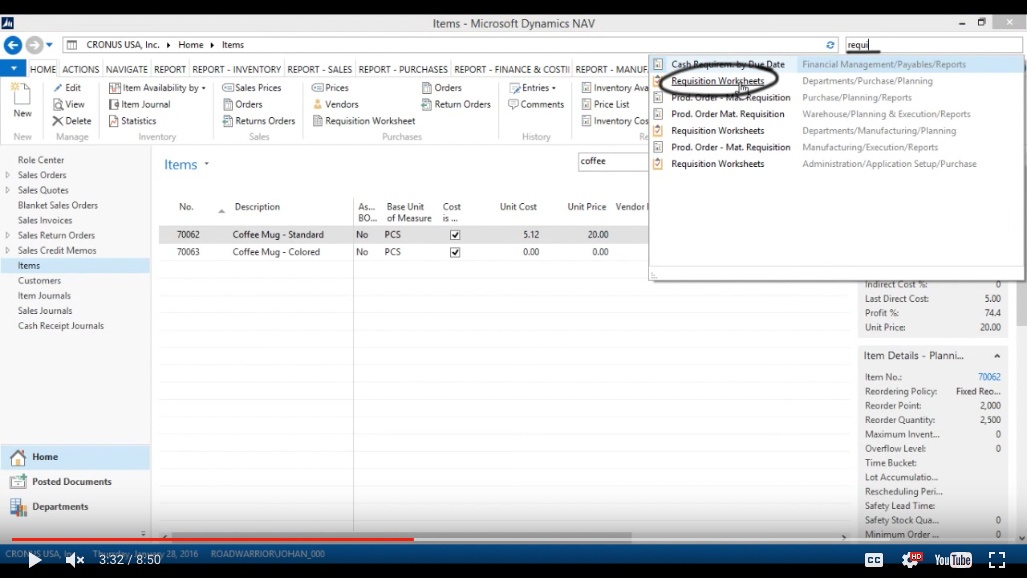
(Click image to view larger version)
Now this worksheet is my planning worksheet, there are many planning worksheets in NAV, this is one of them. This is probably the simplest one, so the easiest one to use. Works will with min/maxes and other type of planning scenarios.
So if I go in here I can just hit Calculate Plan.
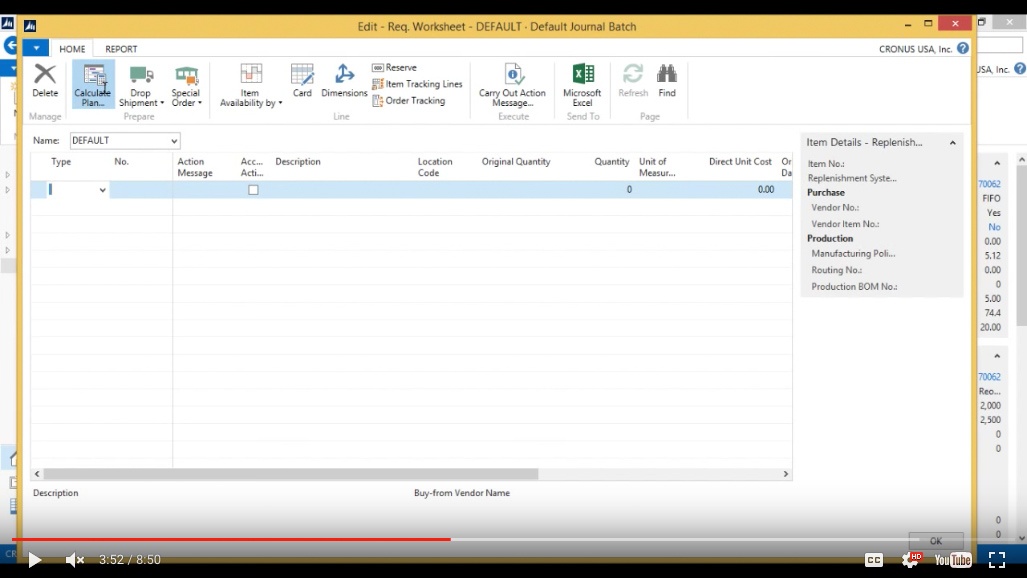
(Click image to view larger version)
And I’m just going to look at the year. I’m going to put my parameters as wide as possible, so I’ll just go from 2015 to 2017, just to show the functionality, but I could show a much smaller horizon if I wanted to. I’m not going to use any forecast. Just take that out and I’m just going to look at the coffee mug and then I hit OK. And it calculates.
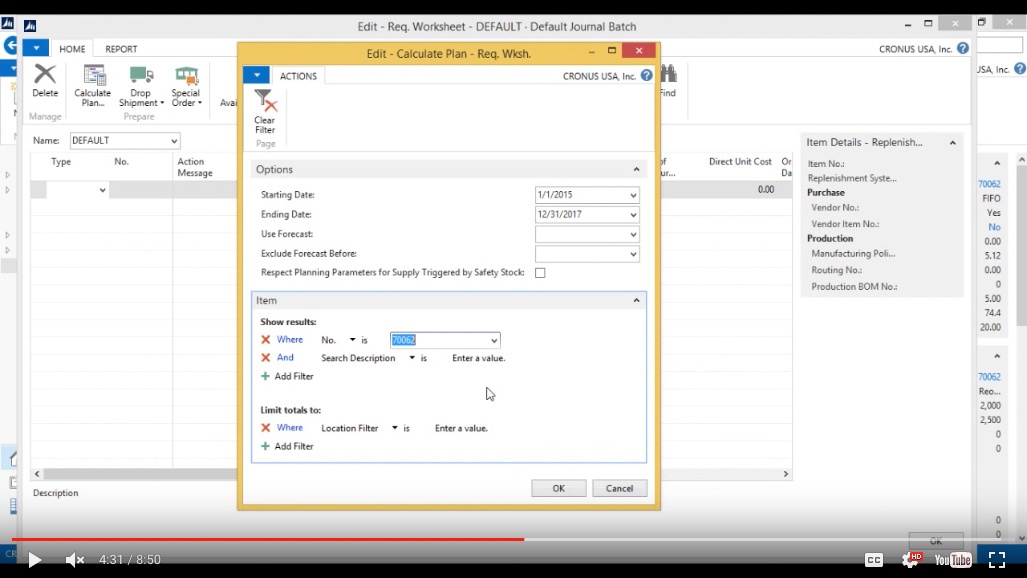
(Click image to view larger version)
And it goes ahead and says well, since I want to have 2500, it suggests to buy 2500 in the blank location which I’ve been working out of, also in the blue location and in the red location. So it wants me to put twenty-five hundred everywhere.
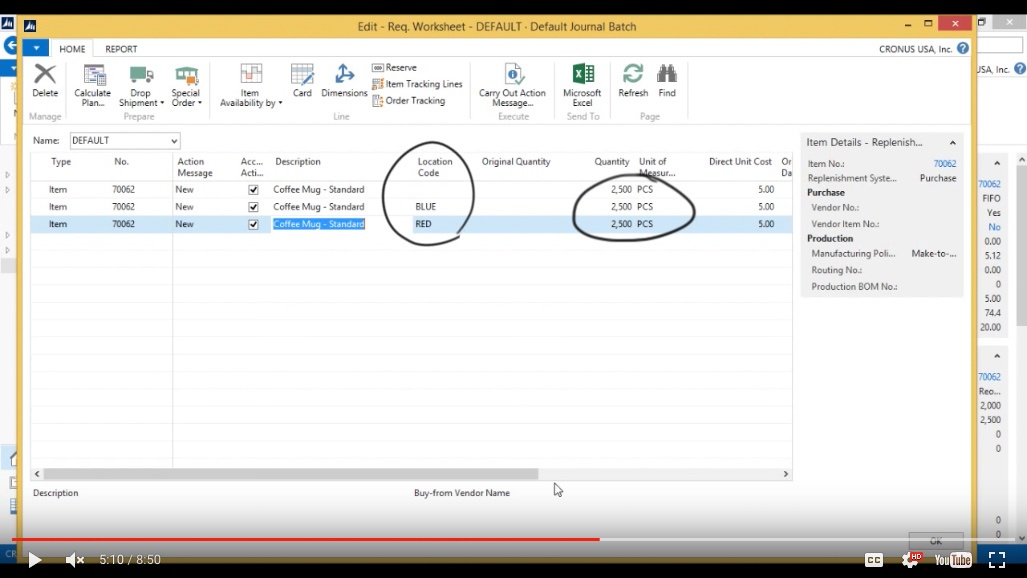
(Click image to view larger version)
There are ways around this; I could have different planning parameters based on location and I will show that in a different video. Those are called Stock Keeping Units. But basically this is showing me that I can plan for all different locations.
If I only wanted to plan for one location I can just delete all.
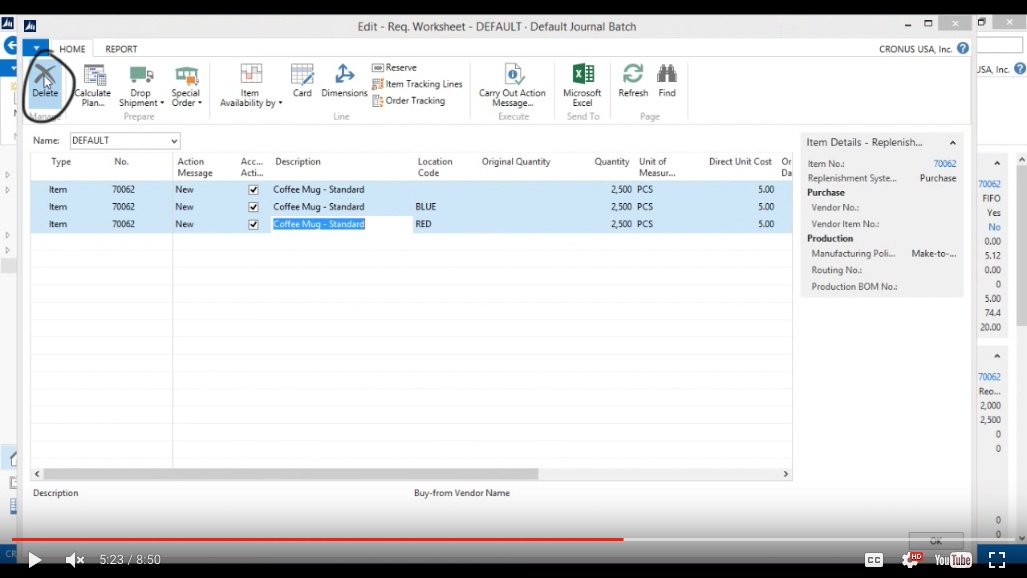
(Click image to view larger version)
Planning for a single location
Then I hit Calculate Plan again.
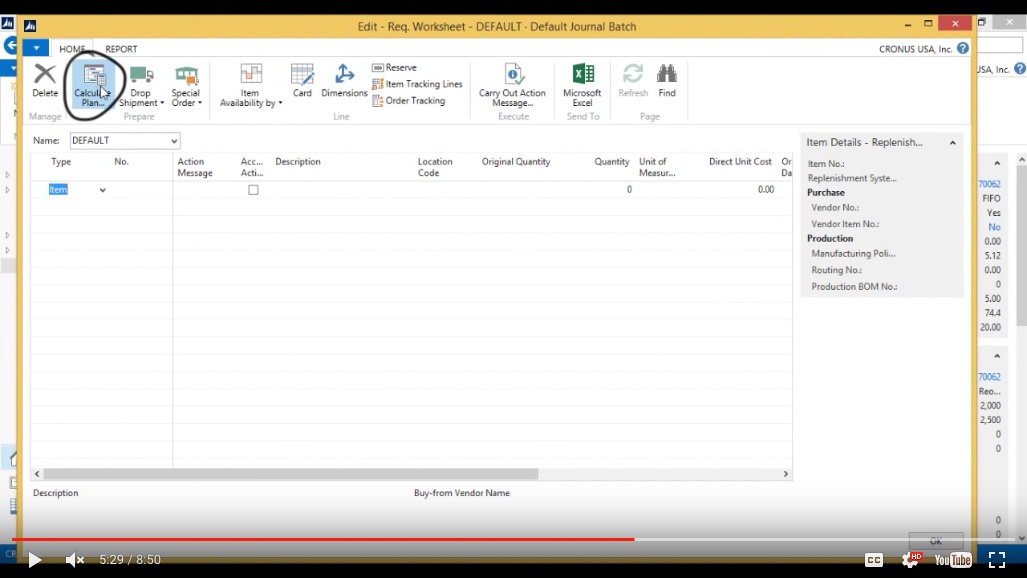
(Click image to view larger version)
In this case I’m only going to do for the blue location.
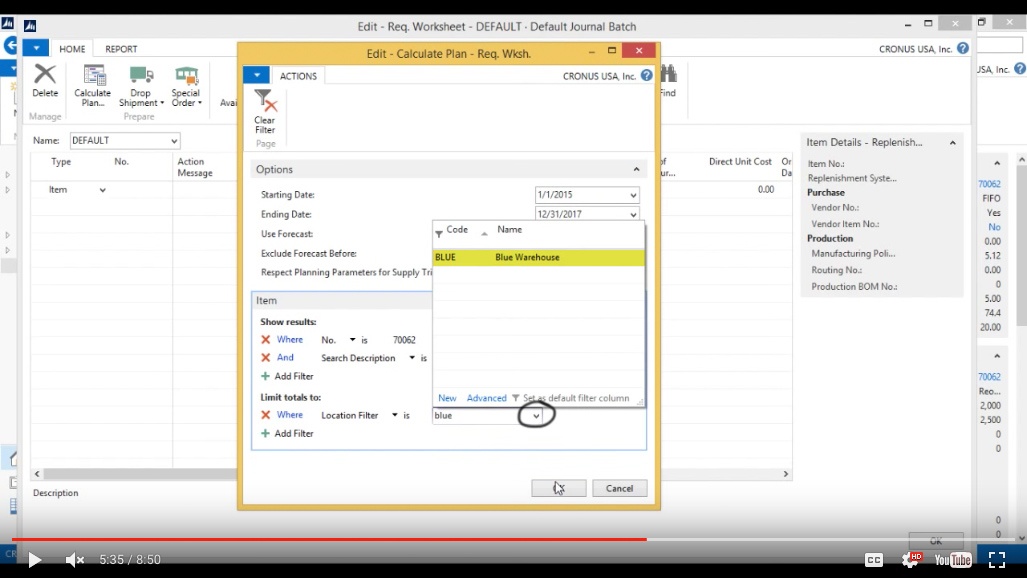
(Click image to view larger version)
And now it just shows for just one location, that’s perfect.
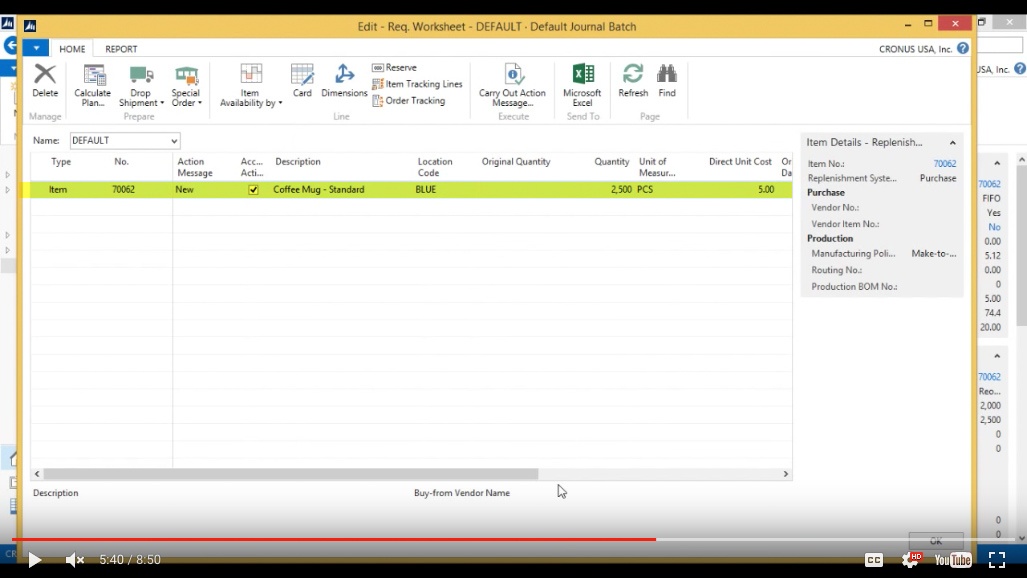
(Click image to view larger version)
So it tells me yeah I dipped under the two thousand and so I’m supposed to buy twenty-five hundred. Where am I buying it from? I can specify that by looking up the vendor. Now if I look up here it’s going to bring me a blank form. That’s because I have not set up any default Vendors for the item.
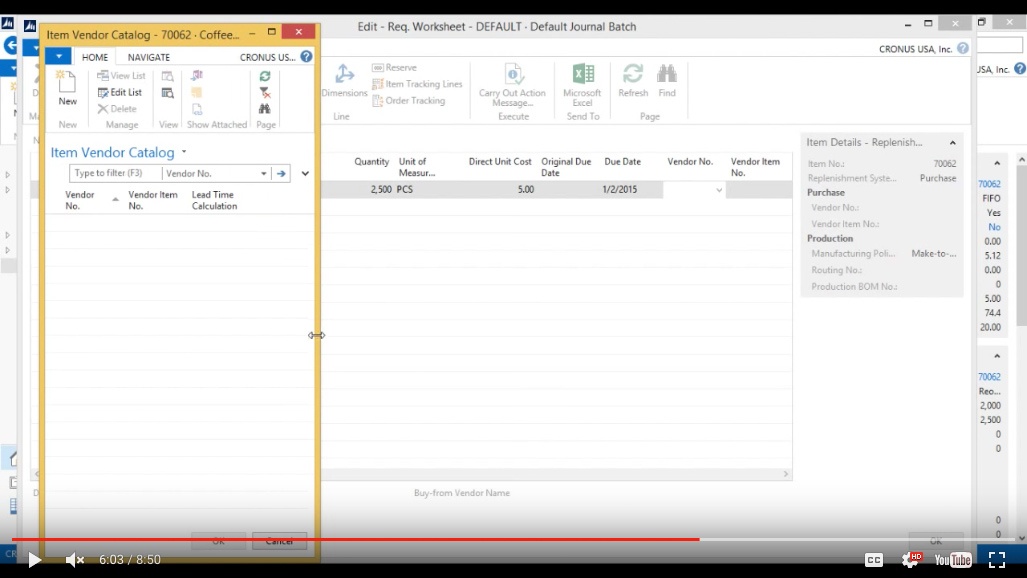
(Click image to view larger version)
Setting up Vendors
So let me go ahead and change that. Go to the item itself right here and just look at vendors.
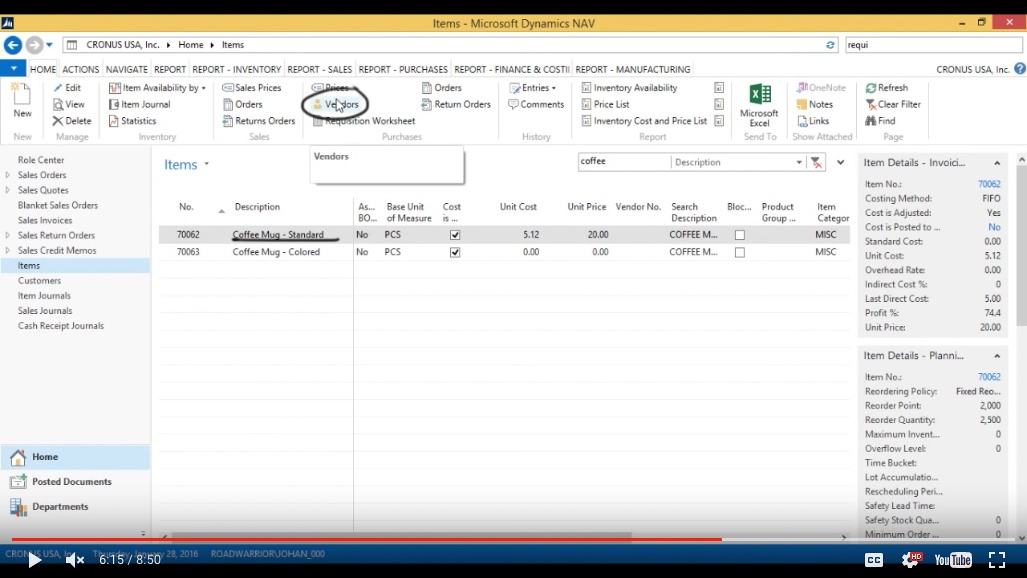
(Click image to view larger version)
I usually get this from either Custom Metals or American Wood Exports.
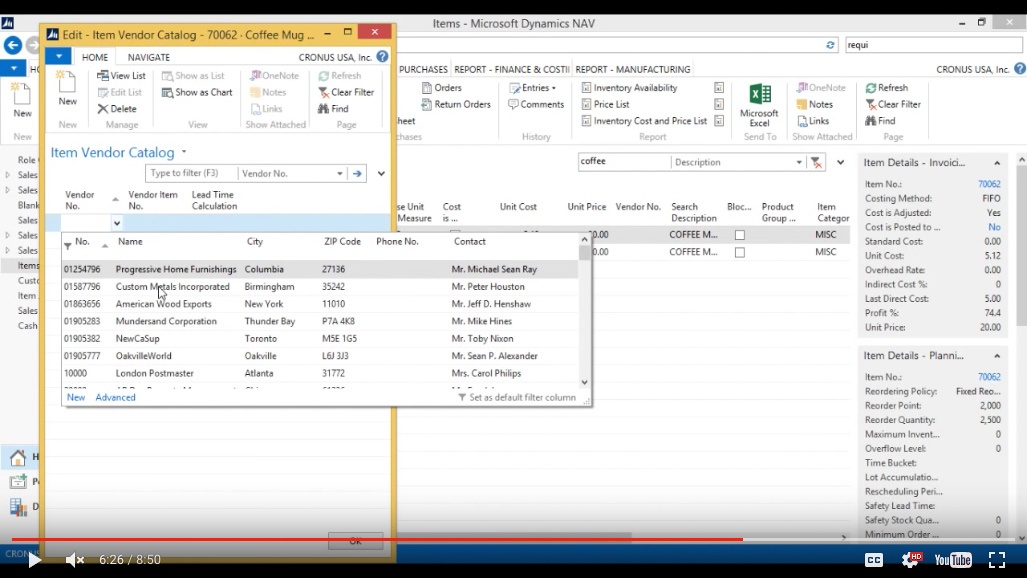
(Click image to view larger version)
Lead Time Calculation
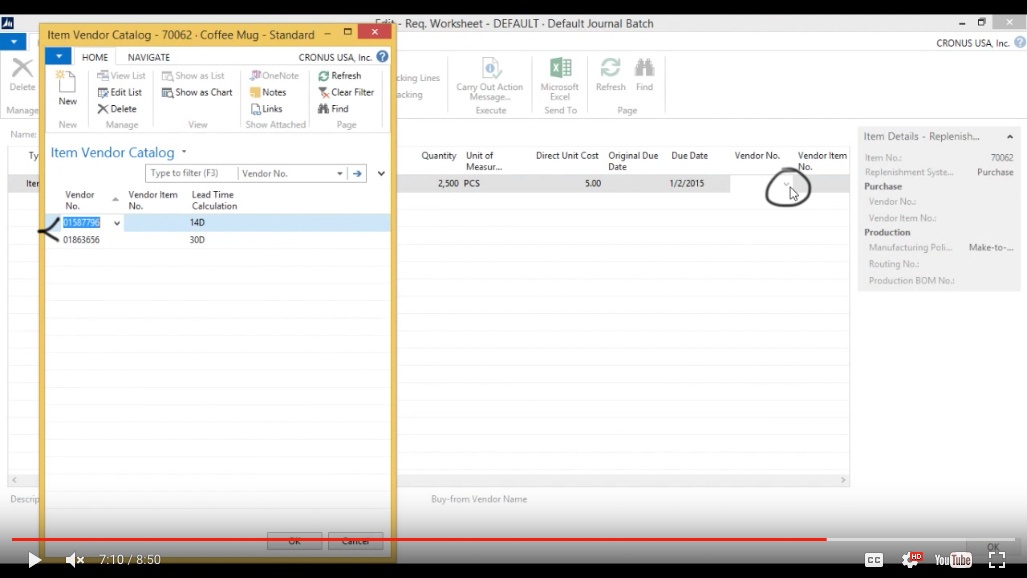
My Lead Time Calculation for Custom Metals is 14 days and it’s 30 days for the Wood Export.
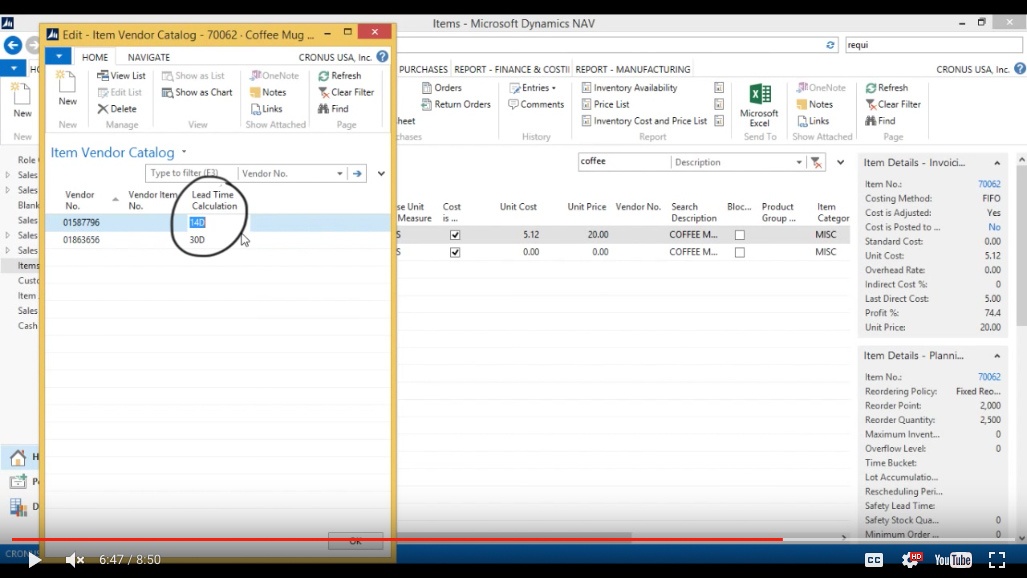
(Click image to view larger version)
Now I just close this out and I go back into the Requisition Worksheet.
(Click image to view larger version)
If I look up the vendor I see those two vendors, and I’m going to get it from the metal place.
(Click image to view larger version)
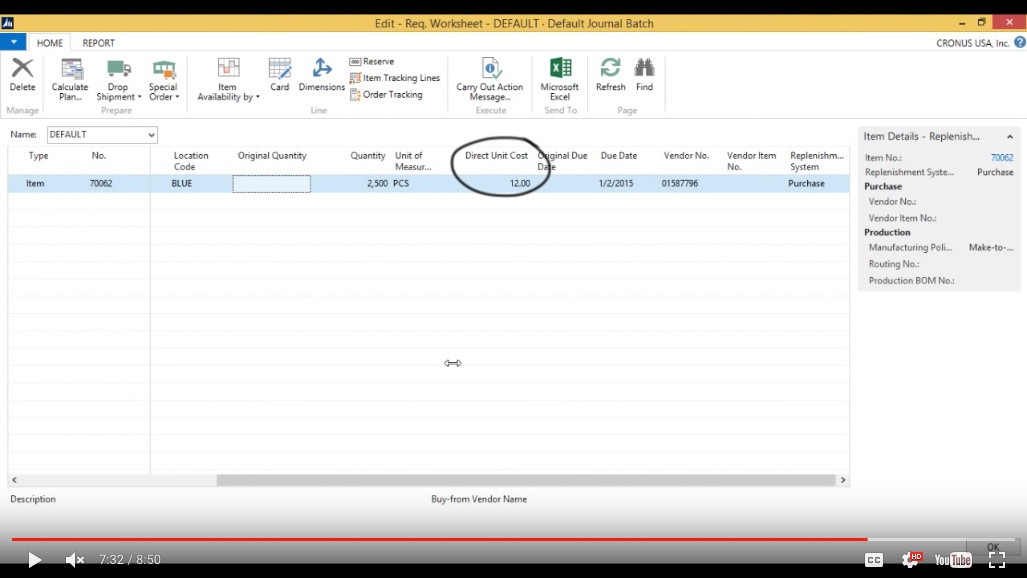
The unit cost for this one is going to be $12.
(Click image to view larger version)
CarryOut Action Message
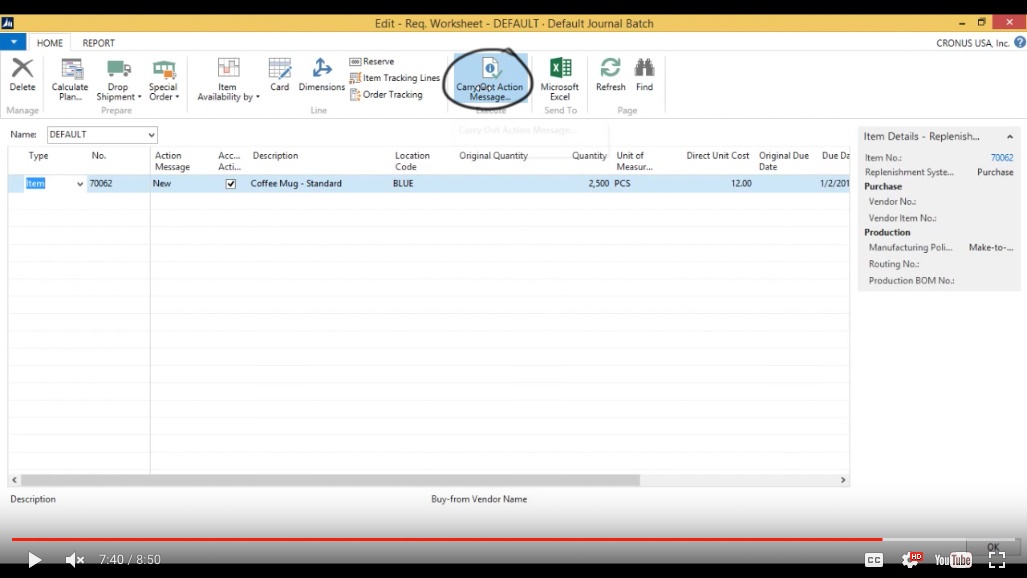
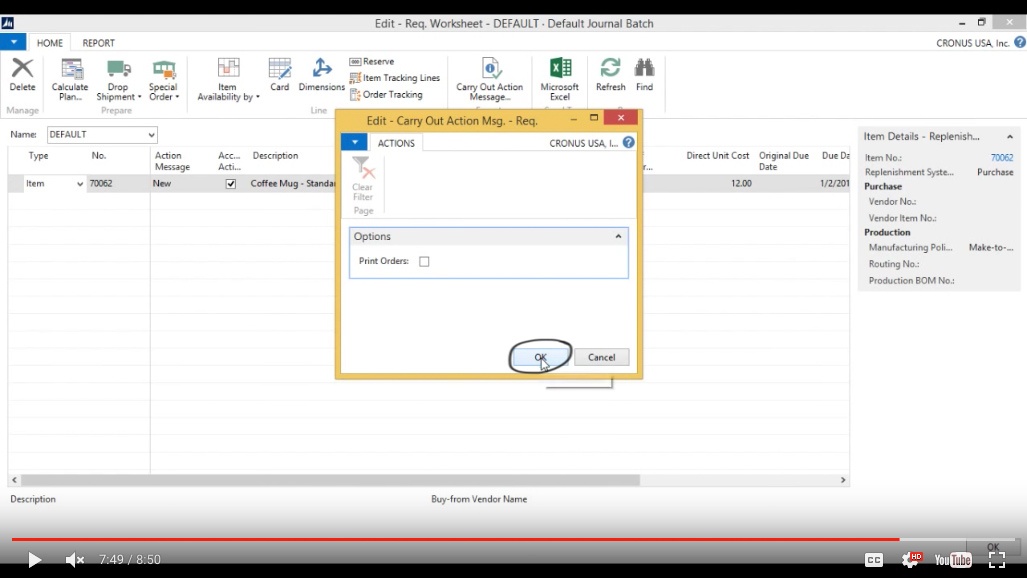
Now all I have to do is execute Carry Out Action Message.
(Click image to view larger version)
And I can actually print the purchase order as I’m doing this, but I’m not going to do that, I’m just going to generate the Purchase Order by clicking OK.
(Click image to view larger version)
It goes through the worksheet and creates a Purchase Order.
View Purchase Order
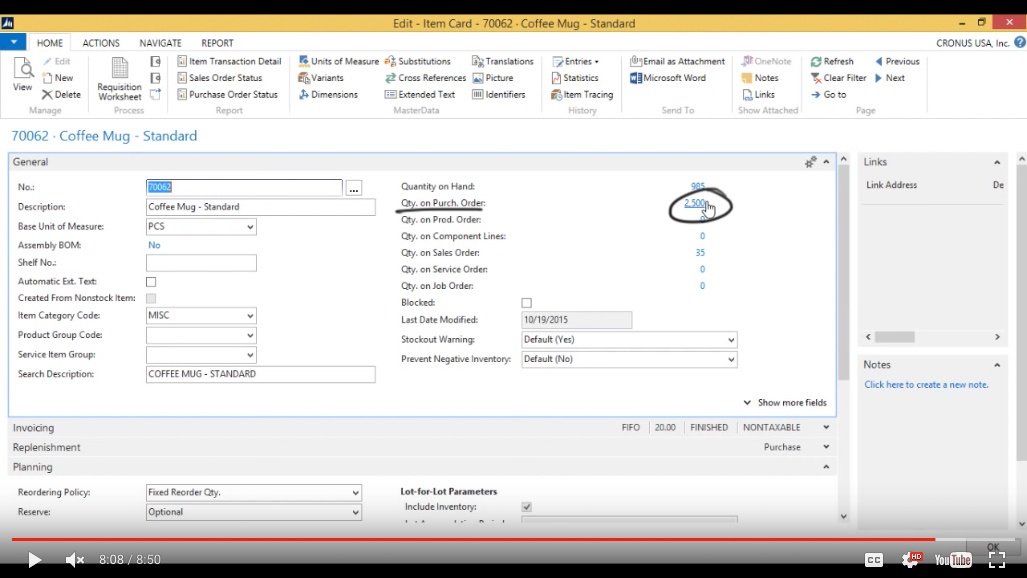
So if I now go into my coffee mug item I can see that I have 2500 on Purchase Order. I can click on that.
(Click image to view larger version)
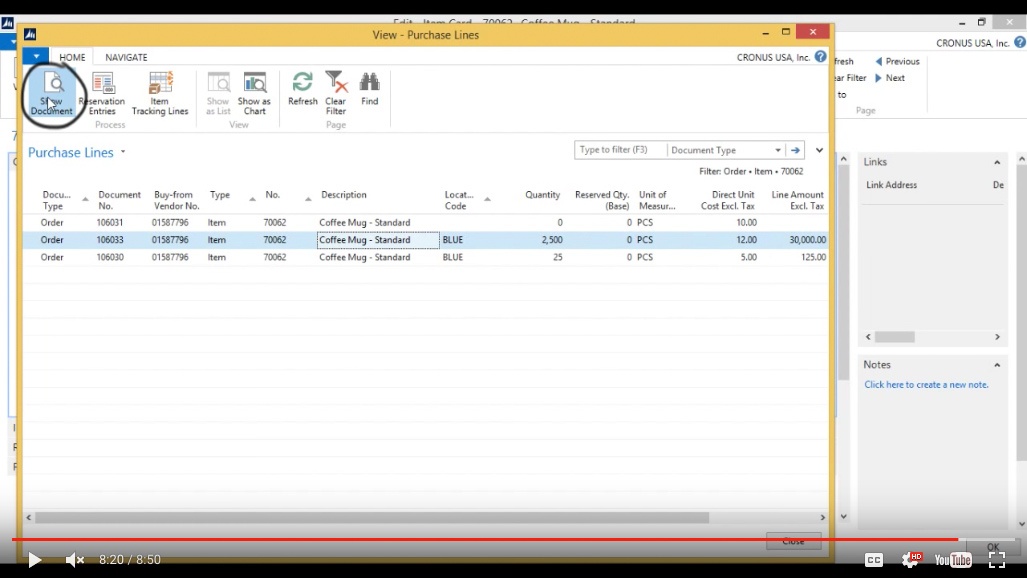
For the Blue location, I hit Show Document.
(Click image to view larger version)
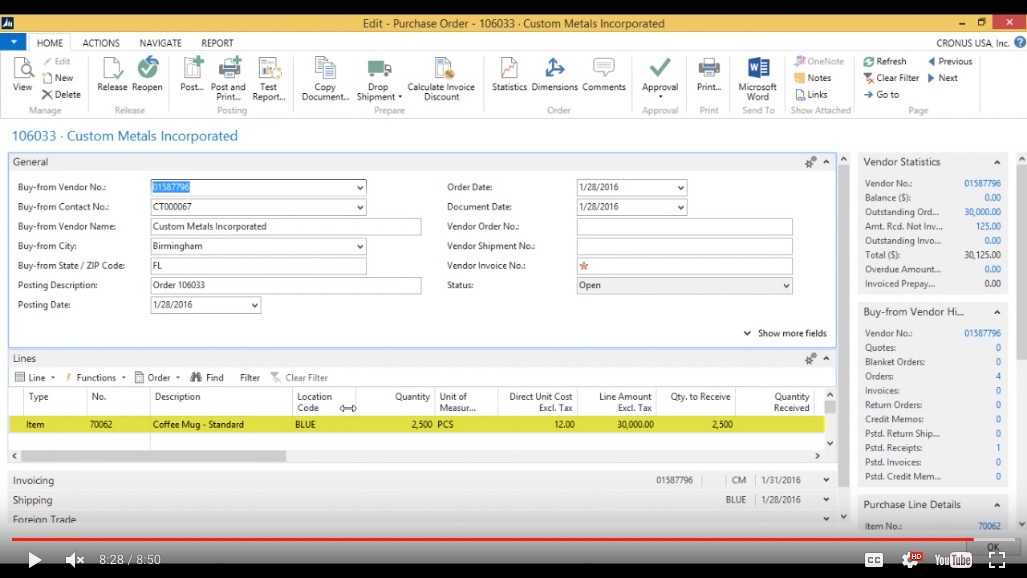
You can now see the Item with a Quantity of 2500 for the Blue location.
(Click image to view larger version)
And that was it for the Requisition Worksheet and min/max level in NAV.
You've learned some of the many ways your business can benefit from using inecta Food. It's trusted by other businesses in your industry and can work just as well (or better) for you. inecta Food is easy to implement. It's easy on your budget with monthly subscription payments. Take the next step to ensure your food business is running the right kind of business software. Software for your food safety, increased efficiency, and stronger revenue growth.
Curious about implementation costs, training, getting a customized demo & detailed estimate, booking a discovery call?

Global Headquarters:
225 Broadway #660,
New York, NY 10007
1-800-632-0573
©2023 INECTA LLC
Global Headquarters: 179 Franklin Street, New York, NY 10013
©2020 INECTA LLC