How to Work With Excel and Microsoft Dynamics NAV 2016
Today what I wanted to show is the integration to Excel and how NAV can interact with Excel. There are many ways that Excel can connect but this particular way is very cool and kind of snazzy and very, very easy to set up.
So my problem that I have is that I want to show the Customer List in Excel with the balance information and credit limits and I want to be able to easily update that list in Excel. So this tool or this little feature actually perfectly solves that problem.
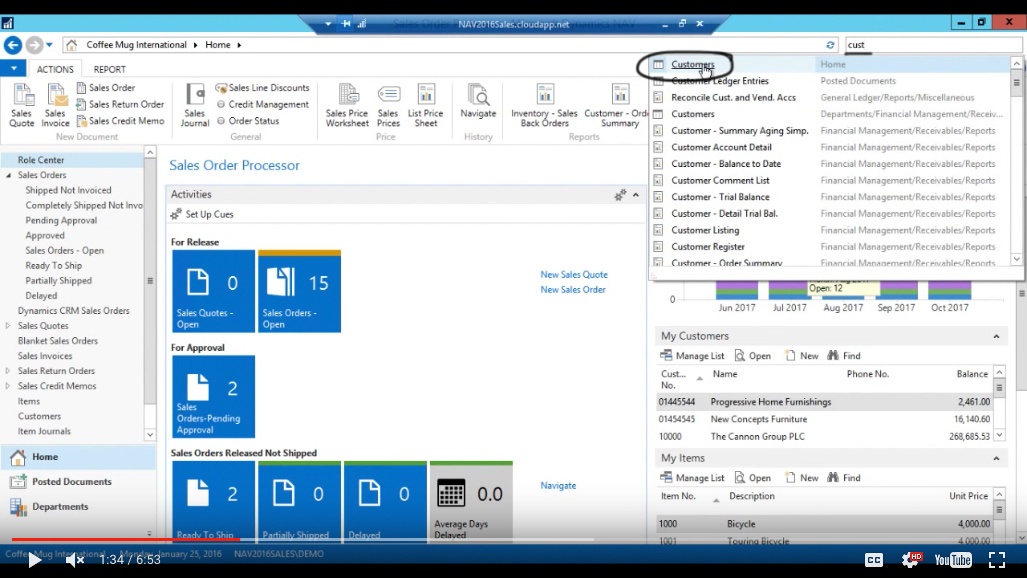
Go into Customer List
So let me go ahead and go here into the customer list, if I can spell it.
(Click image to view larger version)
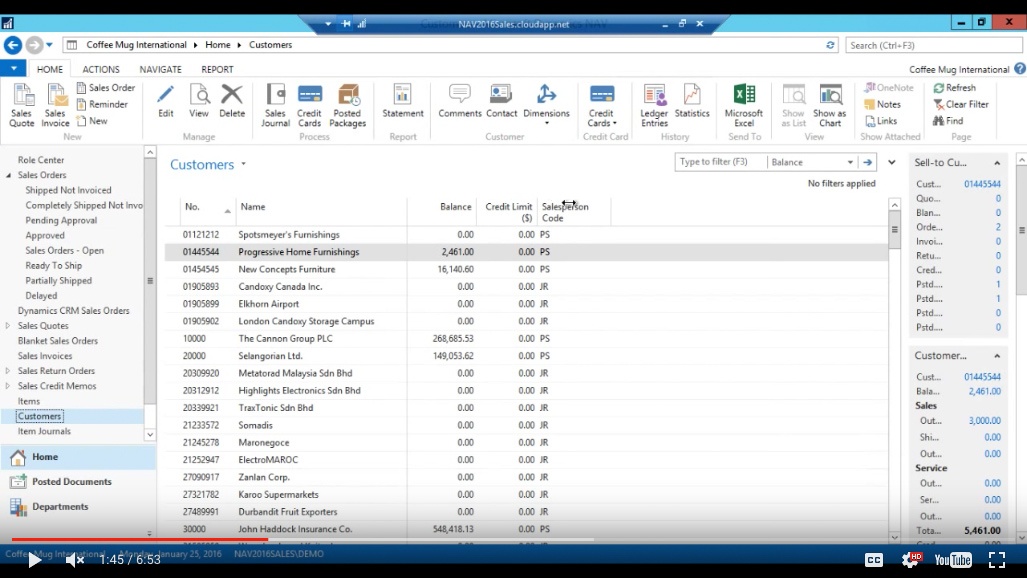
Now here I can see my customer list and I have actually tailored my page to only show the columns that I want to see in Excel.
(Click image to view larger version)
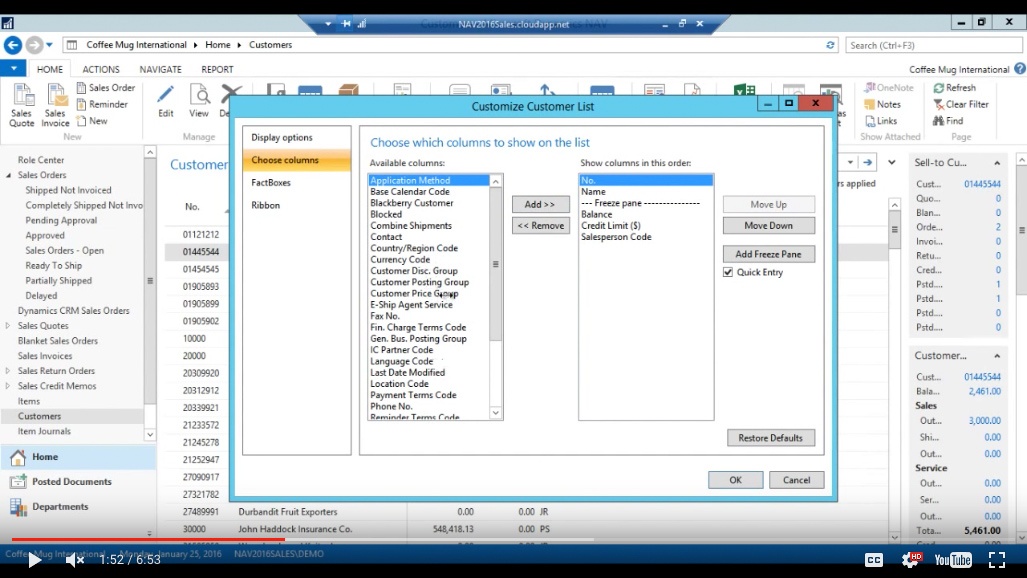
Choose Columns
Now I can basically choose columns by right clicking here and going into Choose Columns.
And pick the ones that I want.
(Click image to view larger version)
I’ve already done that, so it’s sort of like the baking show where you have your ingredients ready and the dough magically appears. However this one was fairly easy to set up.
Filter Non-Zero Entries
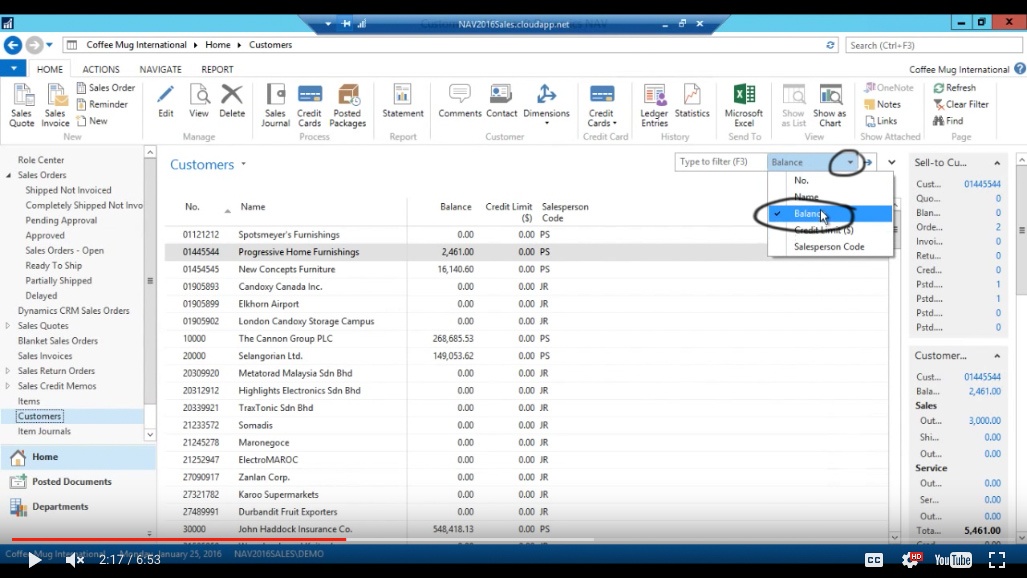
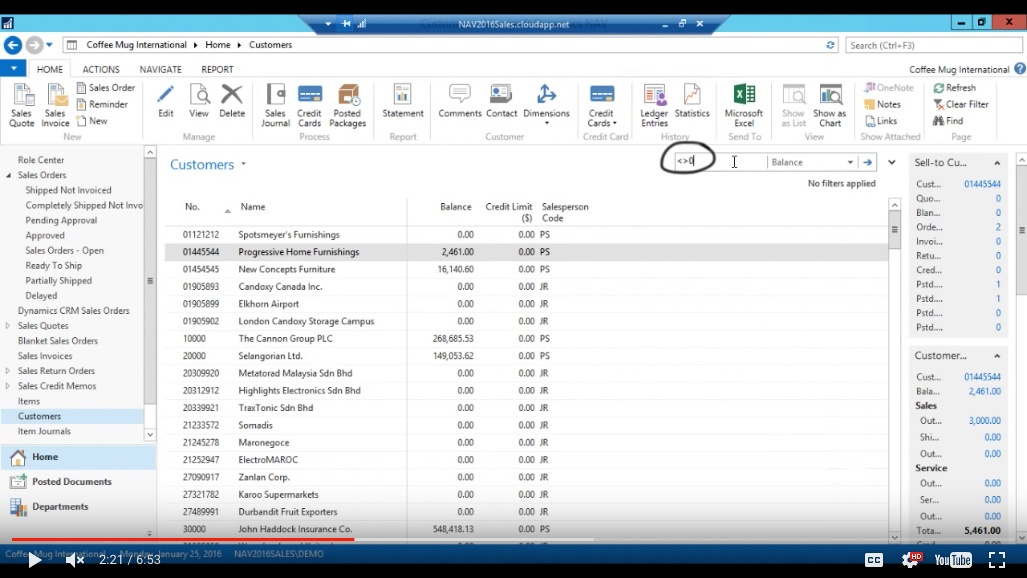
Now what I want to do is filter the balance to non-zero entries.
In order to do that I just go up to Filter right here.
(Click image to view larger version)
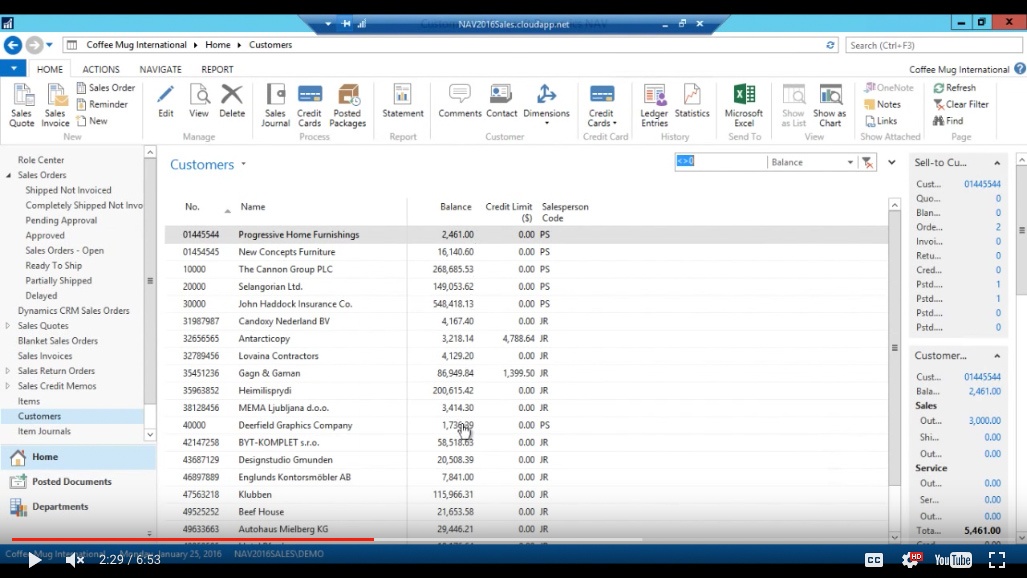
So I select the filter from this screen and type in less than/more than zero.
(Click image to view larger version)
Less than/more than means NOT, and so I don’t want to see zeros and then I have it now. NAV immediately updates the list only showing the non-zero entries.
(Click image to view larger version)
Exporting to Excel
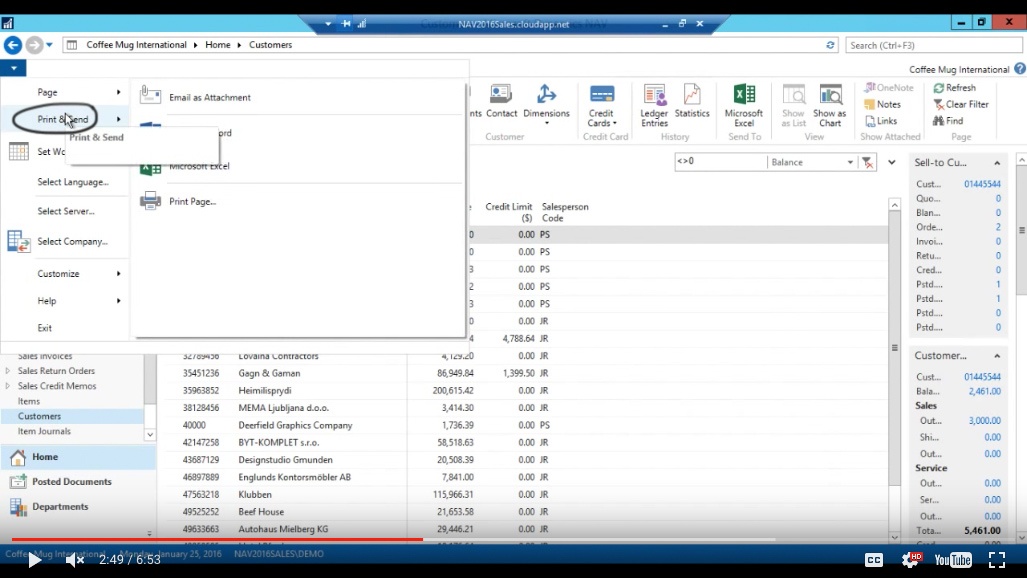
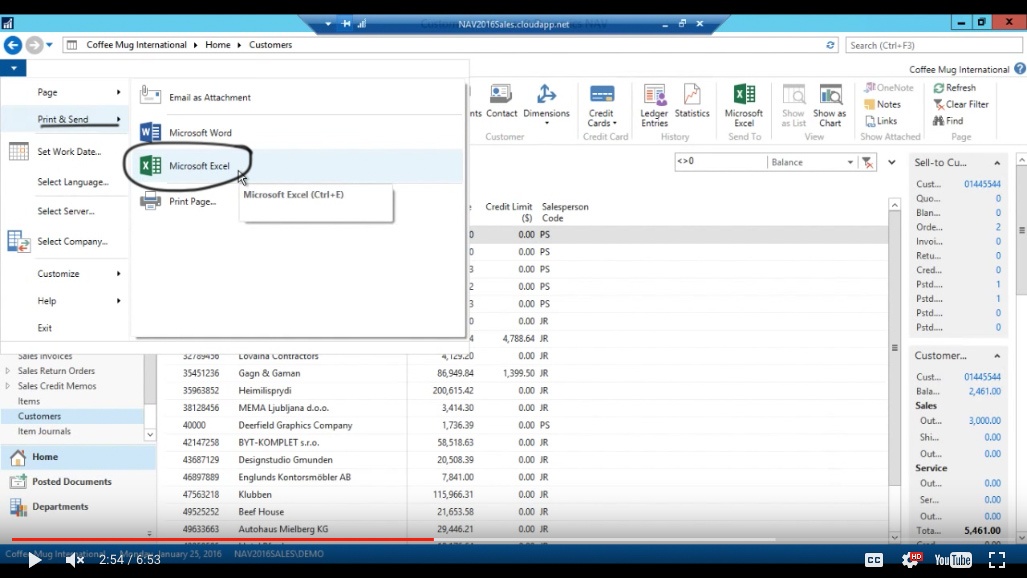
So now I want to print this into Excel. Now I go up to this button over here that’s kind of hidden that we normally use to set the work date, select server and go into different companies etc.
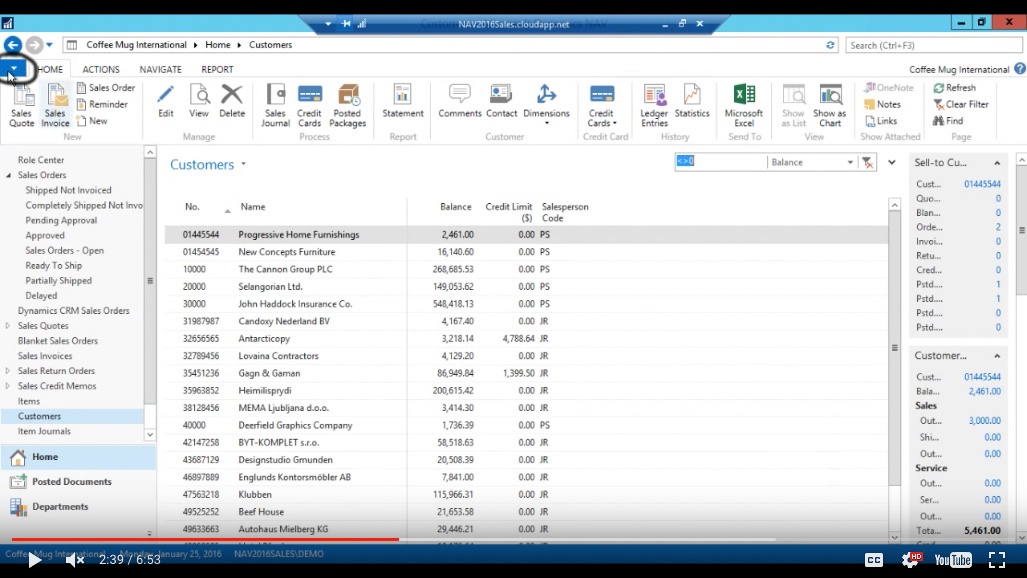
(Click image to view larger version)
But I can go here into Print and Send.
(Click image to view larger version)
And pick Excel.
(Click image to view larger version)
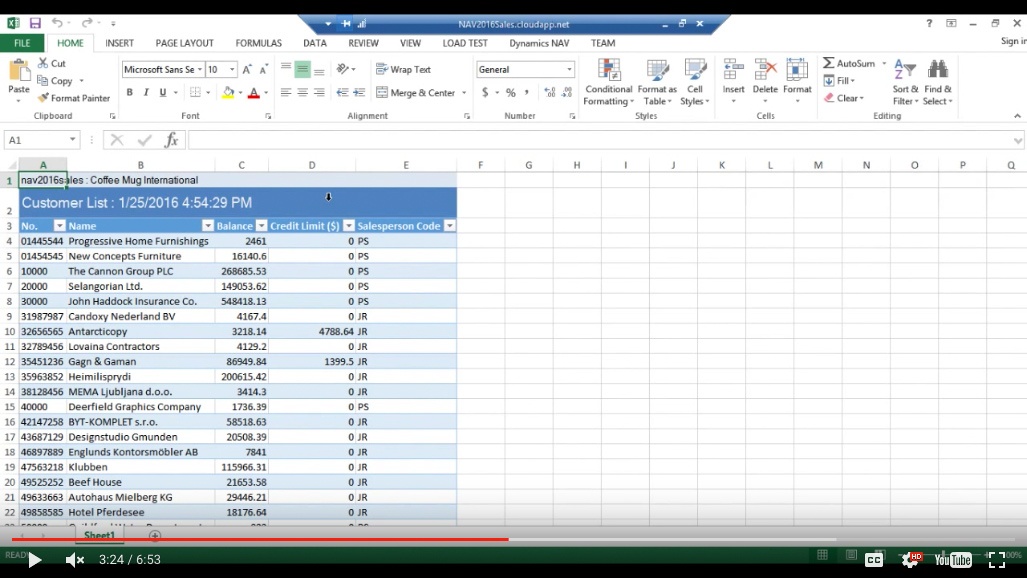
I could have also hit just Control E and what happens is that Excel will open up with a page or sheet populated from the page in NAV.
And it has the filters that we applied and all the data in a nice table format, and it also tells me which company it came from, what was the date and the time. So this is really cool and now I immediately have the data inside Excel in a nice format.
(Click image to view larger version)
Updating Data in NAV
However what happens if the data changes in NAV; how can we update the data in here without actually going through this exercise again and again?
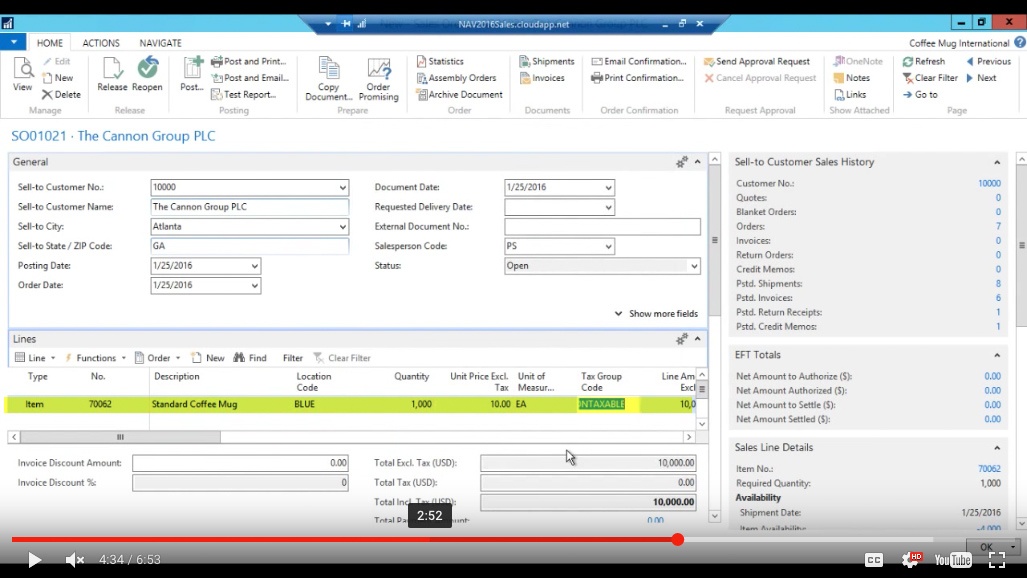
There is a nice trick to that. Let’s just make a note that The Cannon Group has a $268,000 balance and so I want to post a sales order there to increase that balance by $10,000.
Create a New Sales Order
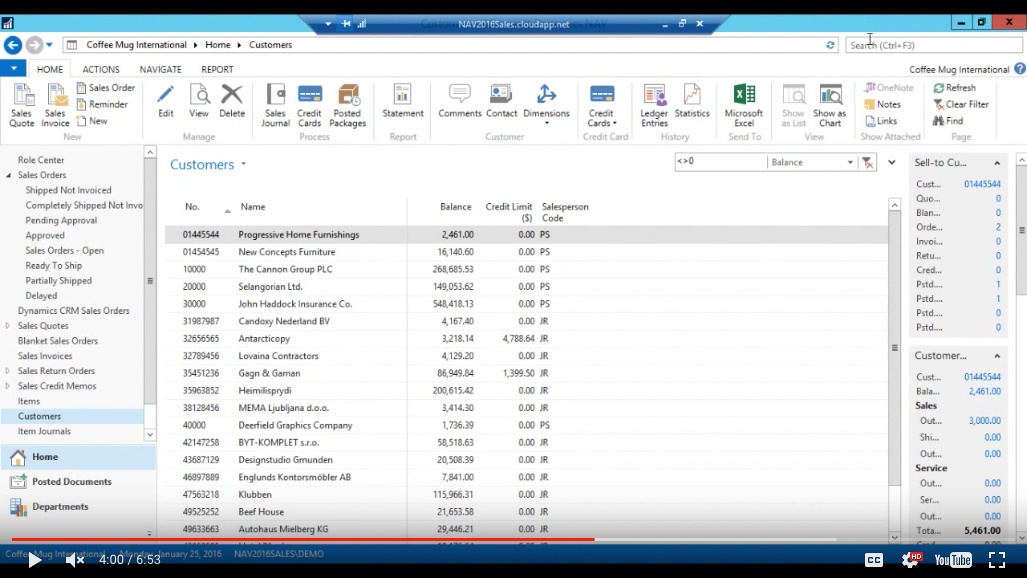
So I go back to NAV.
(Click image to view larger version)
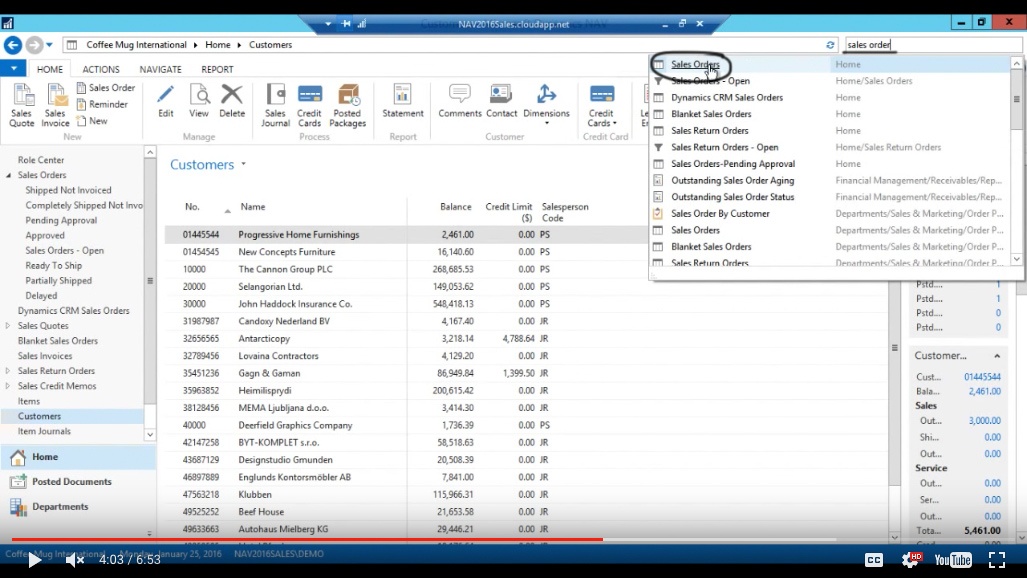
I go into my Sales Orders.
(Click image to view larger version)
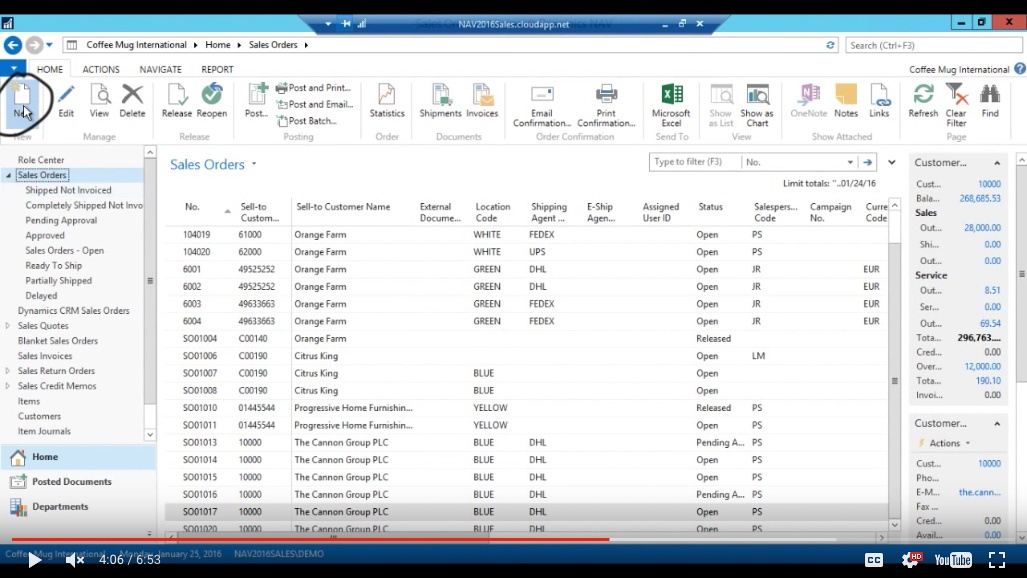
And then I hit New and I could have set this up beforehand but it’s so quick to make a Sales Order in NAV that we just quickly go through it.
(Click image to view larger version)
A Standard Coffee Mug right here out of the Blue location. So what we’re going to do is sell 1000 for $10.
(Click image to view larger version)
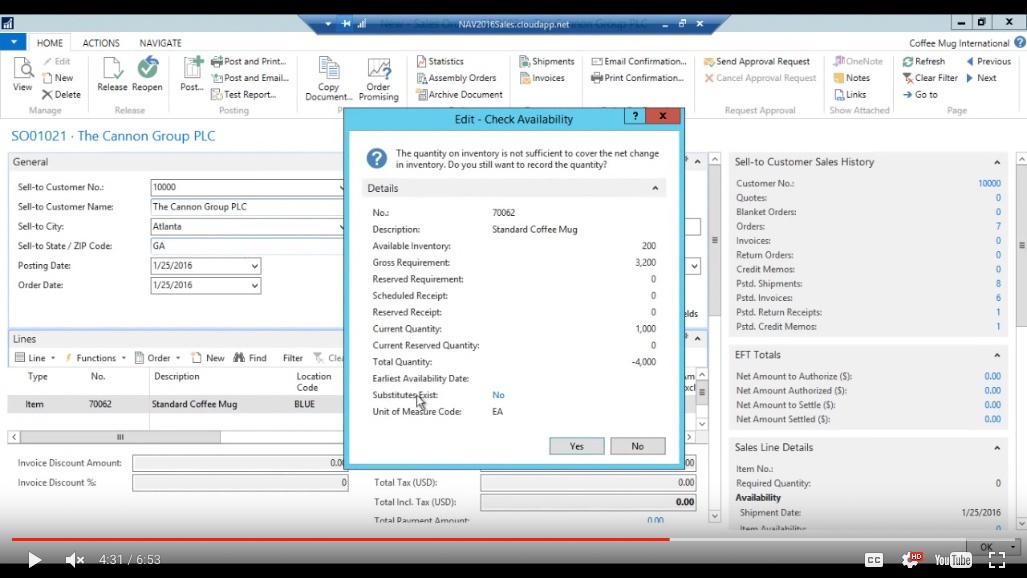
It gave me all kinds of warnings but we just pass through that.
(Click image to view larger version)
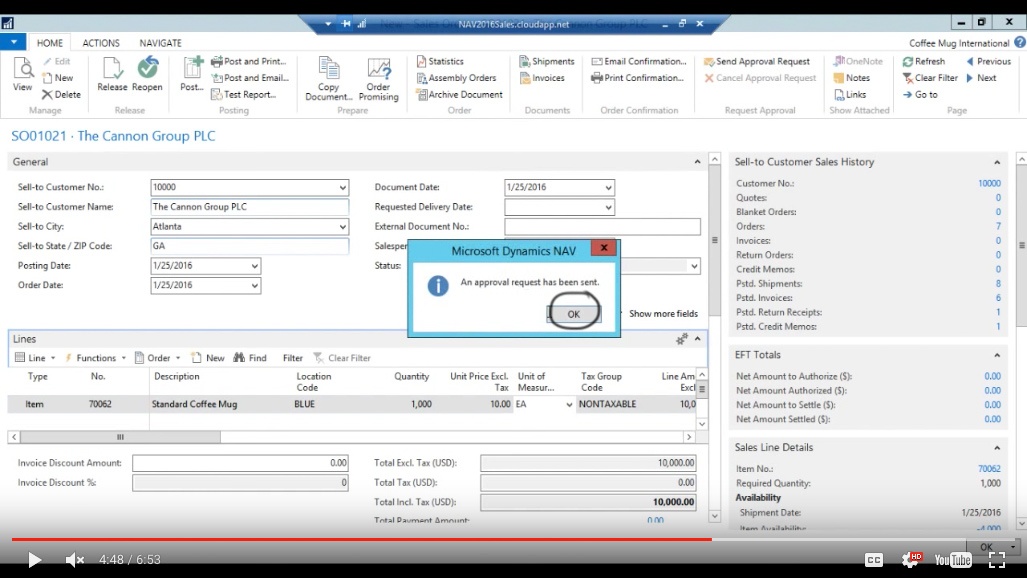
Now I have already set up the Approvals in NAV so I actually have to send an approval request to release this.
click OK.
(Click image to view larger version)
And it’s already released.
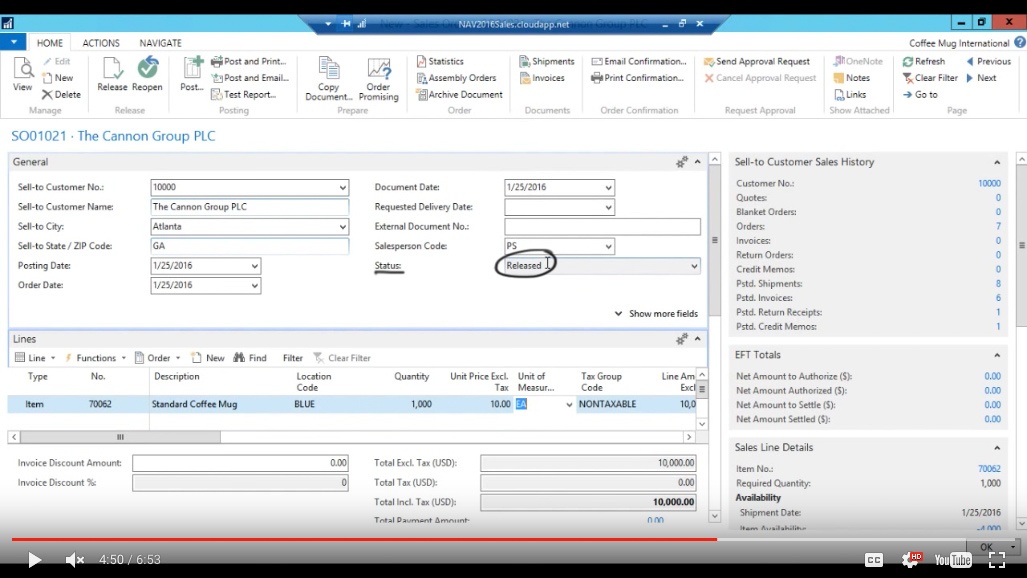
(Click image to view larger version)
Normally I would release it over here, this is just before I post. I will cover the Approvals in another video.
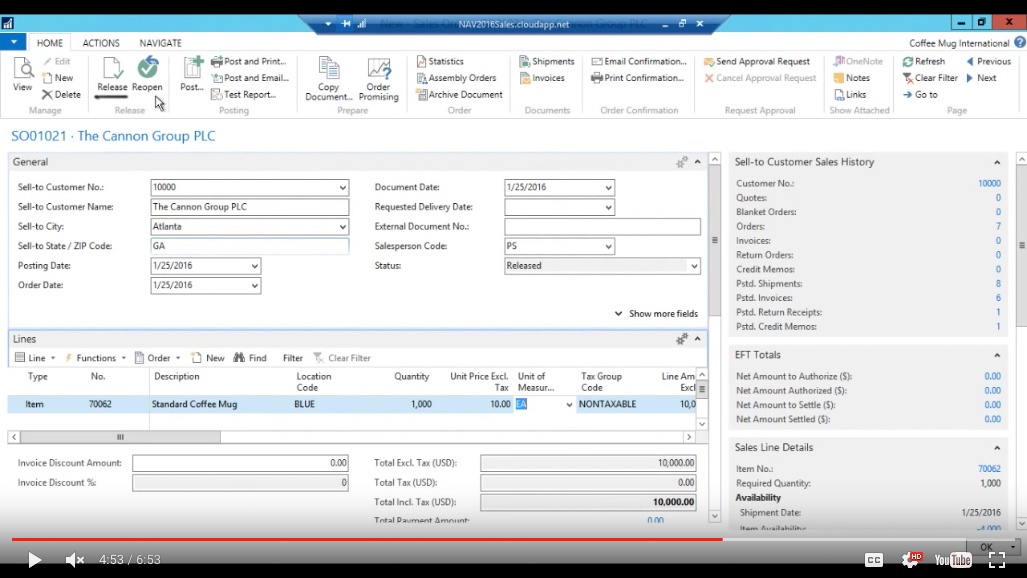
(Click image to view larger version)
Post it
So now we want to go ahead and Post this.
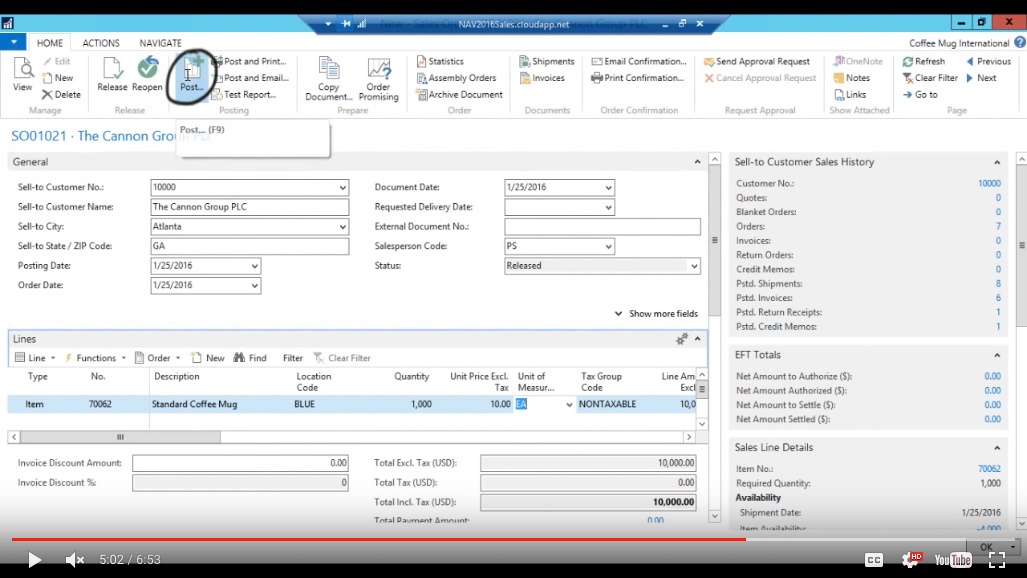
(Click image to view larger version)
Ship and Invoice, and it completes it, and out the door it goes.
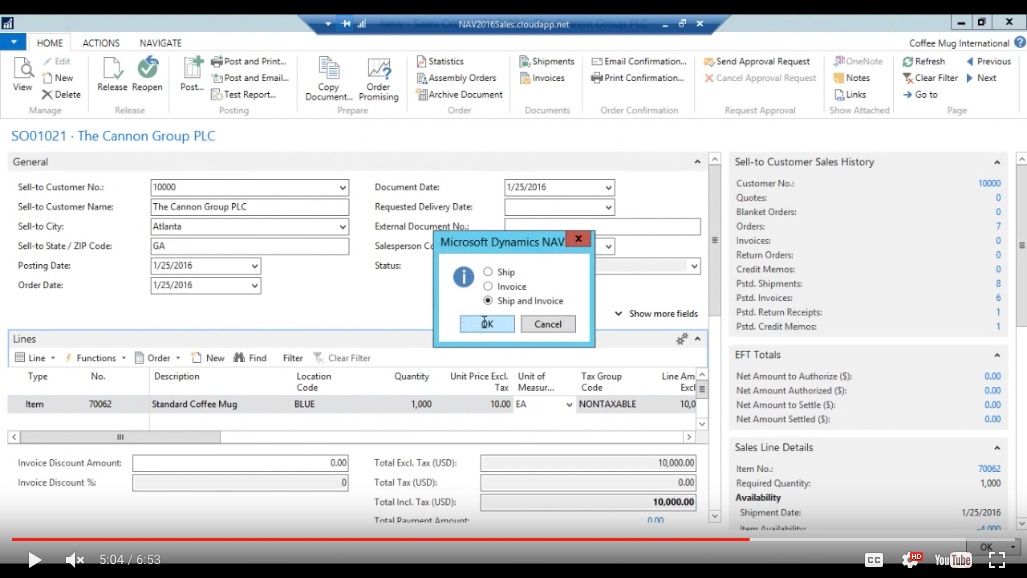
(Click image to view larger version)
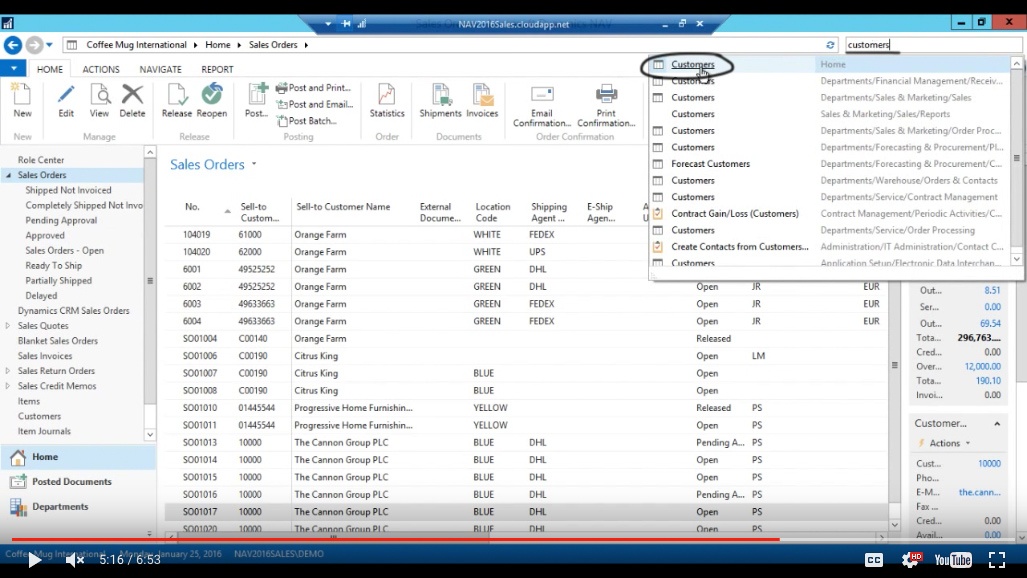
So if I go into the Customers right now.
(Click image to view larger version)
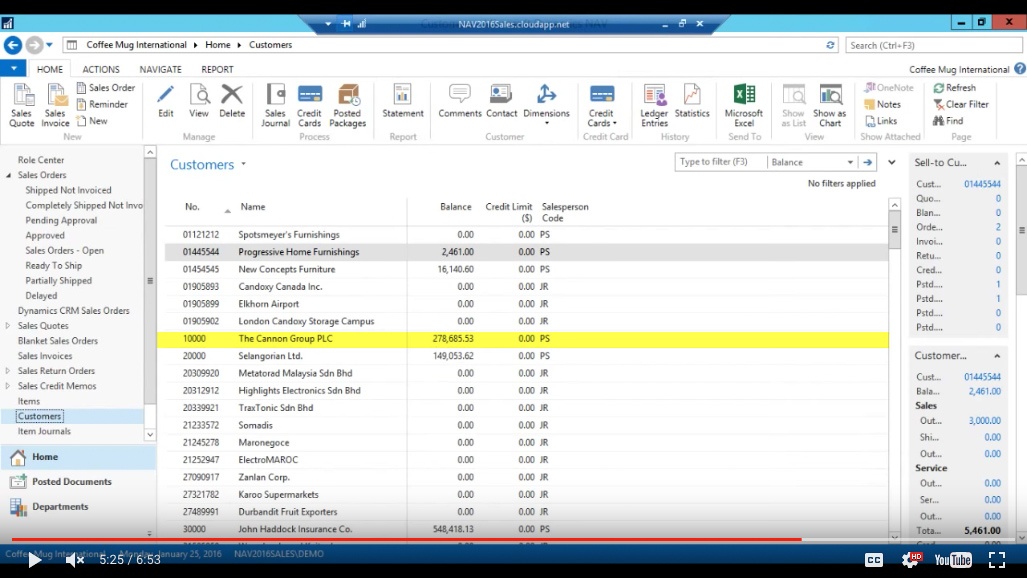
I can see that Cannon Group is $278,000 now, the balance has increased by $10,000.
(Click image to view larger version)
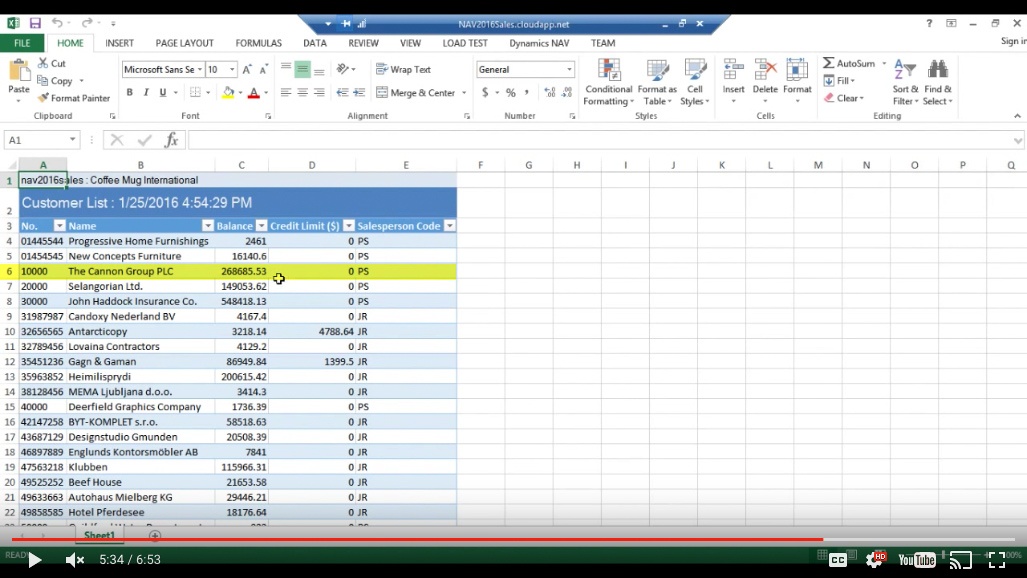
If I go into my balance sheet in Excel I can see that it’s $268,000 so it’s missing $10,000. But of course it was updated a few minutes ago in NAV so it’s missing the information from the last posting.
(Click image to view larger version)
View Updated Data in Excel
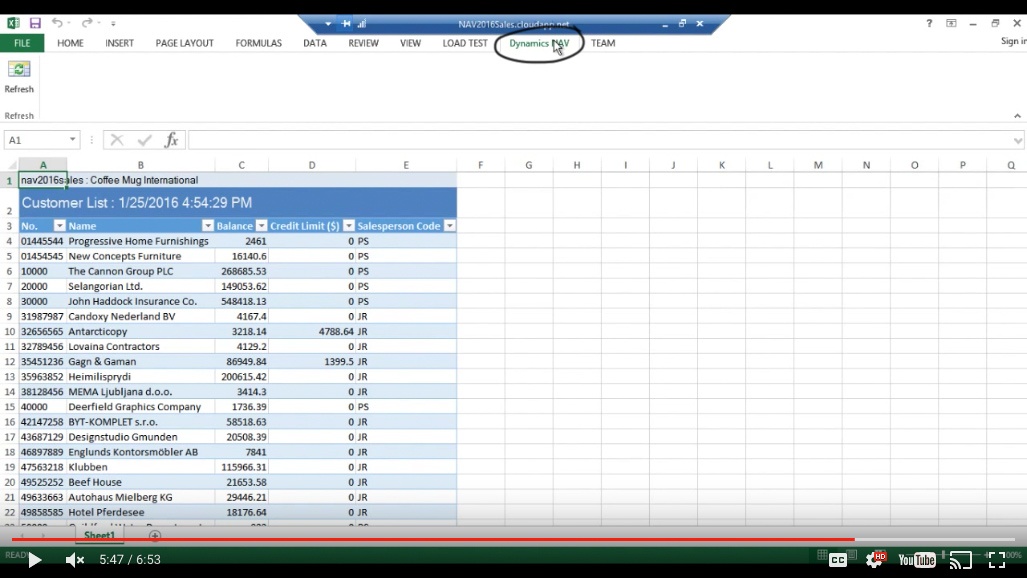
So what I can do is go into Dynamics NAV.
(Click image to view larger version)
This is something that gets installed with the client if you select it in the installation. So it will actually add this little component up in Excel which says Refresh. I can then go ahead and click on that.
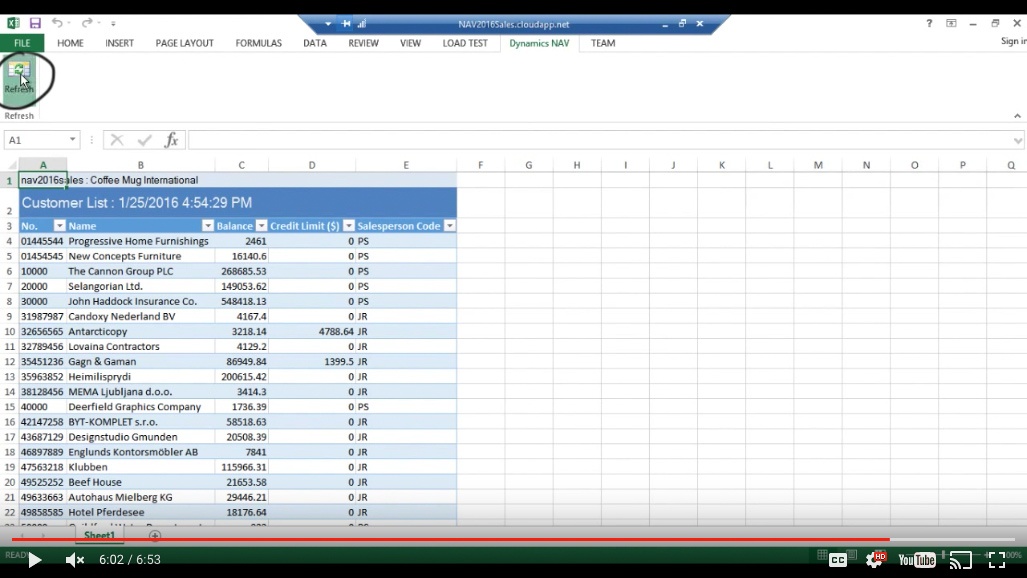
(Click image to view larger version)
Notice that the time stamp got updated and now we have $278,000 in the balance for The Cannon Group.
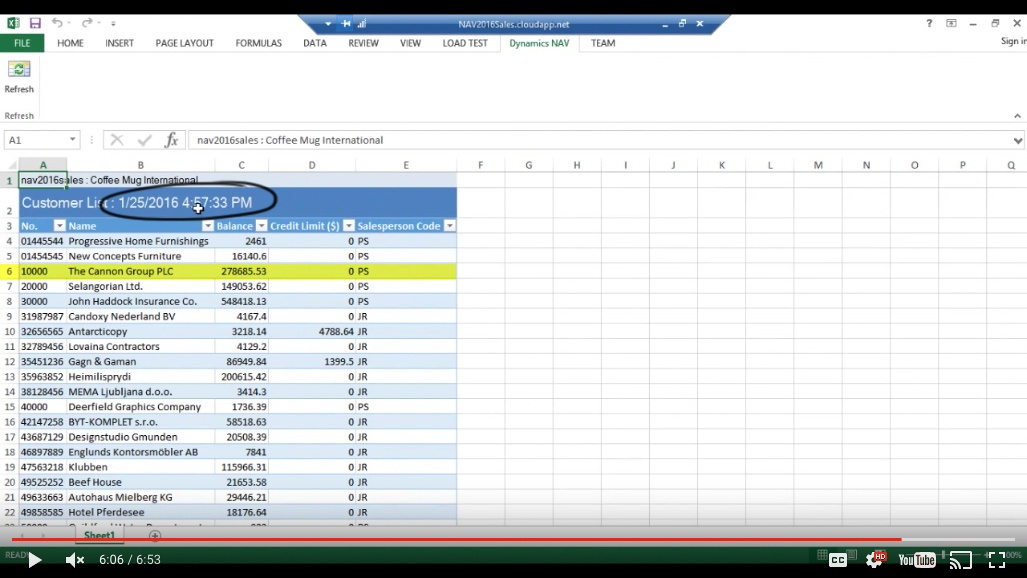
(Click image to view larger version)
So technically we can set up this print out from a page and then just be updating that and pulling some information from this table into other sheets etc. and just hitting Refresh.
So this is an excellent little feature inside NAV.
You've learned some of the many ways your business can benefit from using inecta Food. It's trusted by other businesses in your industry and can work just as well (or better) for you. inecta Food is easy to implement. It's easy on your budget with monthly subscription payments. Take the next step to ensure your food business is running the right kind of business software. Software for your food safety, increased efficiency, and stronger revenue growth.
Curious about implementation costs, training, getting a customized demo & detailed estimate, booking a discovery call?

Global Headquarters:
225 Broadway #660,
New York, NY 10007
1-800-632-0573
©2023 INECTA LLC
Global Headquarters: 179 Franklin Street, New York, NY 10013
©2020 INECTA LLC