Closing the Year in Microsoft Dynamics NAV
We are here at the last day of the year of 2015 and what I wanted to go through today is how to close the year. Now normally we close the year somewhere in January or February after we’ve posted everything in 2015 and are all satisfied with all the numbers.
However, at The Coffee Mug International we have been really good at keeping the numbers straight and we are able to close on the 31st. Now obviously that is not very realistic and we are a fictional company so we are able to do this and I’m just going to go through that today.
Now if I go here into Departments (and by the way we are now running 2016 - we upgraded recently. It didn’t take us more than an hour which is also fairly unrealistic but that’s the nice part of being in a fictional company).
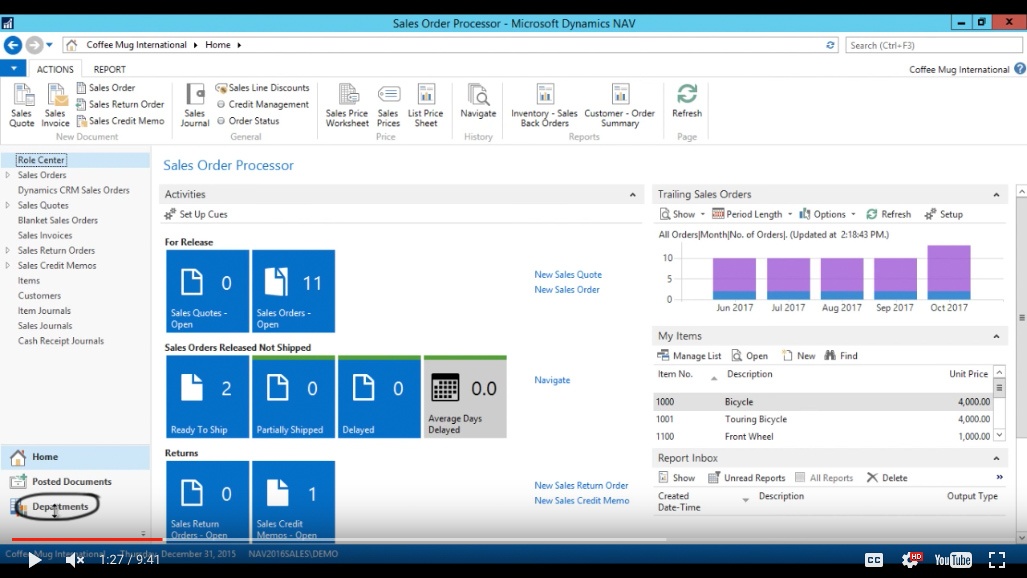
(Click image to view larger version)
Define Accounting Periods for the upcoming year
I go into Periodic Activities, into Fiscal Year.
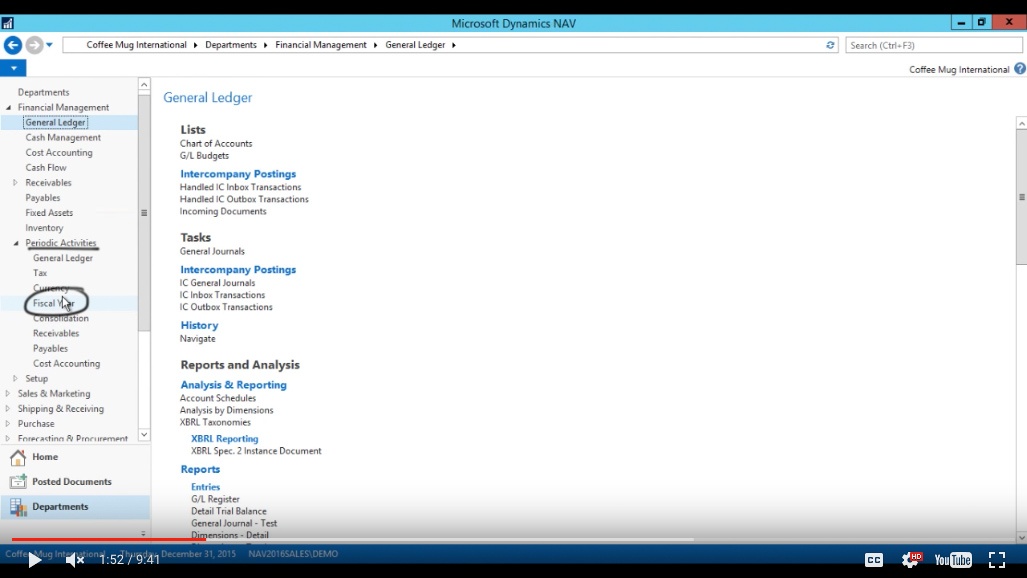
(Click image to view larger version)
Then click on Accounting Periods.
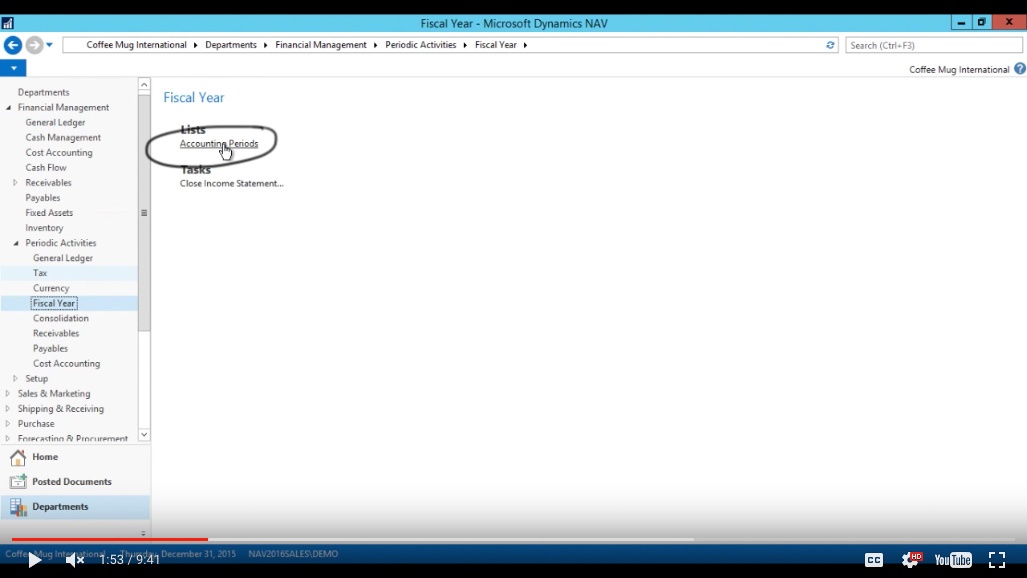
(Click image to view larger version)
Now we have defined 12 accounting periods for 2015 and the first thing we need to do is actually define 2016. Now even if you haven’t closed the year or booked the numbers for 2015, if you do not have account periods for 2016, it would be advisable to do that right away before you close the year.
So that’s something you could actually be doing today or at the last day of the year. Possibly you have maybe already created a couple of years ahead and that’s fine. In this case I don’t so I’m going to go ahead and create a new accounting period.
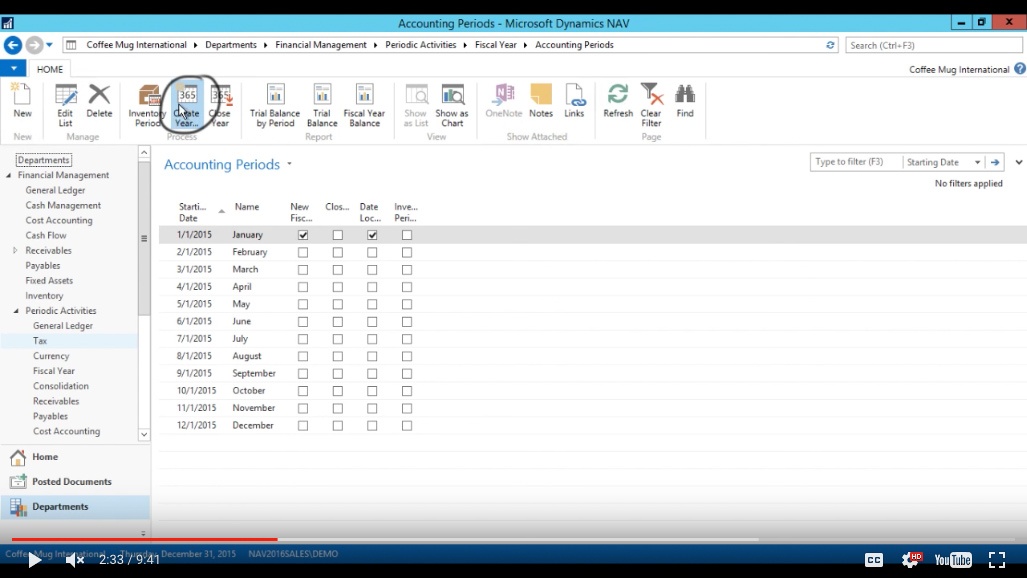
(Click image to view larger version)
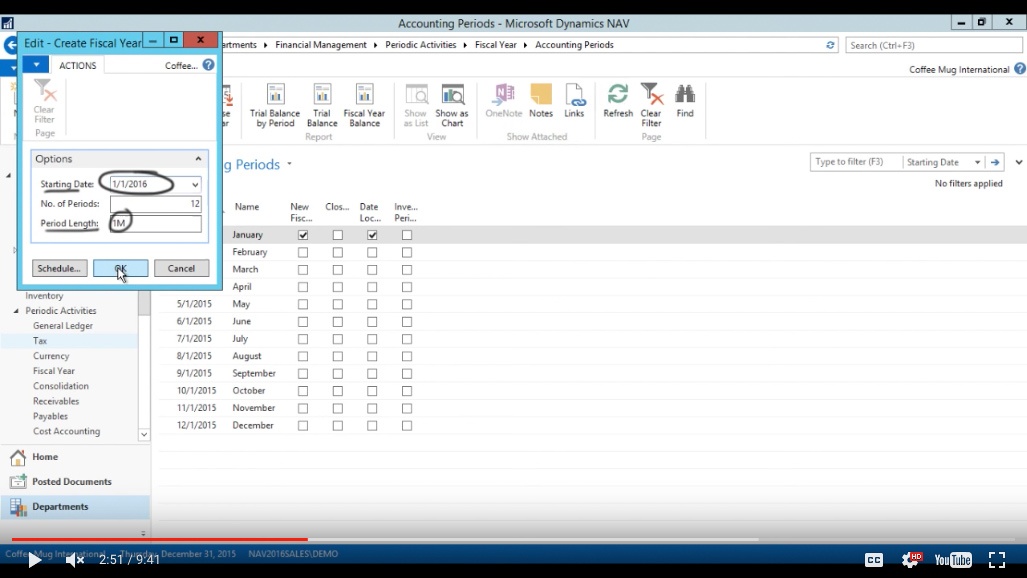
My starting date is going to be 01/01/2016 and Period Length is one month and then click OK.
(Click image to view larger version)
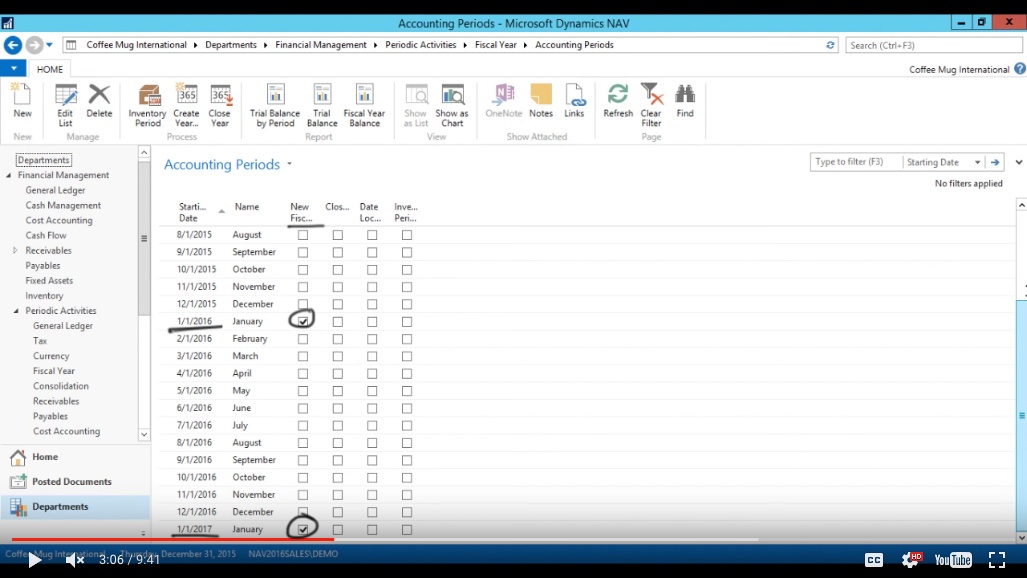
So now we have a new fiscal year 01/01/16 and another one for 2017.
(Click image to view larger version)
Closing the current year
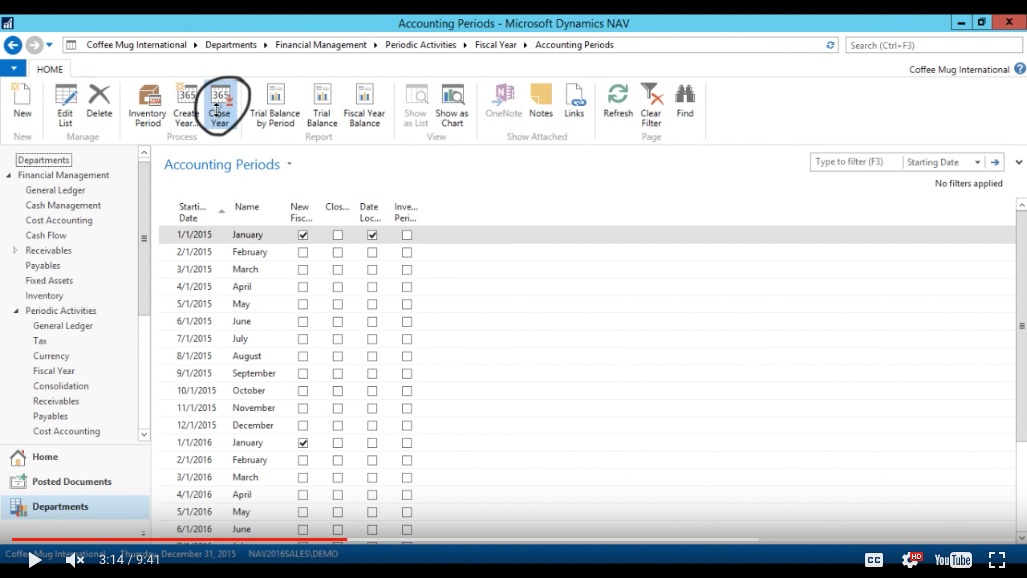
Alright now what I want to do next is actually close 2015. So I can go in here and hit Close Year.
(Click image to view larger version)
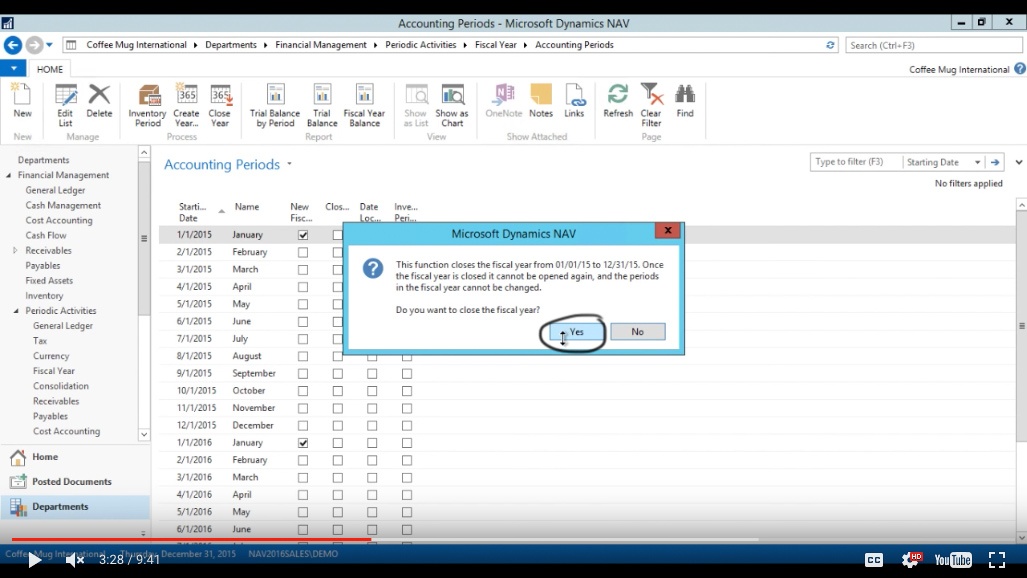
It tells me the function will actually close the fiscal year from 2015, from January 2015 to December. And once I close it I cannot open it so I’m just going to hit Yes and now it’s closed.
(Click image to view larger version)
Now all that this process did was check off these boxes. Now there is no actual process that happens in the background, no postings anything like that, it’s just checked off in this table. What that means however is if you try to post anywhere in the system it will block you. So you’re locked and you can really only post onto one date inside 2015. That date is C12/31/15 which is reserved for just year-end postings, something from the auditors etc.
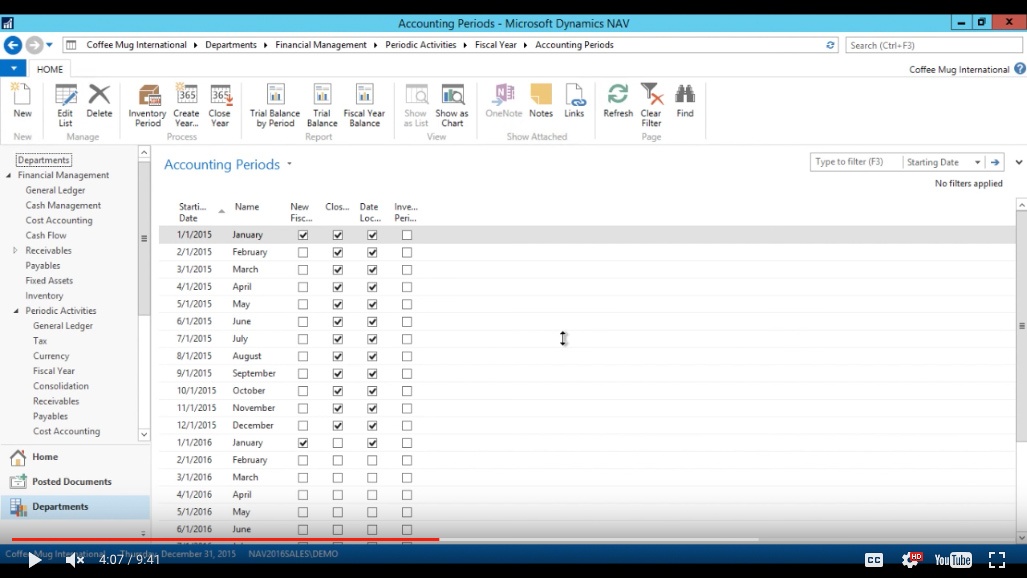
(Click image to view larger version)
Close Income Statement
Alright now in order to post the retained earnings we go to the next task. I go back here into Fiscal Year.
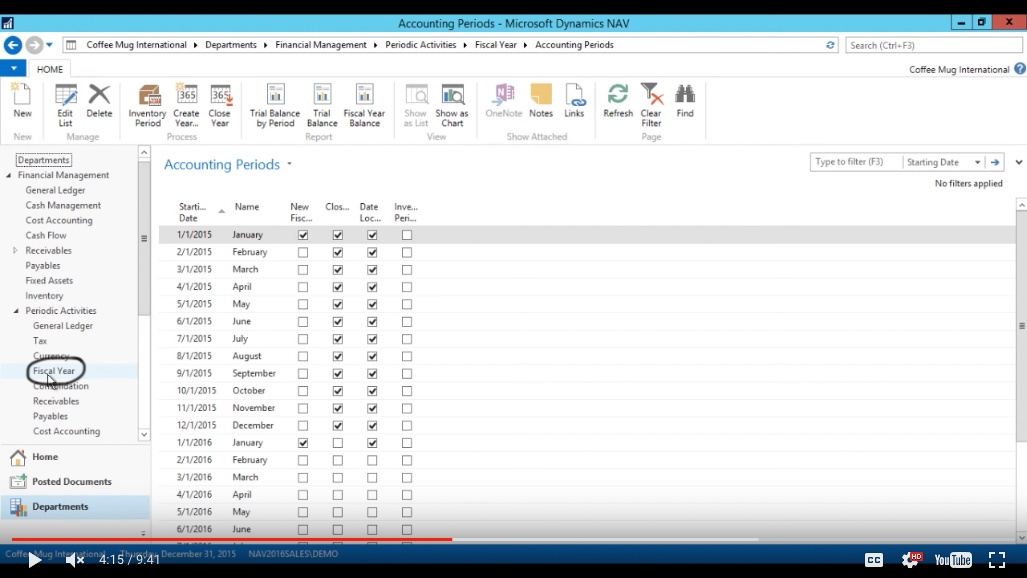
(Click image to view larger version)
I’ve finished with the Account Periods. Now I go into Close Income Statement.
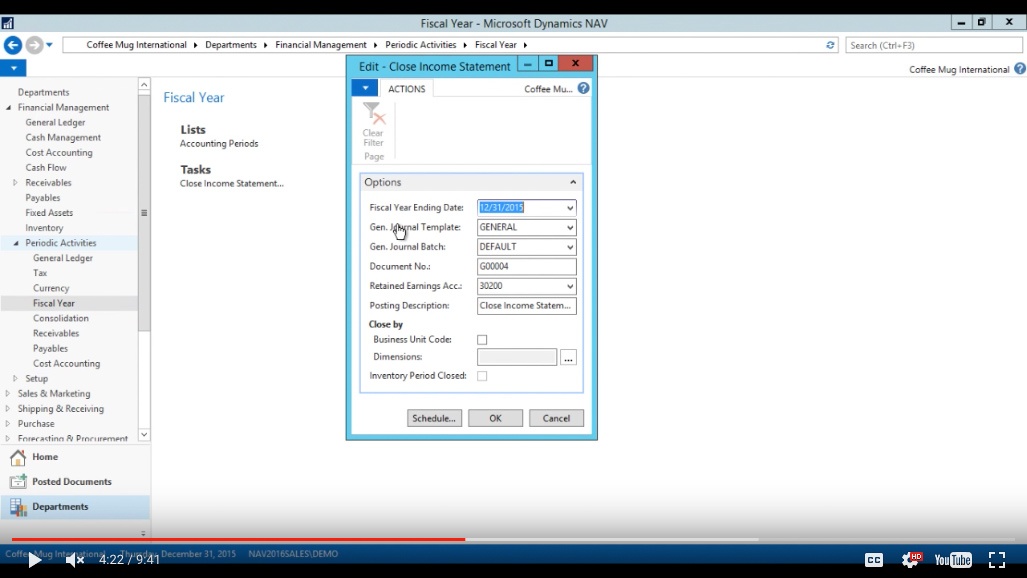
(Click image to view larger version)
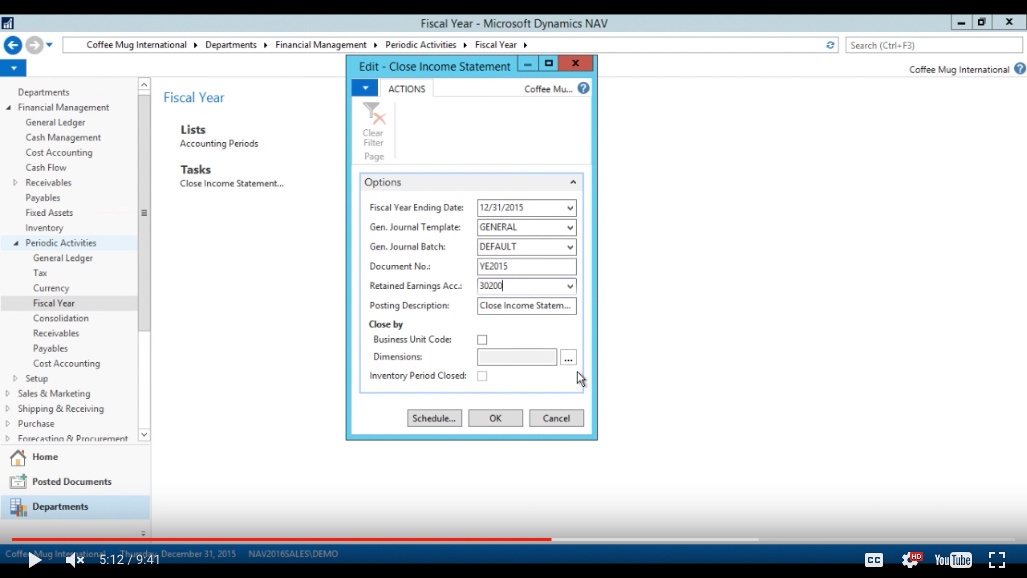
And that brings up the Close Income Statement.
It’s a process that goes through all of the transactions for 2015 on the income statement. It will post against those to clear out the income statement and move it to retained earnings.
So I will make sure that the Ending Date for the year is correct.
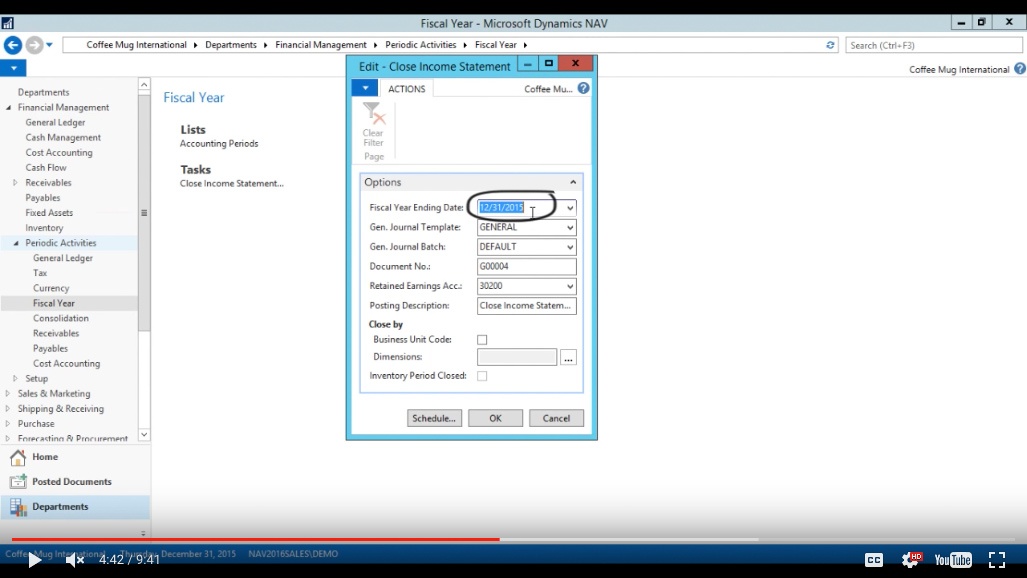
(Click image to view larger version)
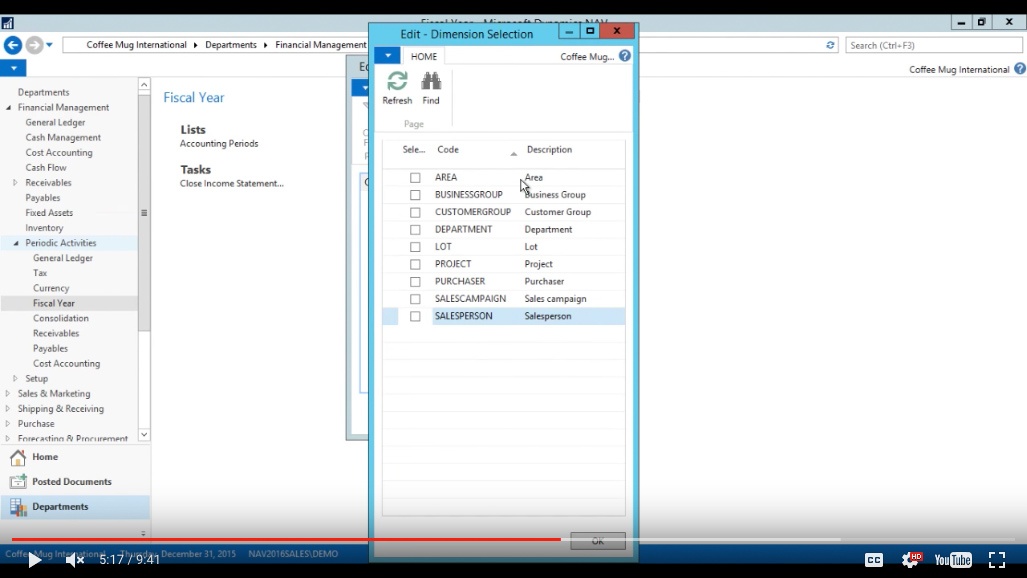
The General Journal template is usually picked as General; Batch is Default; Document Number - I like to change that to be Year End 2015. That’s more descriptive. I pick the Retained Earnings account here, that’s the 30200 in my case. Posting Description I can change but I’m happy with that one. I’m not using any Dimensions; if I were I would be checking off which dimensions I want to close with.
(Click image to view larger version)
The system would be closing out based on those dimensions.
(Click image to view larger version)
But in this case I’m not going to do that. This is important if you are actually managing dimensions because it will group by the dimensions as well not only the GL account.
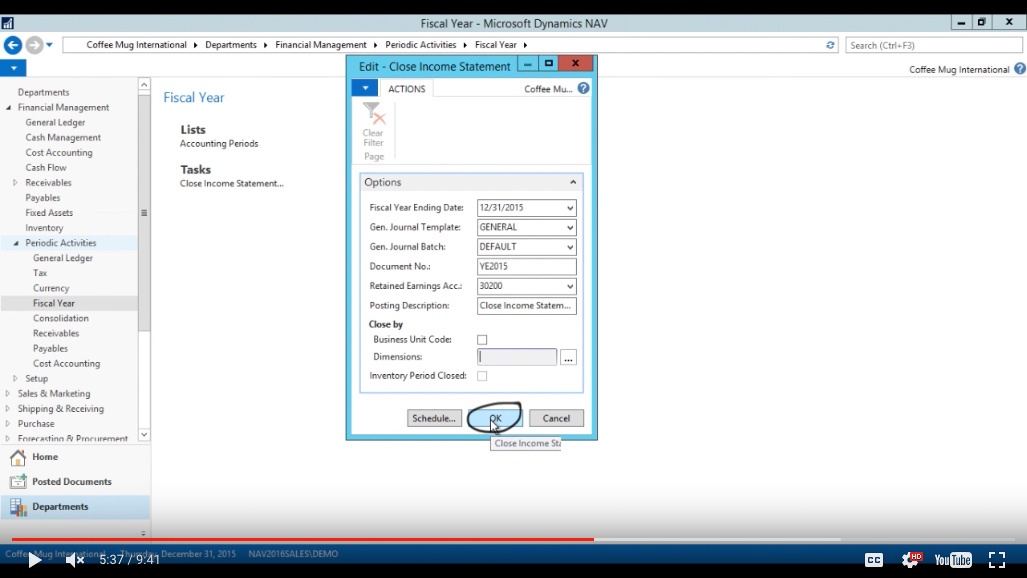
And now I just hit OK.
(Click image to view larger version)
The system goes through its processes and what happened right now is it populated the General Journal Default Batch as I specified.
General Journal
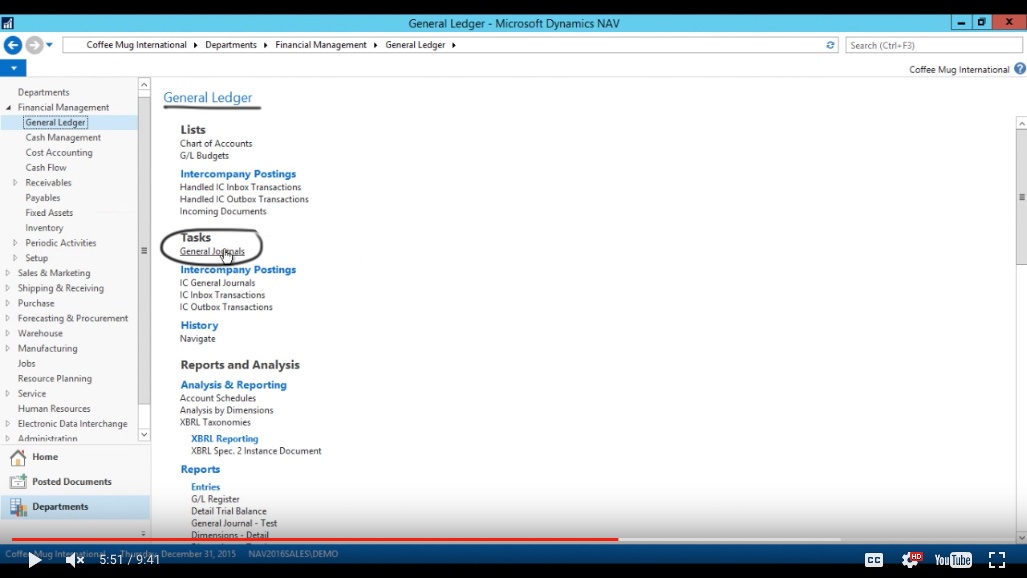
Now I have to go into that General Journal.
(Click image to view larger version)
And take a look at that.
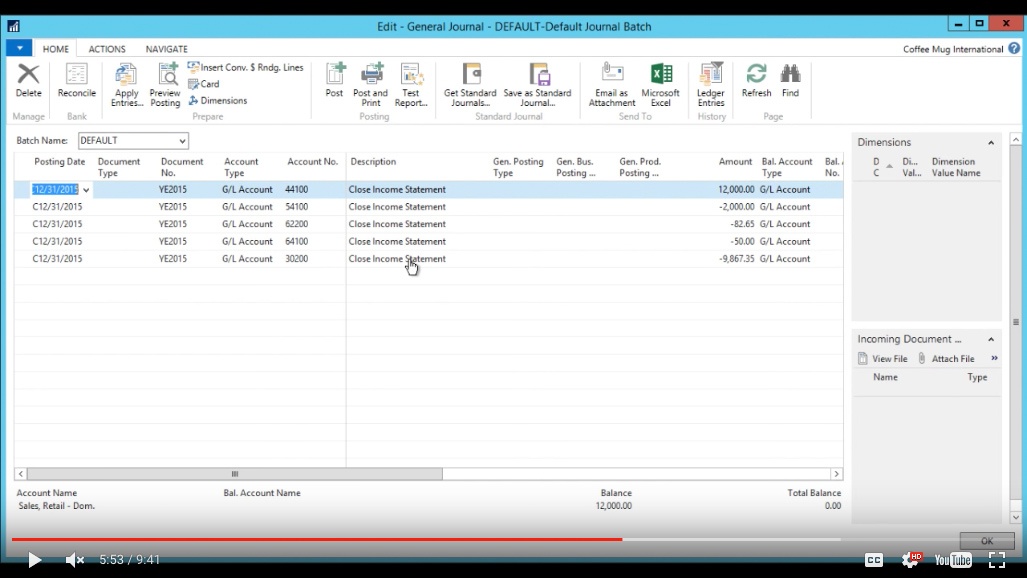
(Click image to view larger version)
Now these are my Closing Entries. Our year was not very eventful, it’s pretty simple. I’m actually closing out on our sales for $12,000; purchases $2000; we got some costs for $82 and $50 and I am booking a $9000 profit which is nice.
Now notice that the date is C12/31/15.
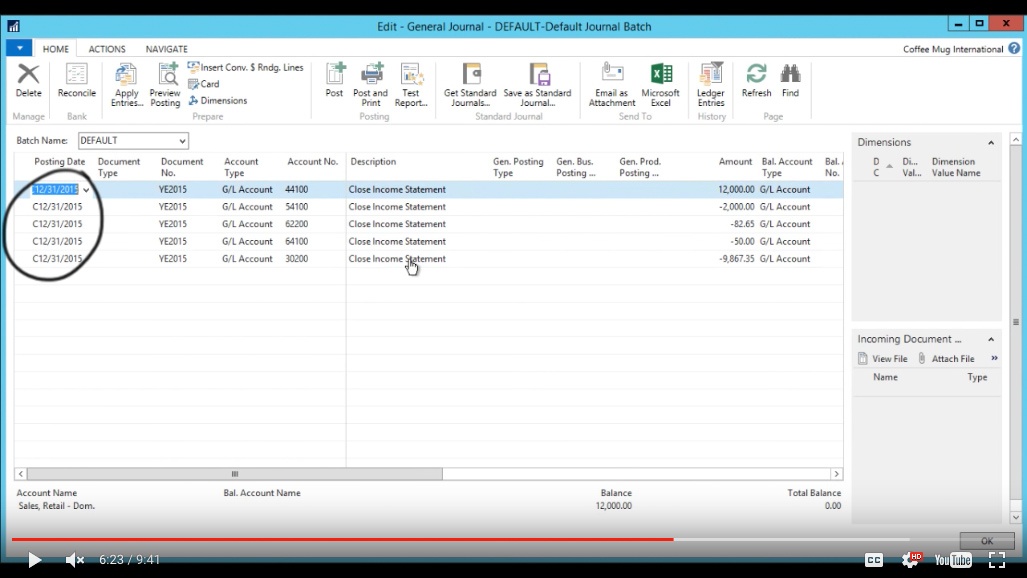
(Click image to view larger version)
Now this is a date that’s really only reserved for accounting systems; it does not exist in reality. It’s the date after the 31st of December but still inside the year 2015. Basically its serves so you can look at all dates with C and see all the closing transactions or you can look at all dates without it and then you see just the normal year.
So it’s kind of handy that way. This is the only date that’s open after you’ve closed the year and it’s meant to close out the financial statements.
Post
Now all I have to do is hit Post.
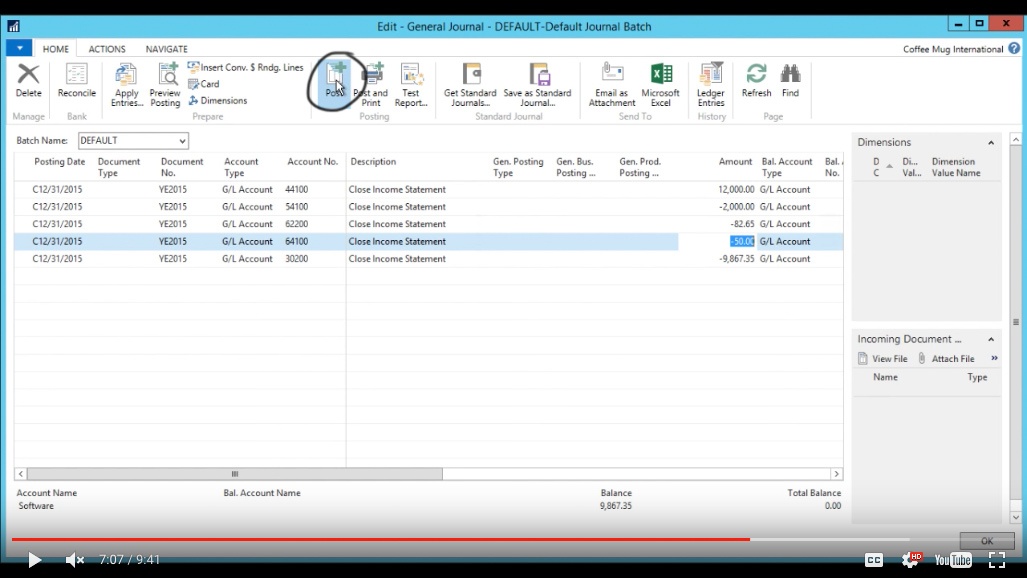
(Click image to view larger version)
Now it’s successfully posted and I can go ahead and look at my Chart of Accounts.
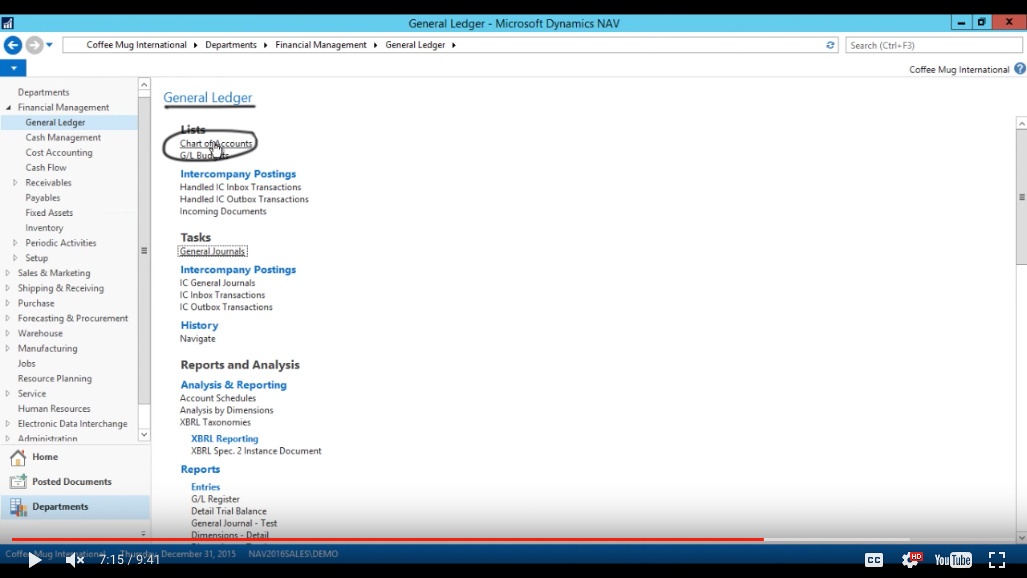
(Click image to view larger version)
Chart of Accounts
If I go ahead and look at my changes now we had a lot of postings actually hitting 2017 but I’m not interested in 2107 right now.
I’m going to go and only look at 2015 so I enter into the filter field …123115.
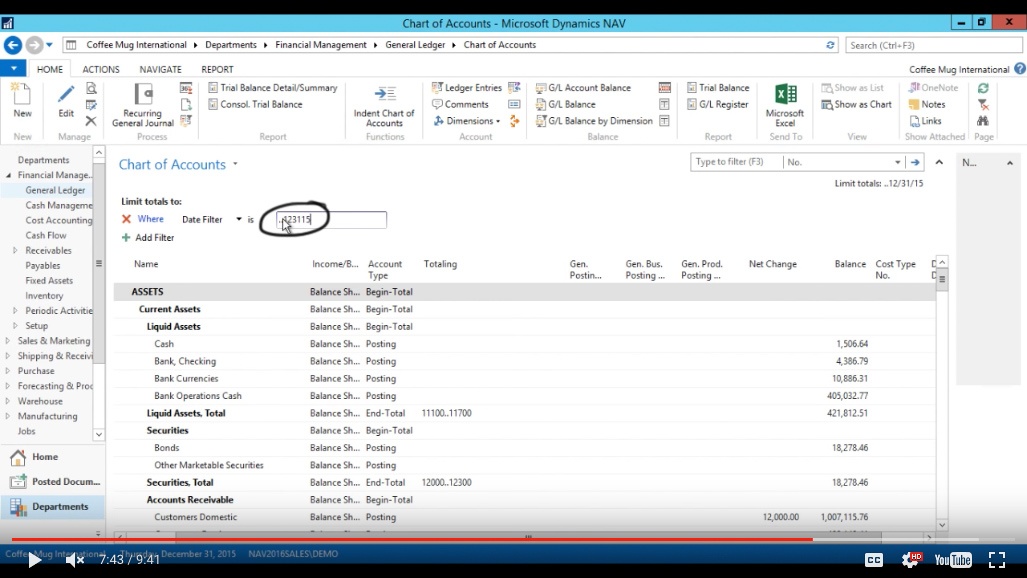
(Click image to view larger version)
We can filter on Non-zero and net change and my date filter is up to the end of the year 2015.
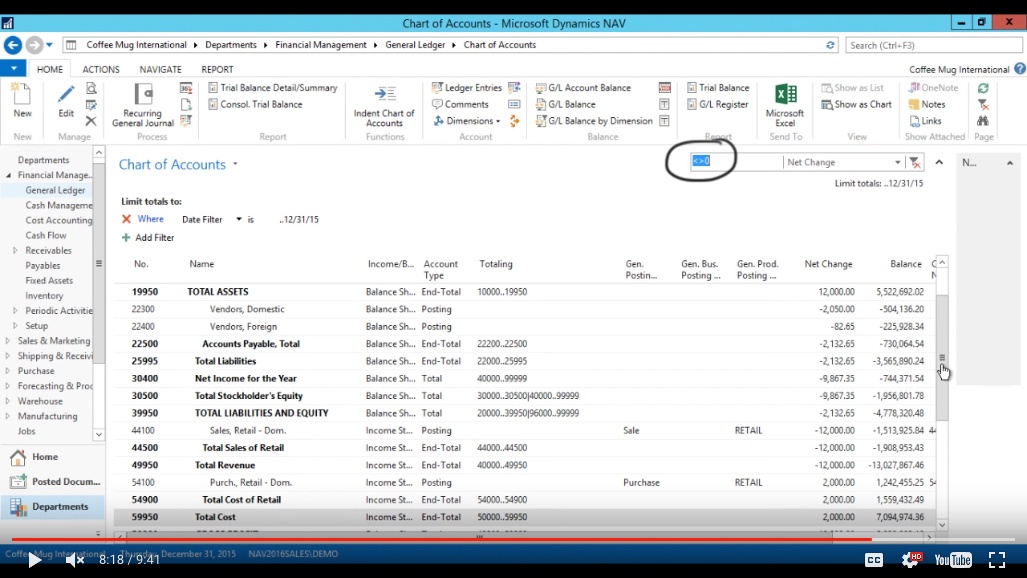
(Click image to view larger version)
That way I see all of the transactions there and notice I have my net operating income as $9867.
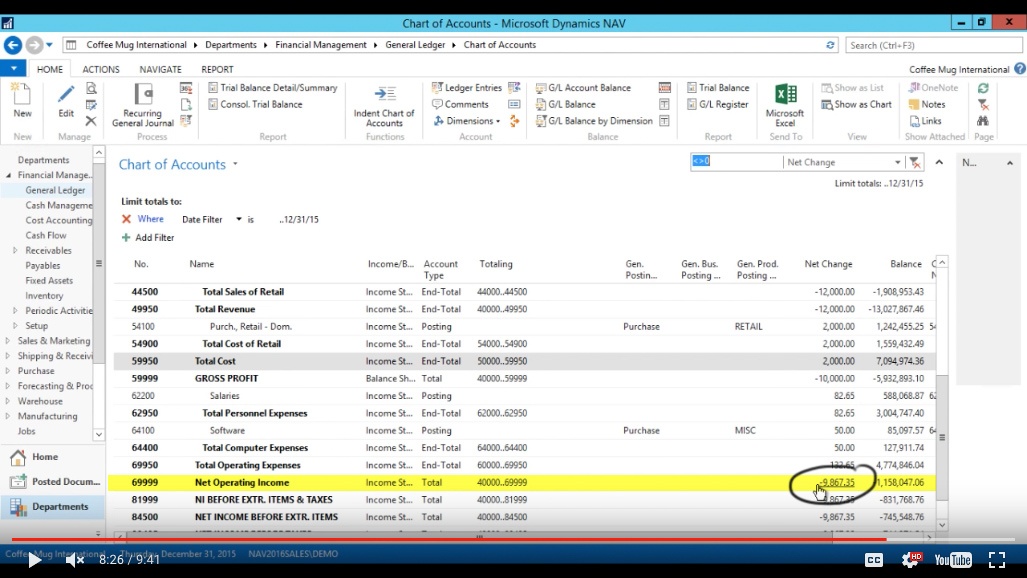
(Click image to view larger version)
And here is my cost and here is the revenue $12,000.
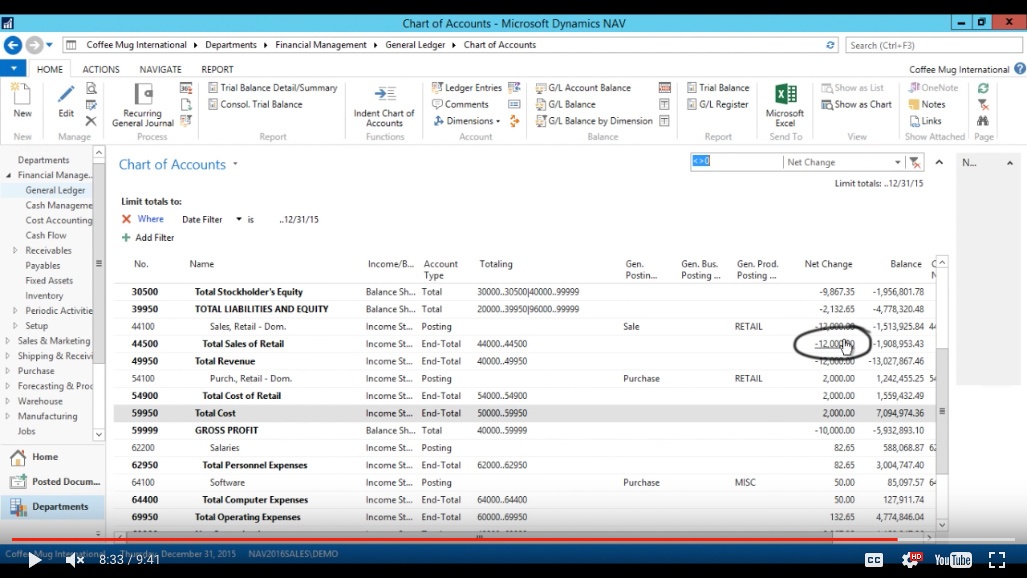
(Click image to view larger version)
This is all the way up to 123115. Now if I look at including the ‘C’ it goes away because it has booked the transaction against it.
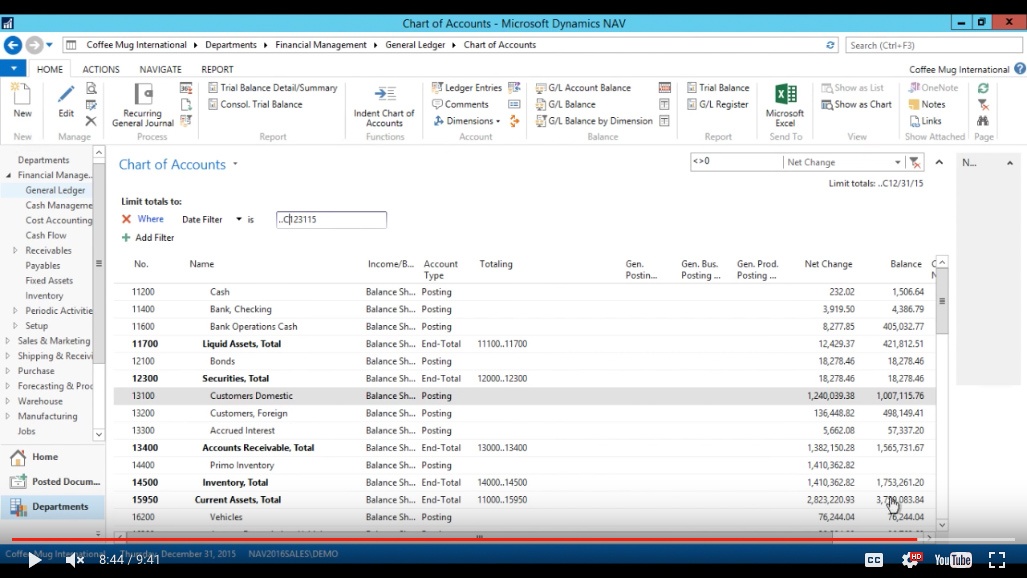
(Click image to view larger version)
However, if I go into my retained earnings.
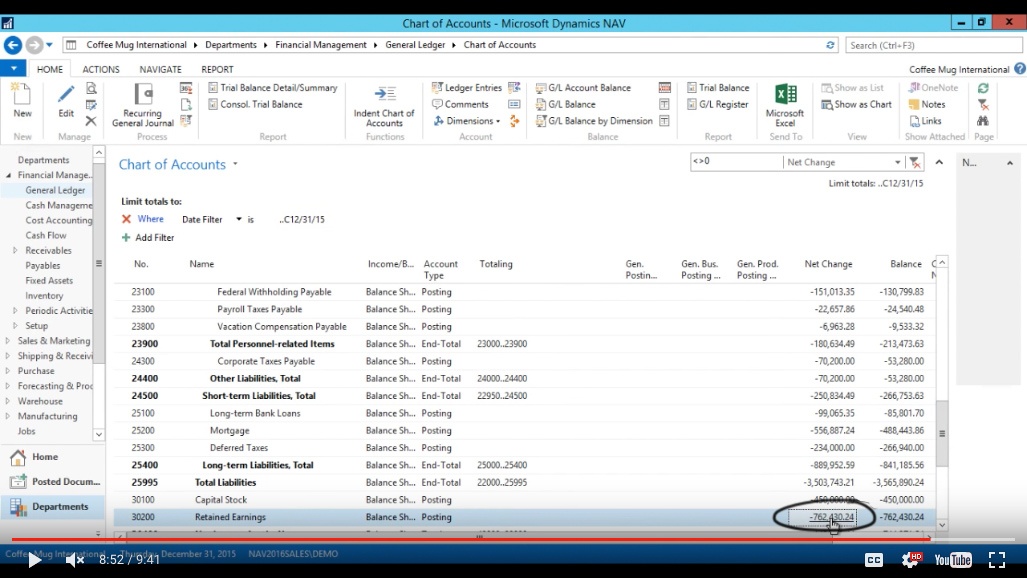
(Click image to view larger version)
It includes that closing entry.
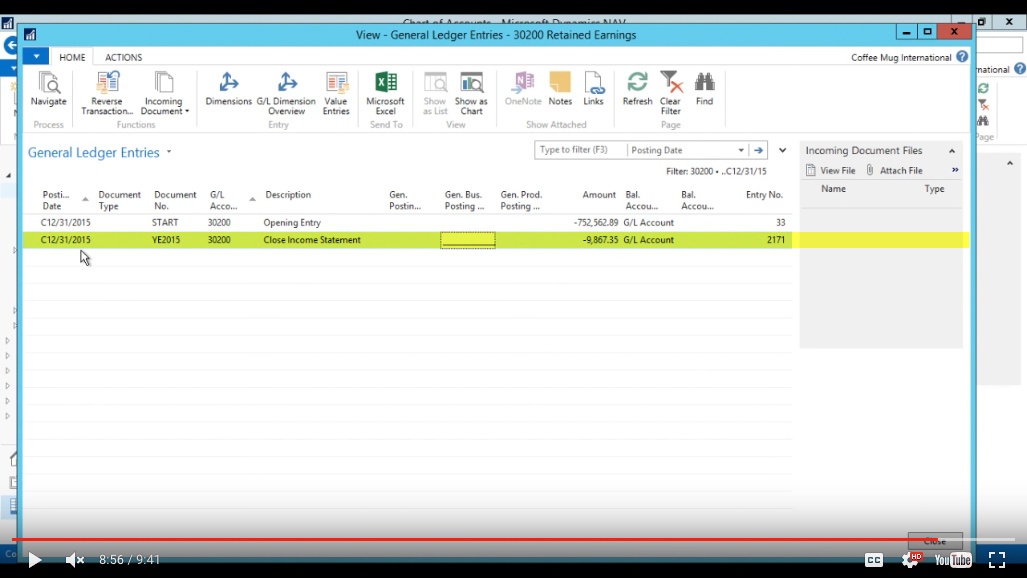
(Click image to view larger version)
You might just ignore this start here but the closing entry comes in. And that’s pretty much it for the closing of the year.
You've learned some of the many ways your business can benefit from using inecta Food. It's trusted by other businesses in your industry and can work just as well (or better) for you. inecta Food is easy to implement. It's easy on your budget with monthly subscription payments. Take the next step to ensure your food business is running the right kind of business software. Software for your food safety, increased efficiency, and stronger revenue growth.
Curious about implementation costs, training, getting a customized demo & detailed estimate, booking a discovery call?

Global Headquarters:
225 Broadway #660,
New York, NY 10007
1-800-632-0573
©2023 INECTA LLC
Global Headquarters: 179 Franklin Street, New York, NY 10013
©2020 INECTA LLC